Sian + Bryan

When I was given the opportunity to photograph Sian and Bryan’s wedding, I was thrilled! I’ve known Sian for many years - our families are great friends so we would often go on family trips together. I am so happy that she met a wonderful guy like Bryan, they really are a match made in heaven.

Their beautiful wedding was held at Wedgewood Weddings University Club in Irvine, CA. The venue was gorgeous and had wonderful greens for some pretty portraits of the wedding party.

Here are some of the 3,000 photos I took of Sian and Bryan’s big day - they both look so cute and happy together. I am excited to see what the future holds for both of you!

-Charlie

Our New Brentwood Townhouse

We’re all done! Mostly that is - there will still be lots of small things that I need to work on and tweak in the future, but the townhouse that my sister and I bought is now complete. It took a lot of sweat, anxiety, stress, and time. But when you can step into a home that is full of design elements that you chose, it’s a big sense of accomplishment and relief.

The journey started in April when I started prepping for my real estate salesperson exam. I enrolled in a 135-hour online course that satisfied the CalBRE requirement, and spent lots of hours studying at sweetgreens and other various cafes. The whole process is time consuming and a chore, but I was approved to take my exam in mid-May and on June 6th, I had my license! This all happened during my busy grad photoshoot season, where I did well over 100 shoots. So I was quite drained at this point.

Next was getting employed with a broker! We have a family friend who owns her own brokerage, so luckily I was able to join her team instantly.

Scouting for houses is never easy, but we got SO lucky. Pretty much the first house I went to go look at was the one we ended up making an offer on. It was GROSS. It looked like it hadn’t been cleaned in the 26 years since it was built. When I first stepped in, germophobe me almost noped straight out of there. But I quickly saw that it had lots of potential both in the layout and in the types of renovations we could do to make it livable. Here are some pictures of what it looked like.


We actually lost out on getting the property the first time around. They chose another buyer who offered more money. But that fell through and the seller chose to give it to us, thanks to a super personable letter I wrote :) There were even other offers higher than ours! I remember being in the car on my way to bowling and getting the email. I was super excited!

The paperwork to purchase a house is ridiculous. It was my first time acting as a buyers agent, so I had to learn through the process. There were so many forms, signatures bouncing back and forth, and document verifications - it seemed endless! I am really lucky to have been able to jump straight into a deal with my salesperson license, as doing an actual deal gives you the experience and knowledge to work in the actual industry.

FINANCIALS (if you’re interested)

I owe a lot to my parents for helping us and encouraging us to get involved in real estate. My parents themselves came to America with pretty much zero money, and today they own quite a few properties and rentals. Real estate is lucrative, and if done right it can help build wealth equity and pass as a great investment. The interest portion of mortgage payments and property tax is also tax deductible. They encouraged my sister and I to begin at an early age, and they were also instrumental to our ability to secure this property. The way it works in many of these hot markets is like this: all-cash offers typically win because there is no need to get lending approval and such. Without cash, it will be hard to get a great deal on a home. My parents had the funds necessary to put down an all-cash offer 60k more than asking price, which is what it took to get it. We are in the process of doing a refinance, meaning we will get a loan on the house and most of the money will be returned to my parents. They will be giving us a 200k loan for the down payment, that we are paying off to them in 5 years. In addition, we will be responsible for the mortgage payments. All in all, we would not be able to buy our place without my parents’ help. So they made this whole thing possible. I guess they really love us!

In summary, here is a rundown of the financials: Parents paid full price for the property in cash (691k). They will receive the full 691k back within 5 years. About 491k of that cash will be paid back in the next month through the refinance process. The rest (200k) will be paid back over these 5 years by my sister and I. My sister and I paid for the cost of renovations (about 21k each), and we have property taxes (about 10k per year) and HOA fees (250 per month). Since the refinance will be based on the new appraised value, we also pull out as much equity as we can (risky) to invest it in business opportunities.

We closed escrow on July 10th, and so began the renovation process.

RENOVATIONS

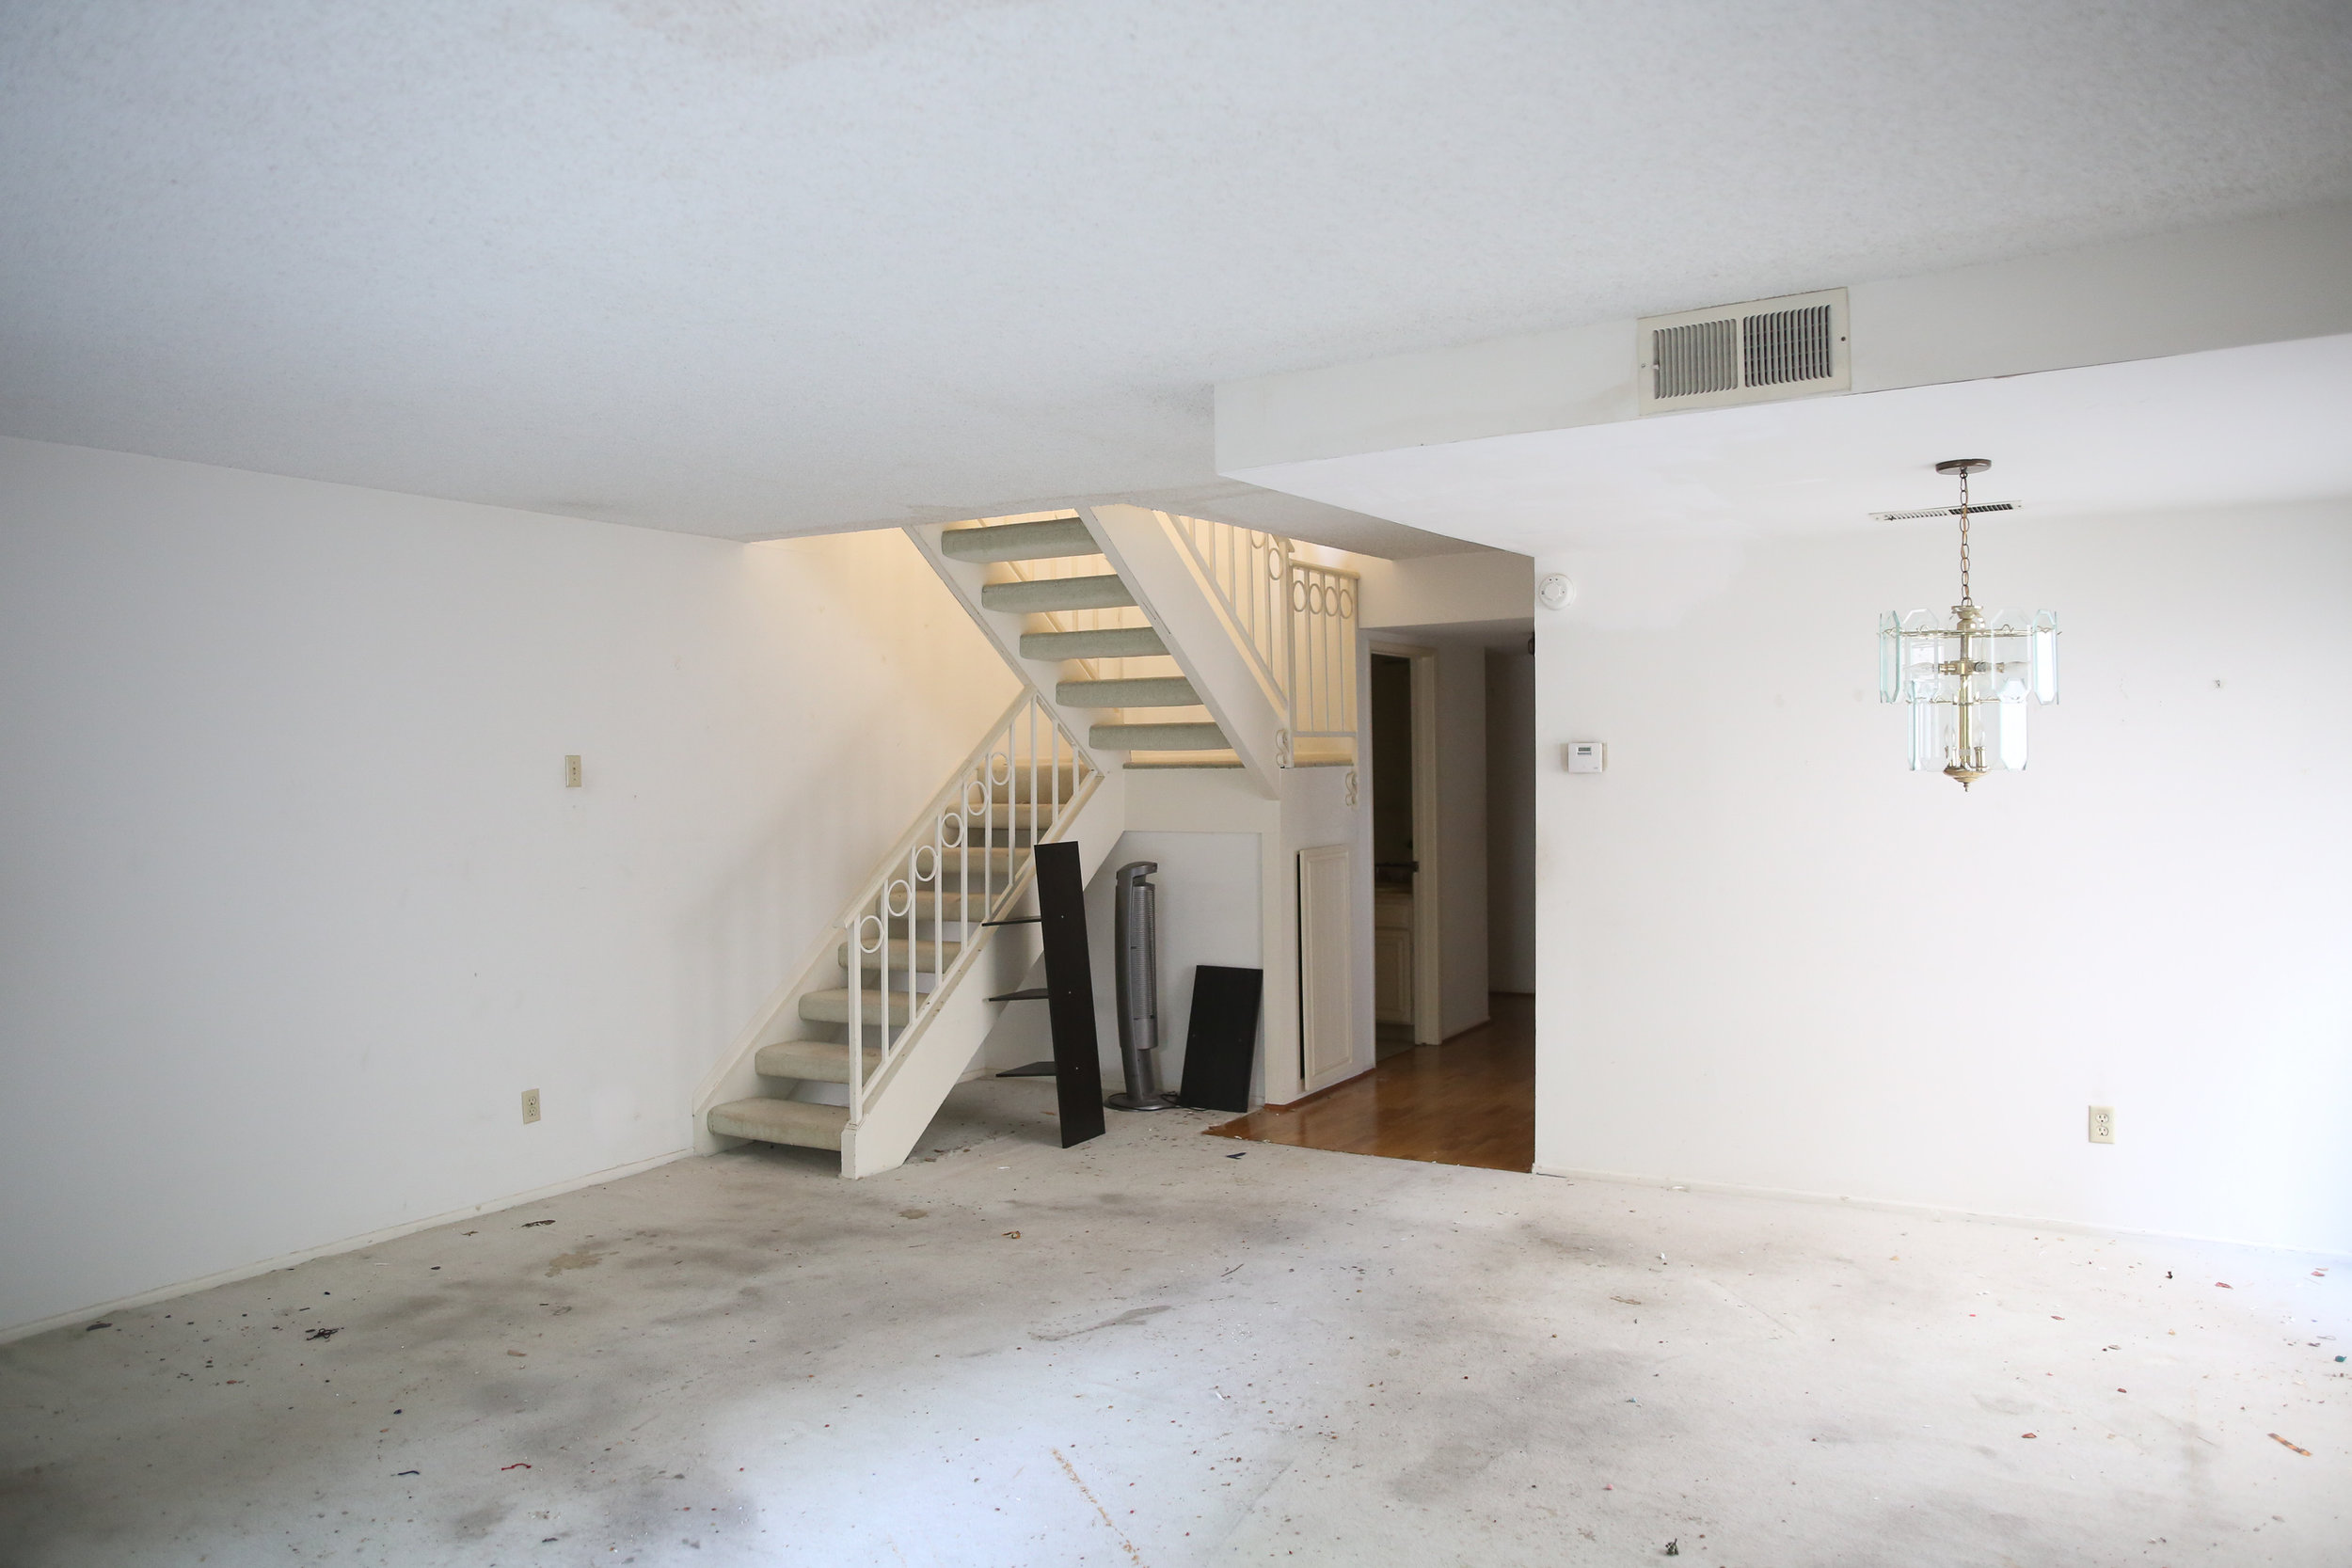
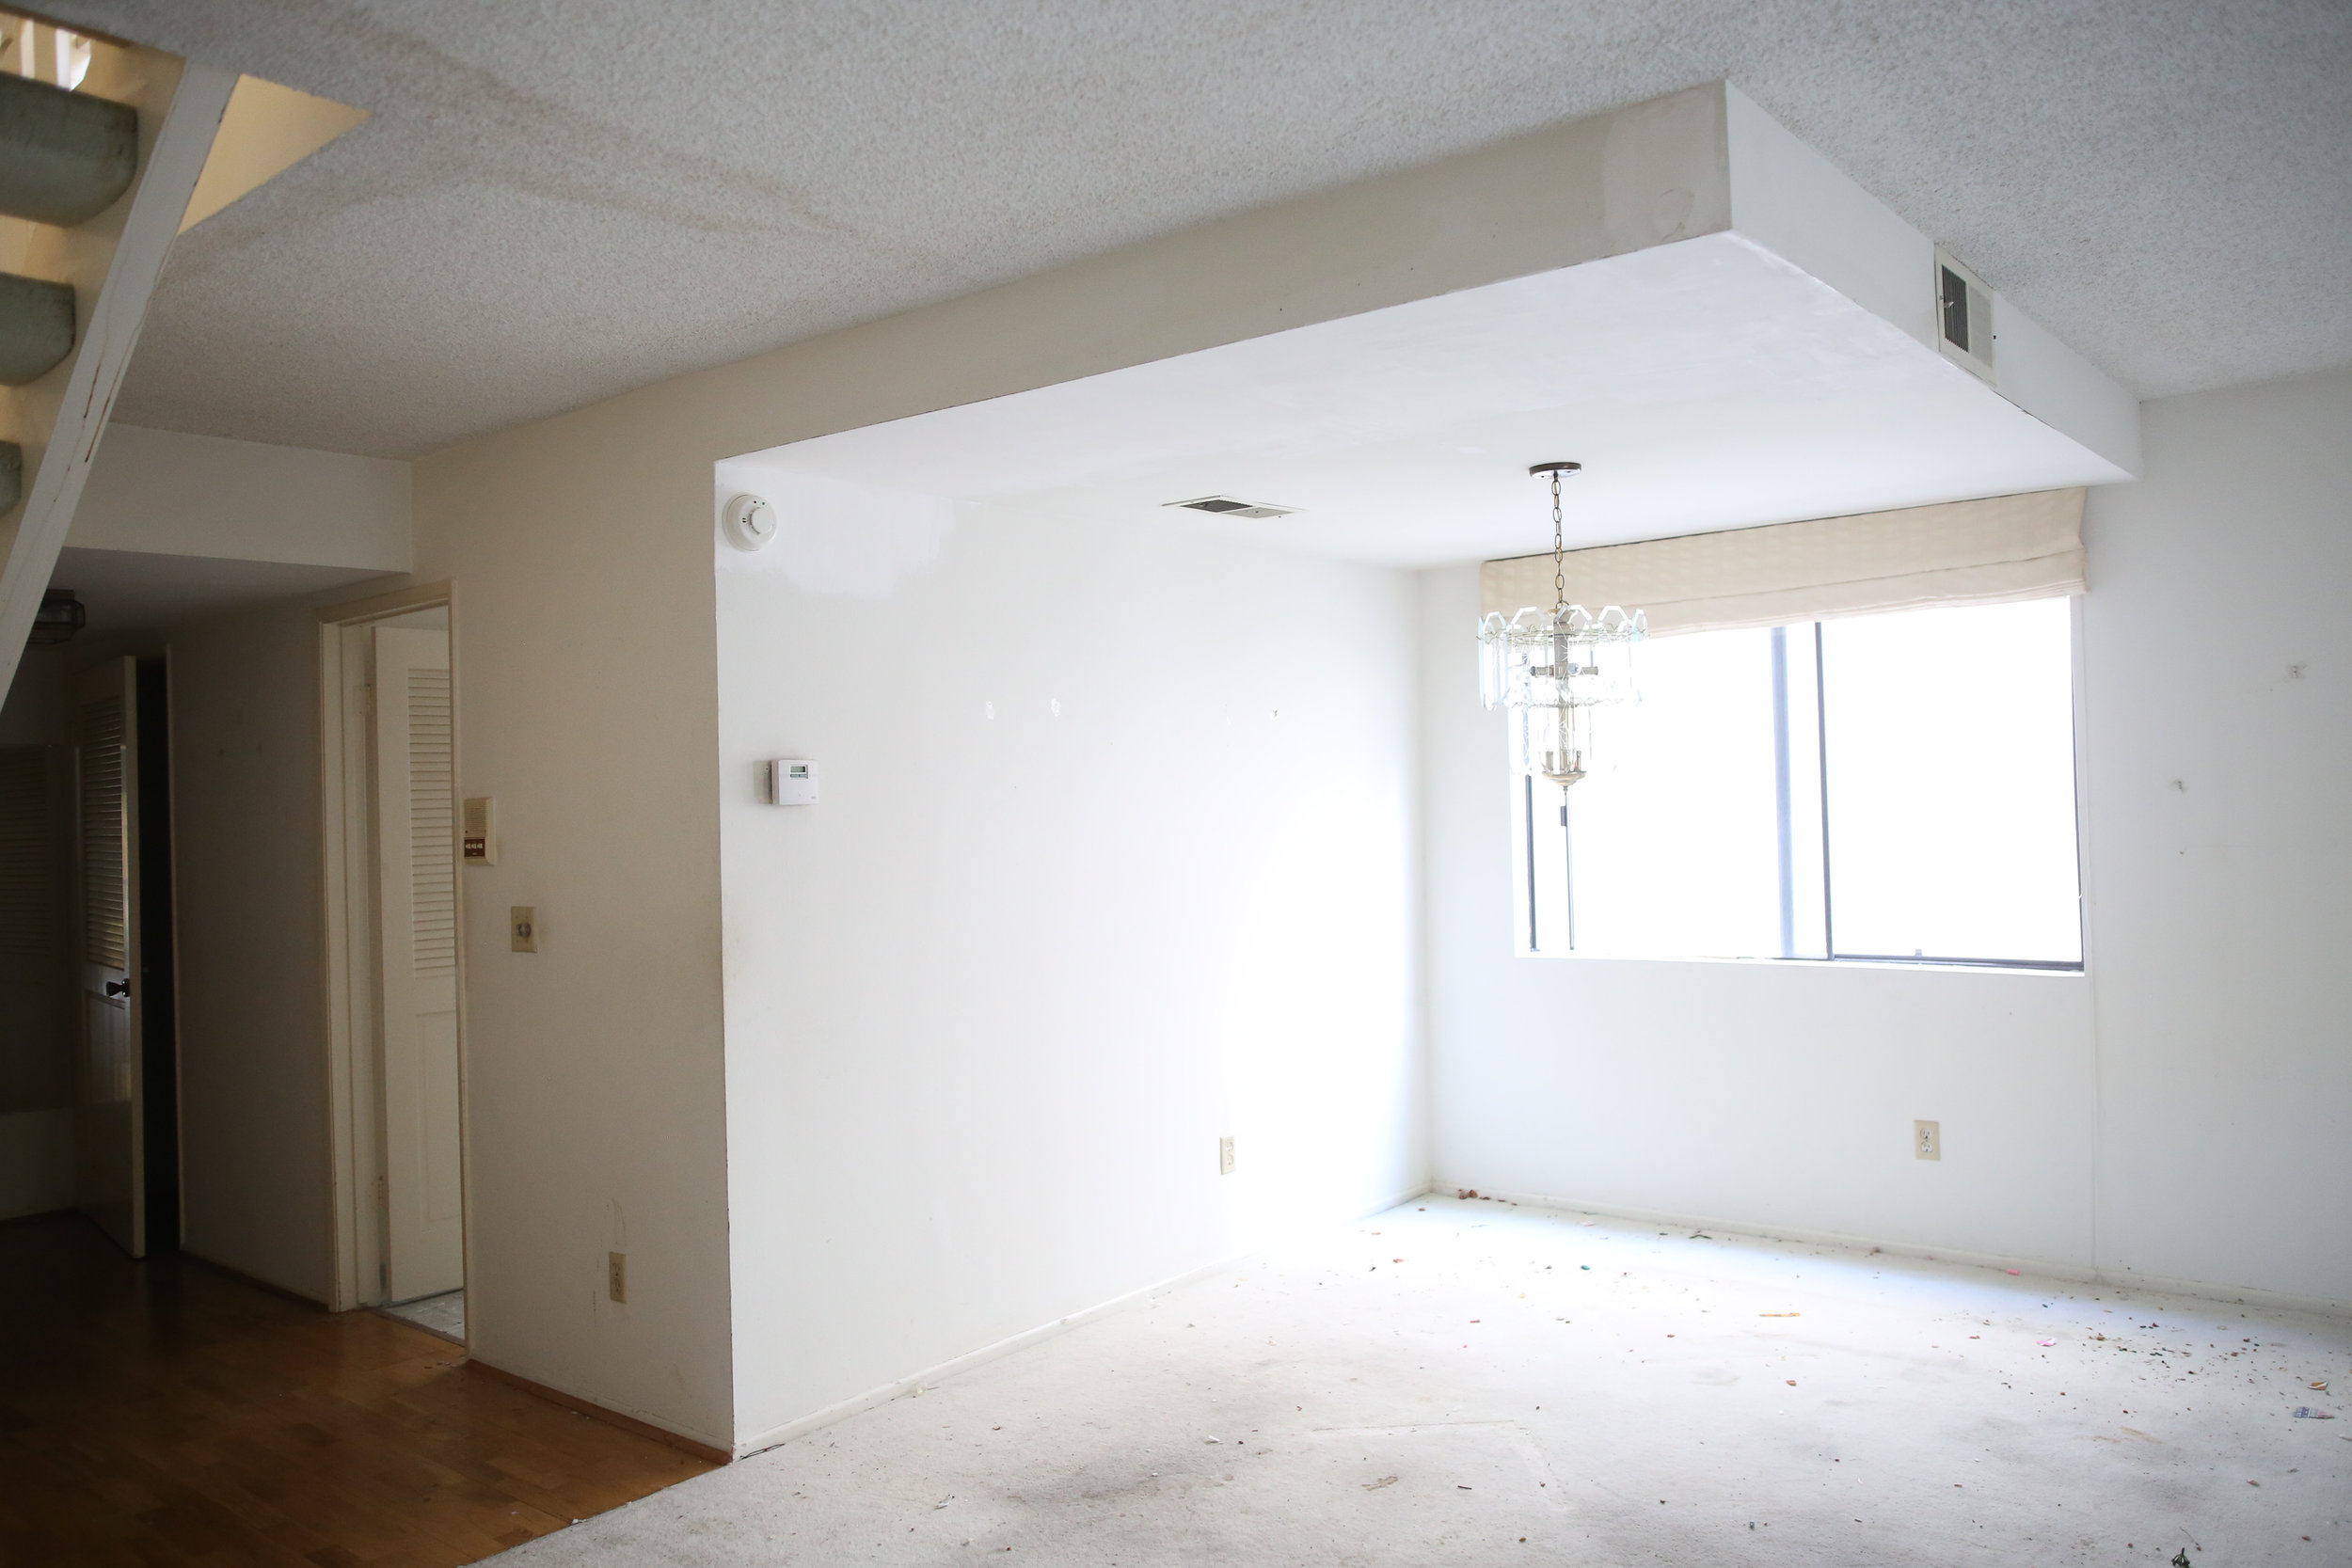
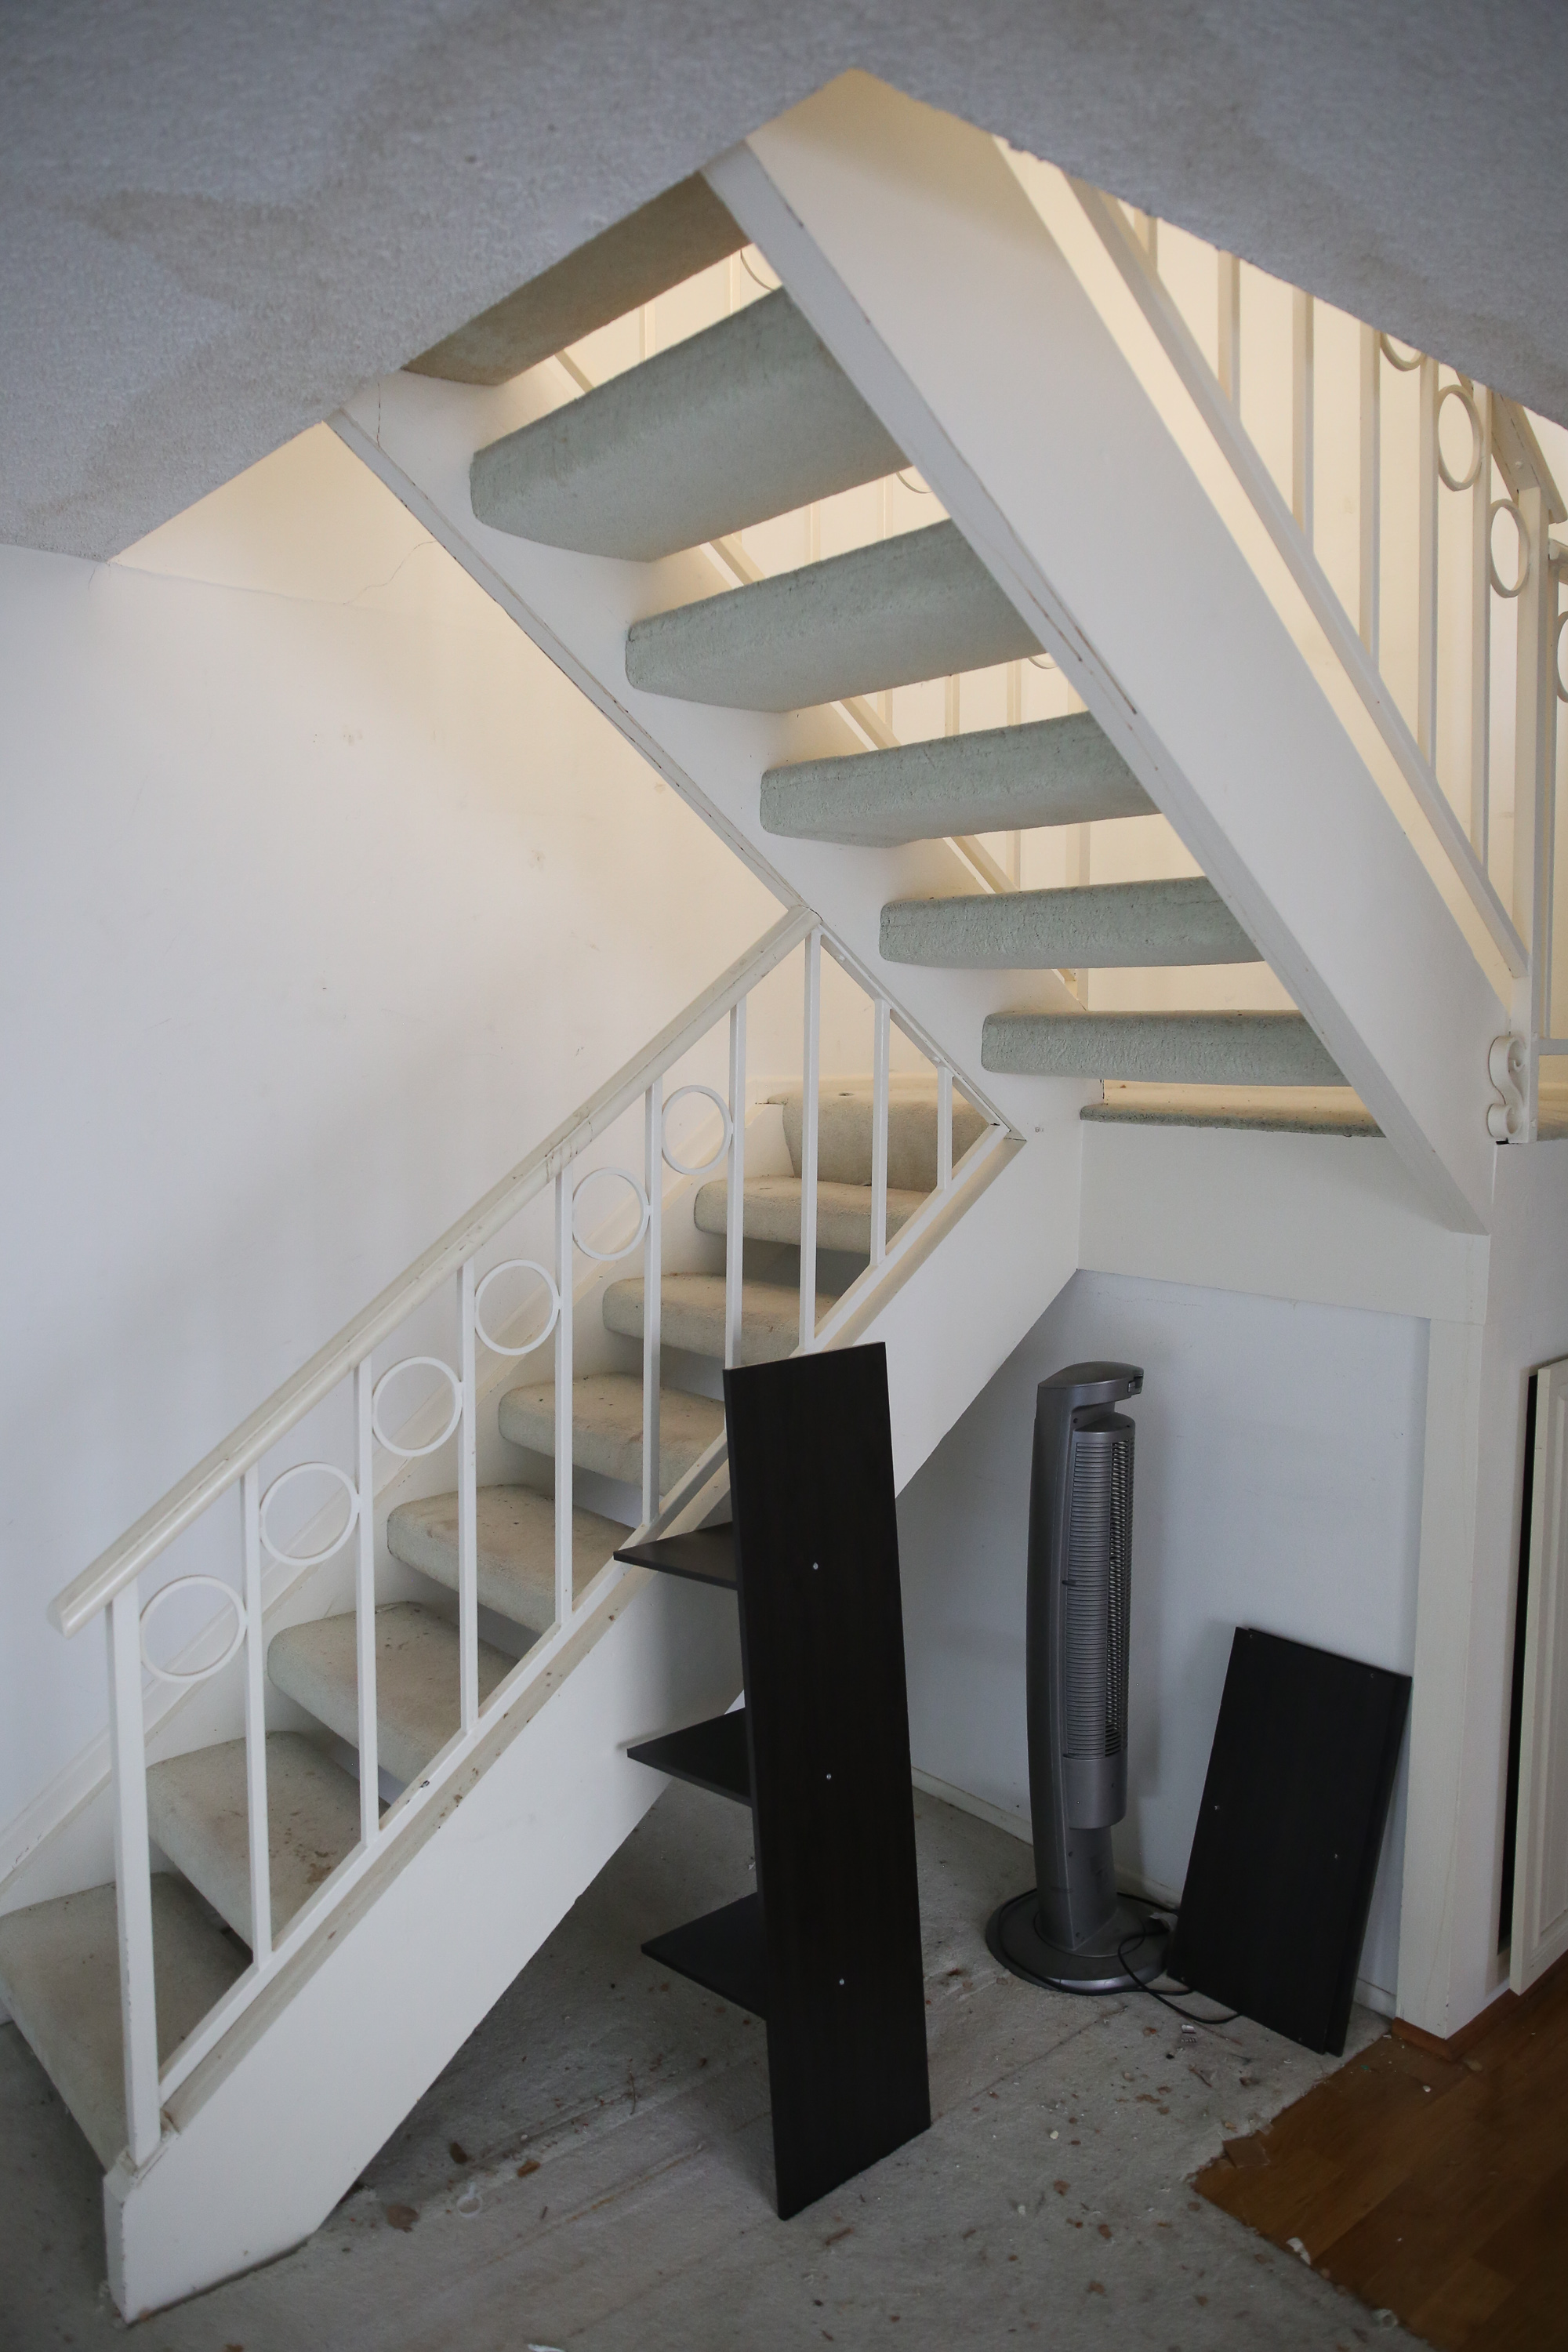
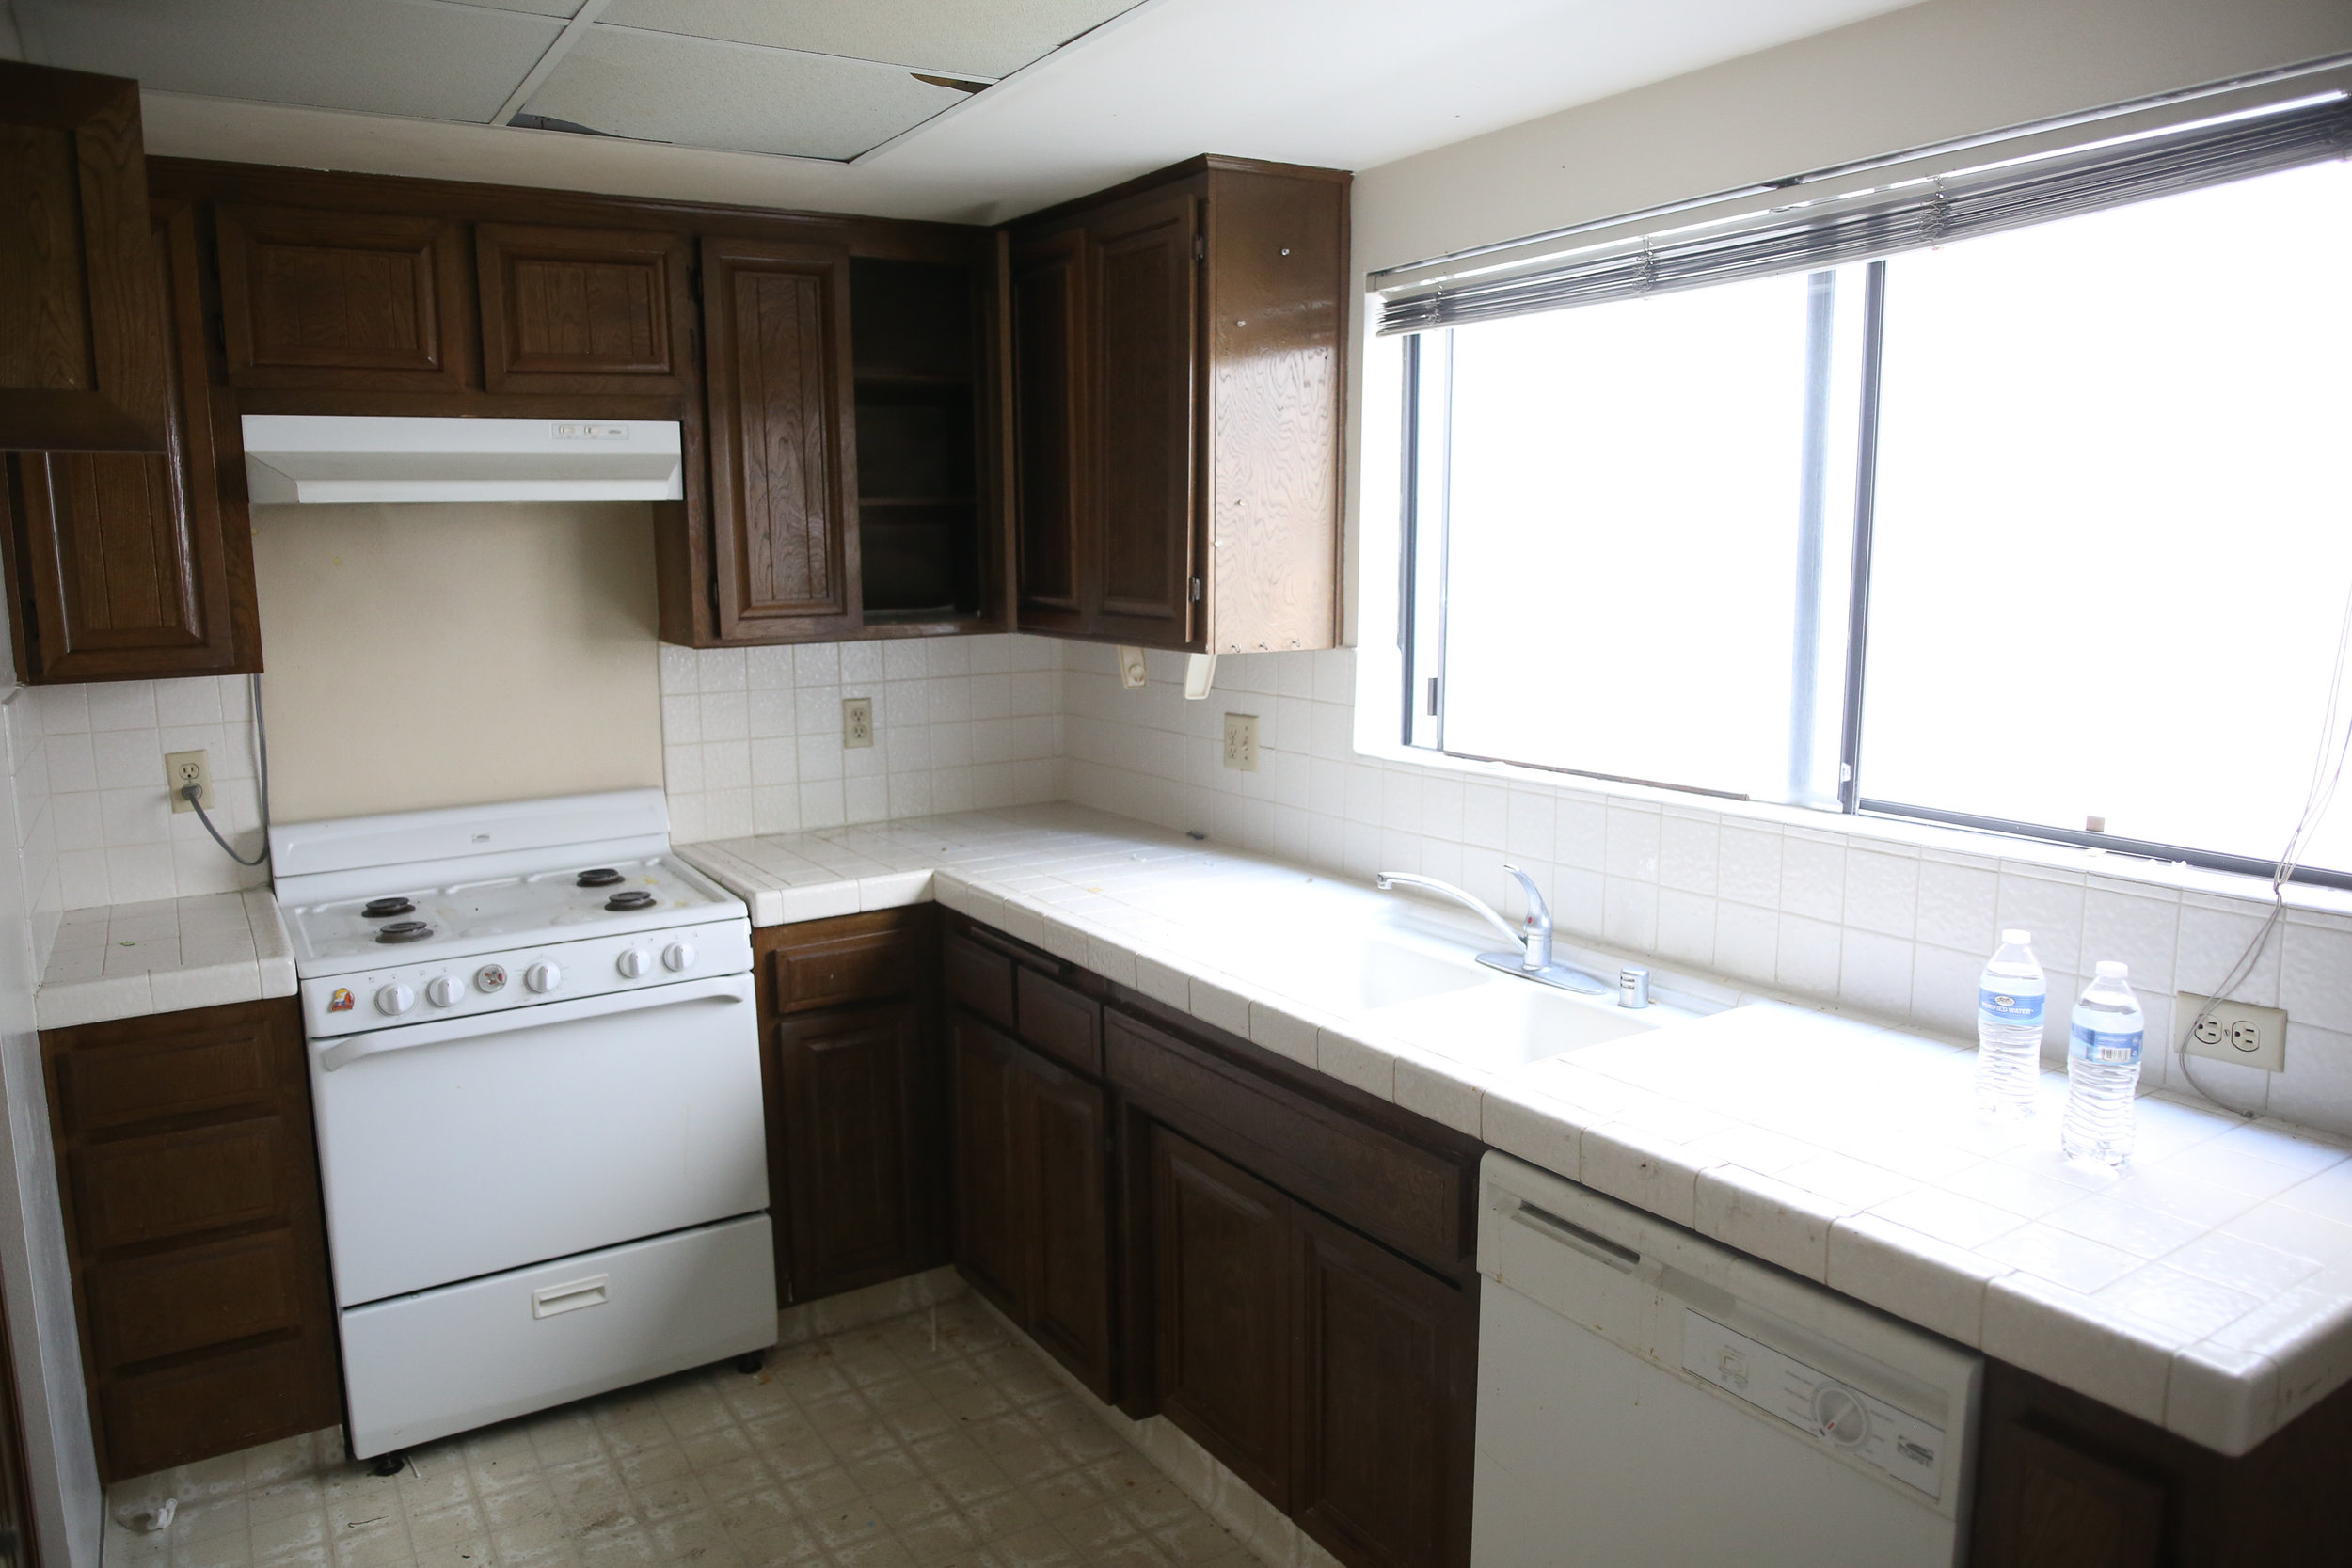
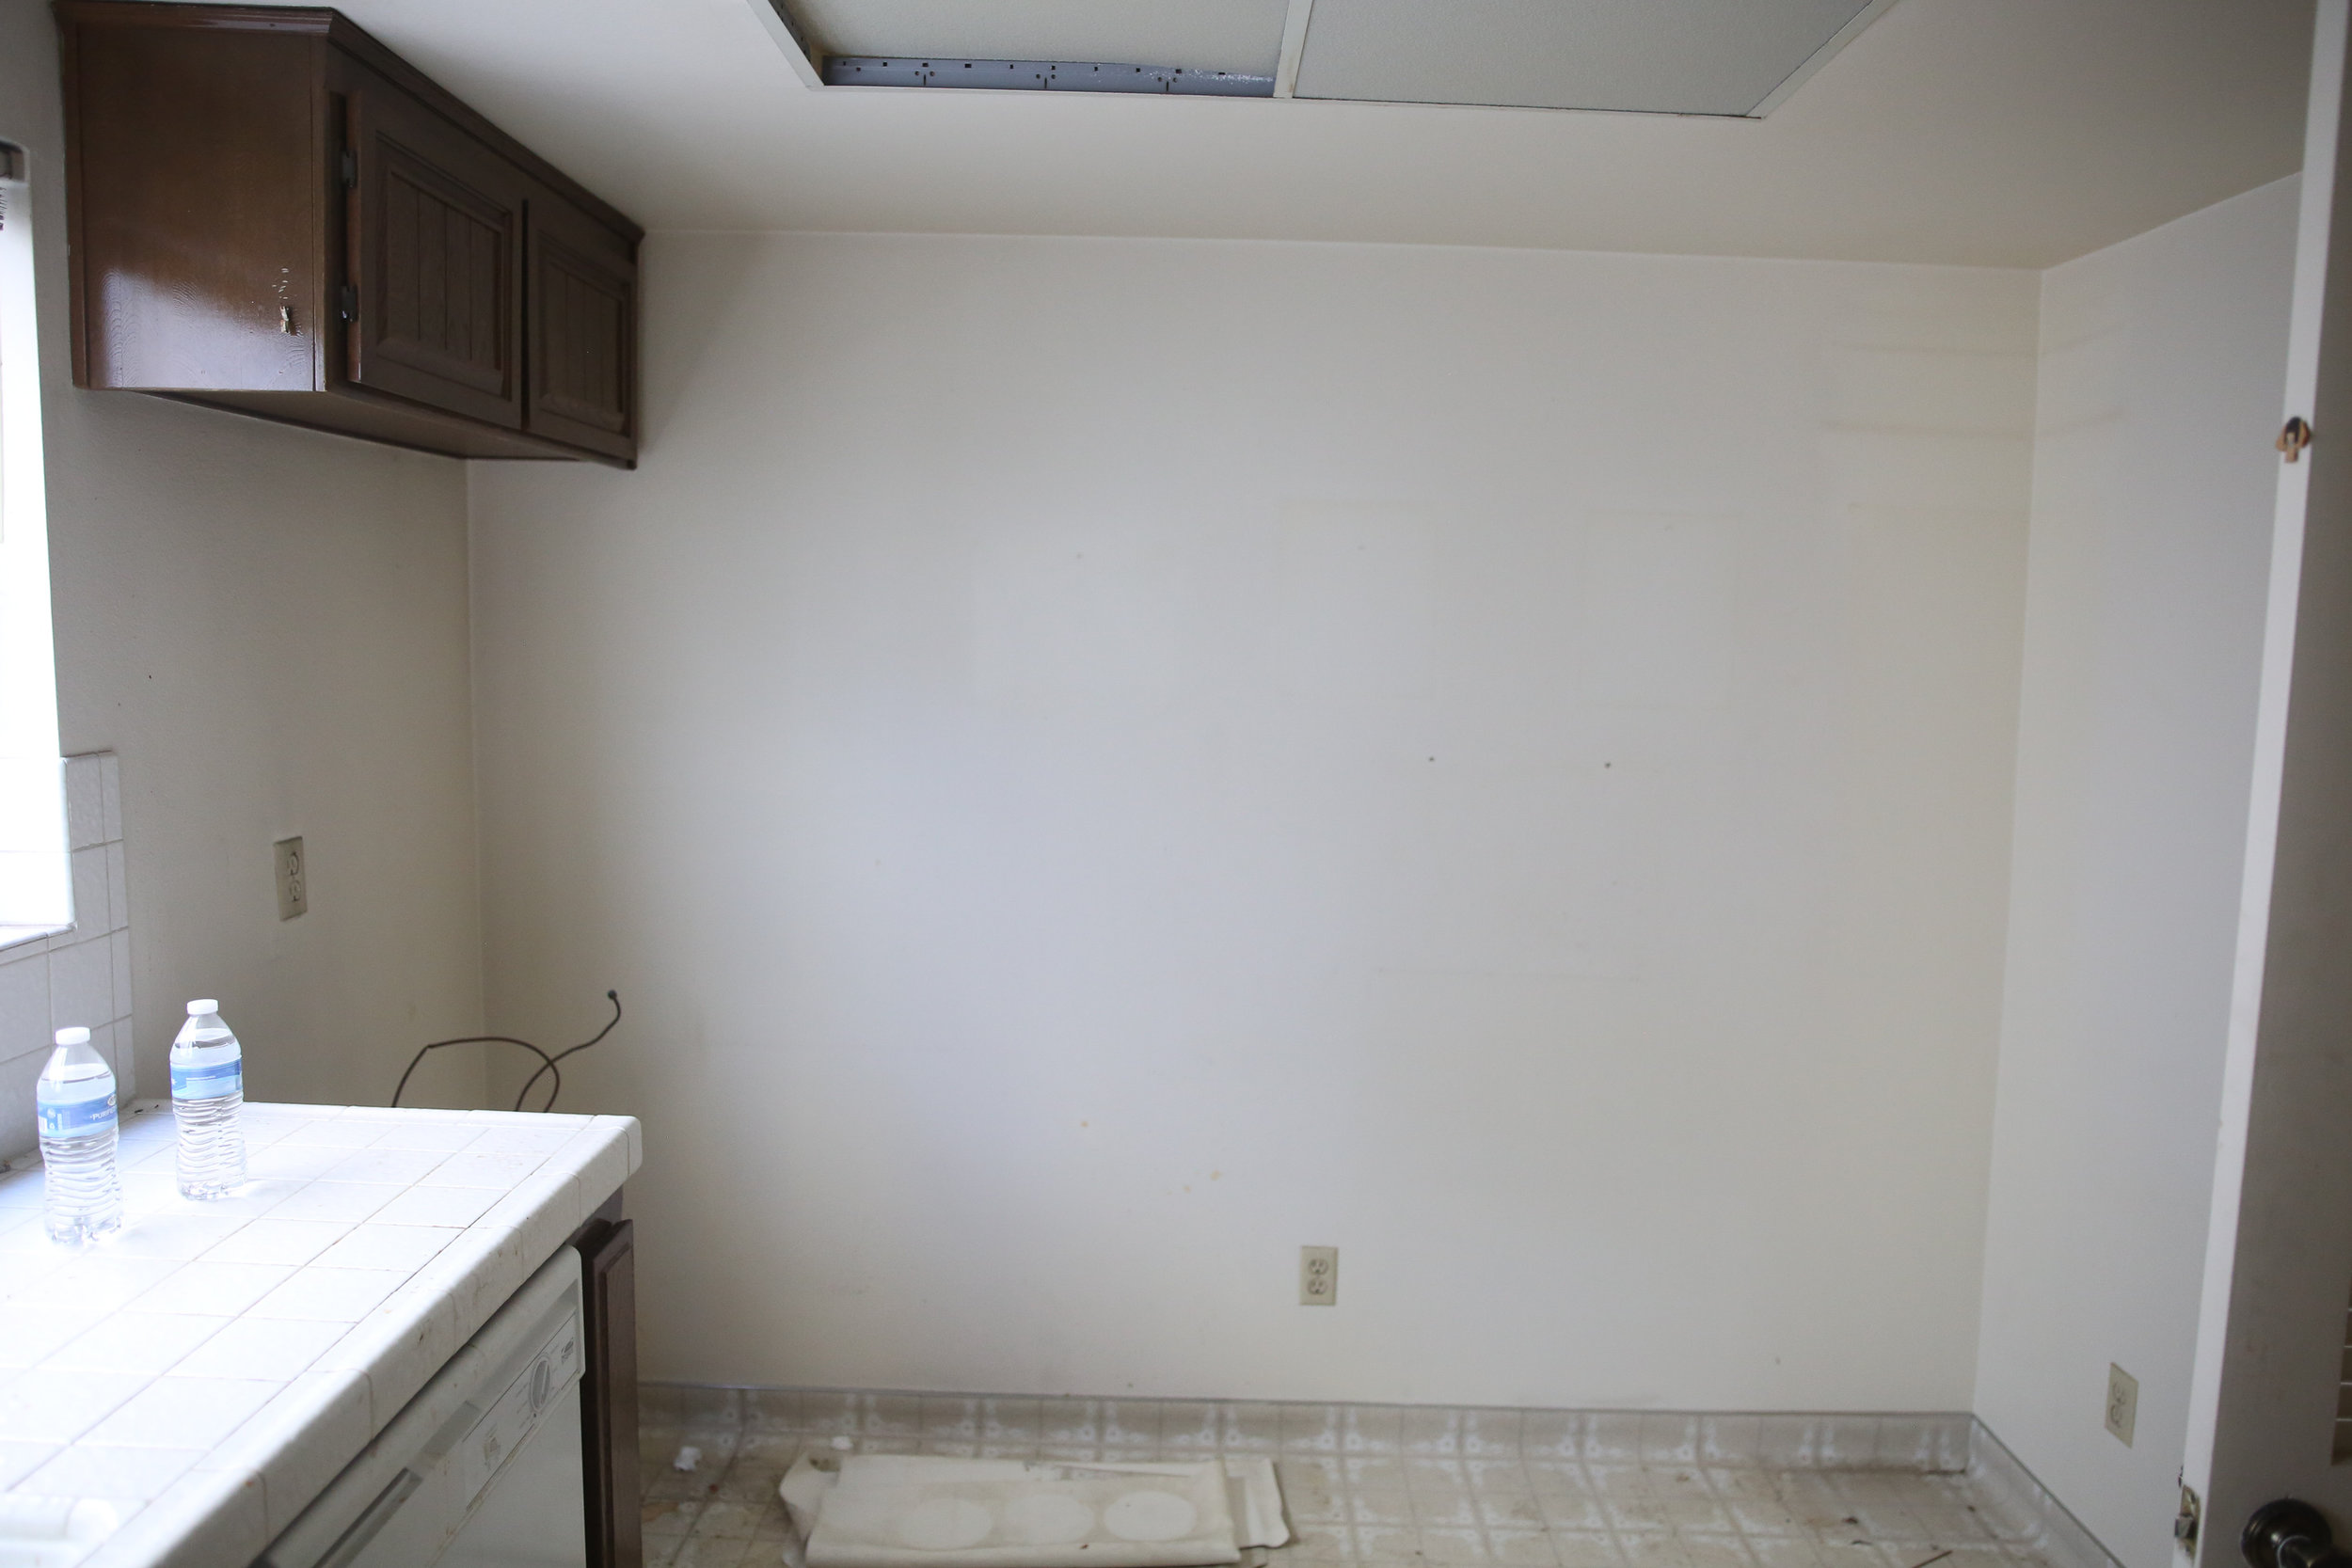
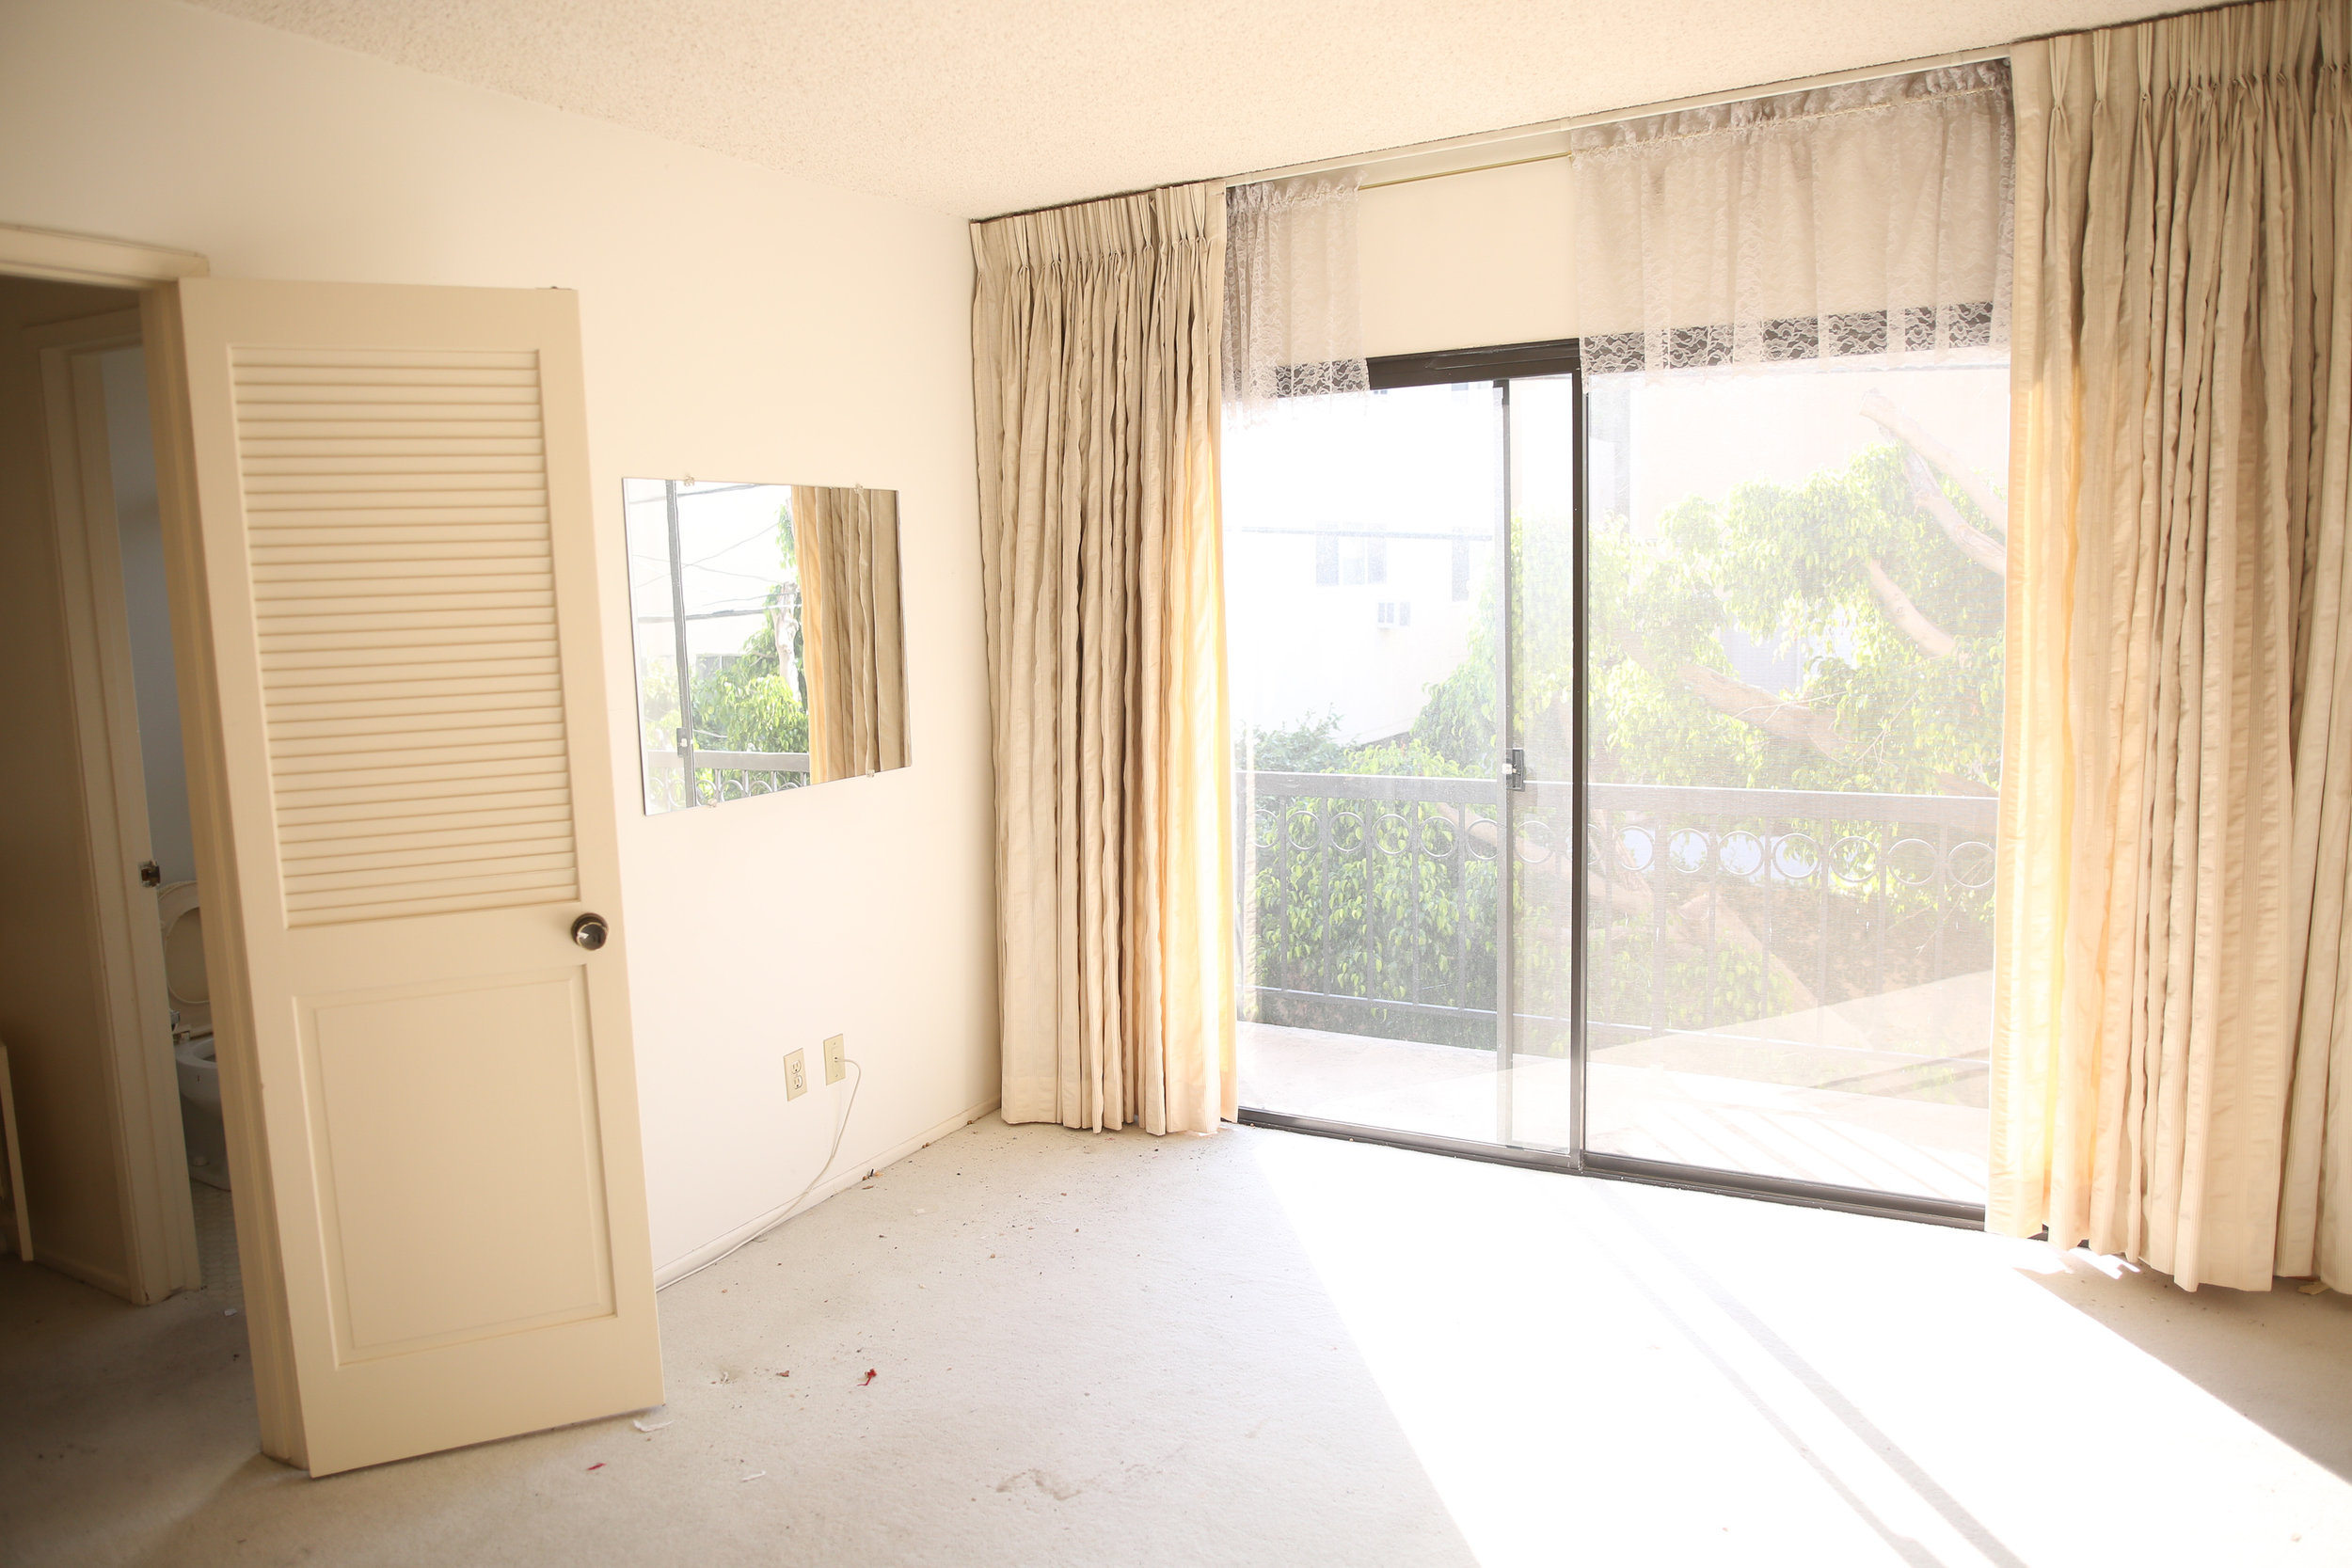
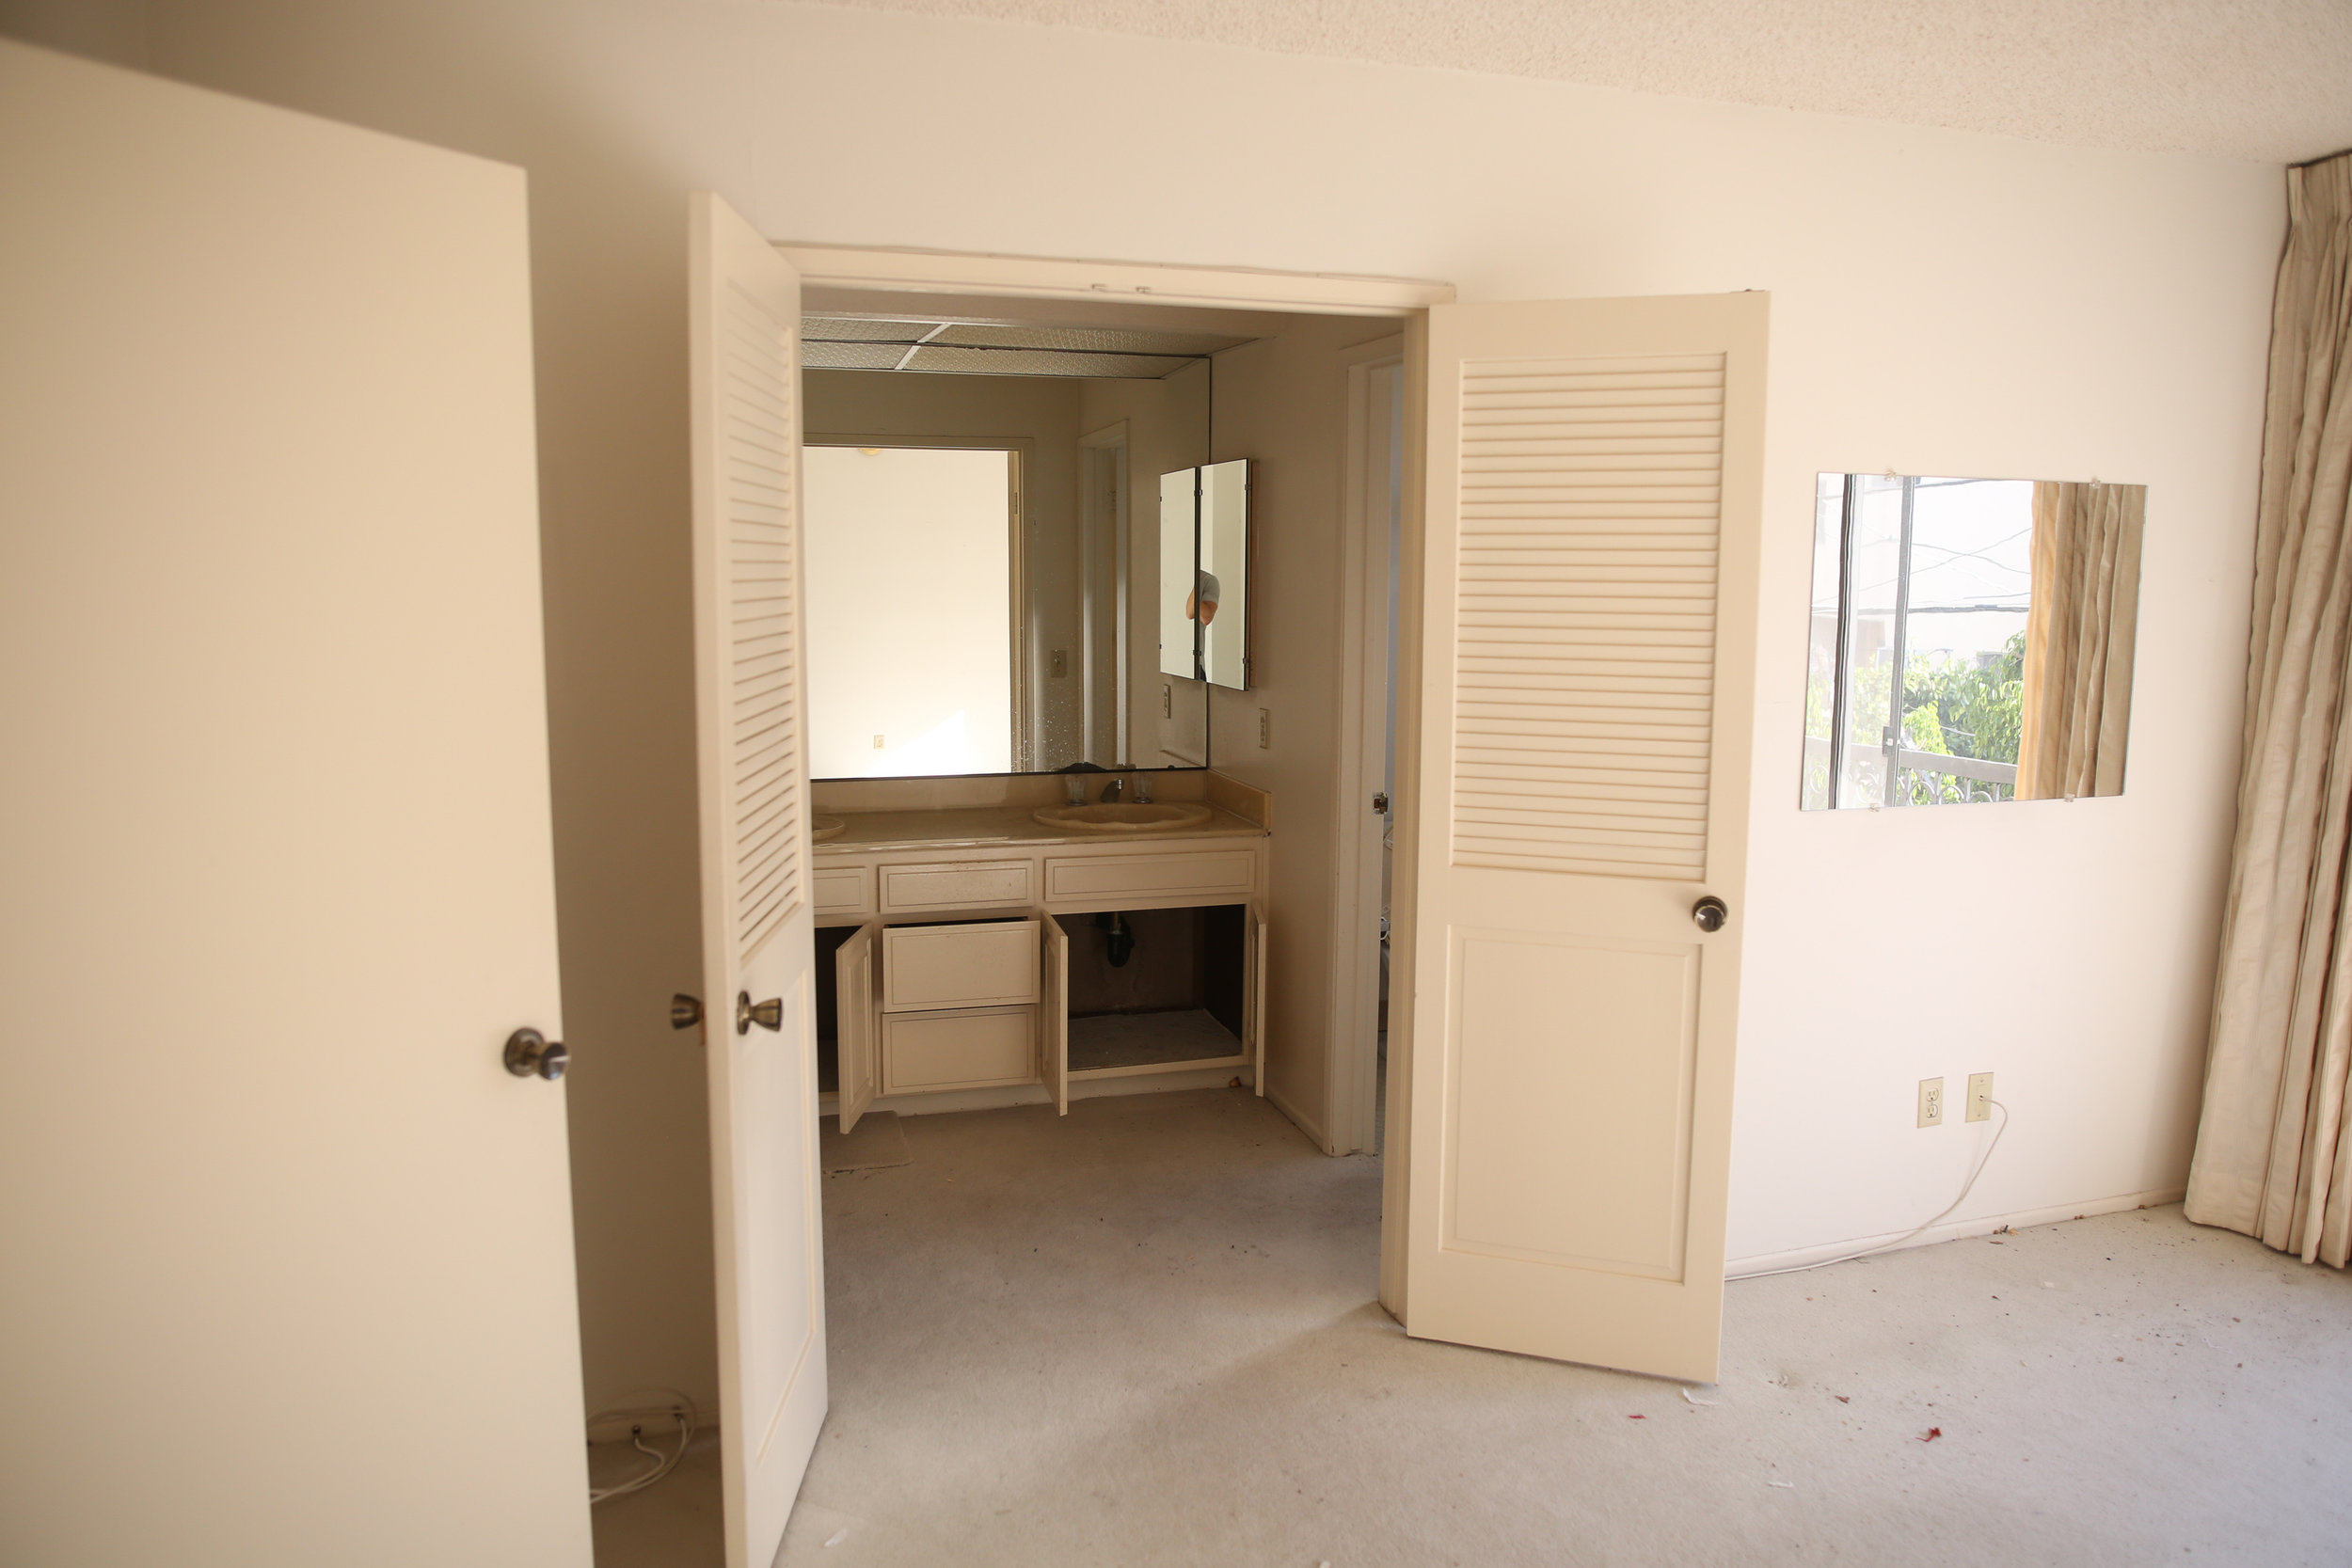
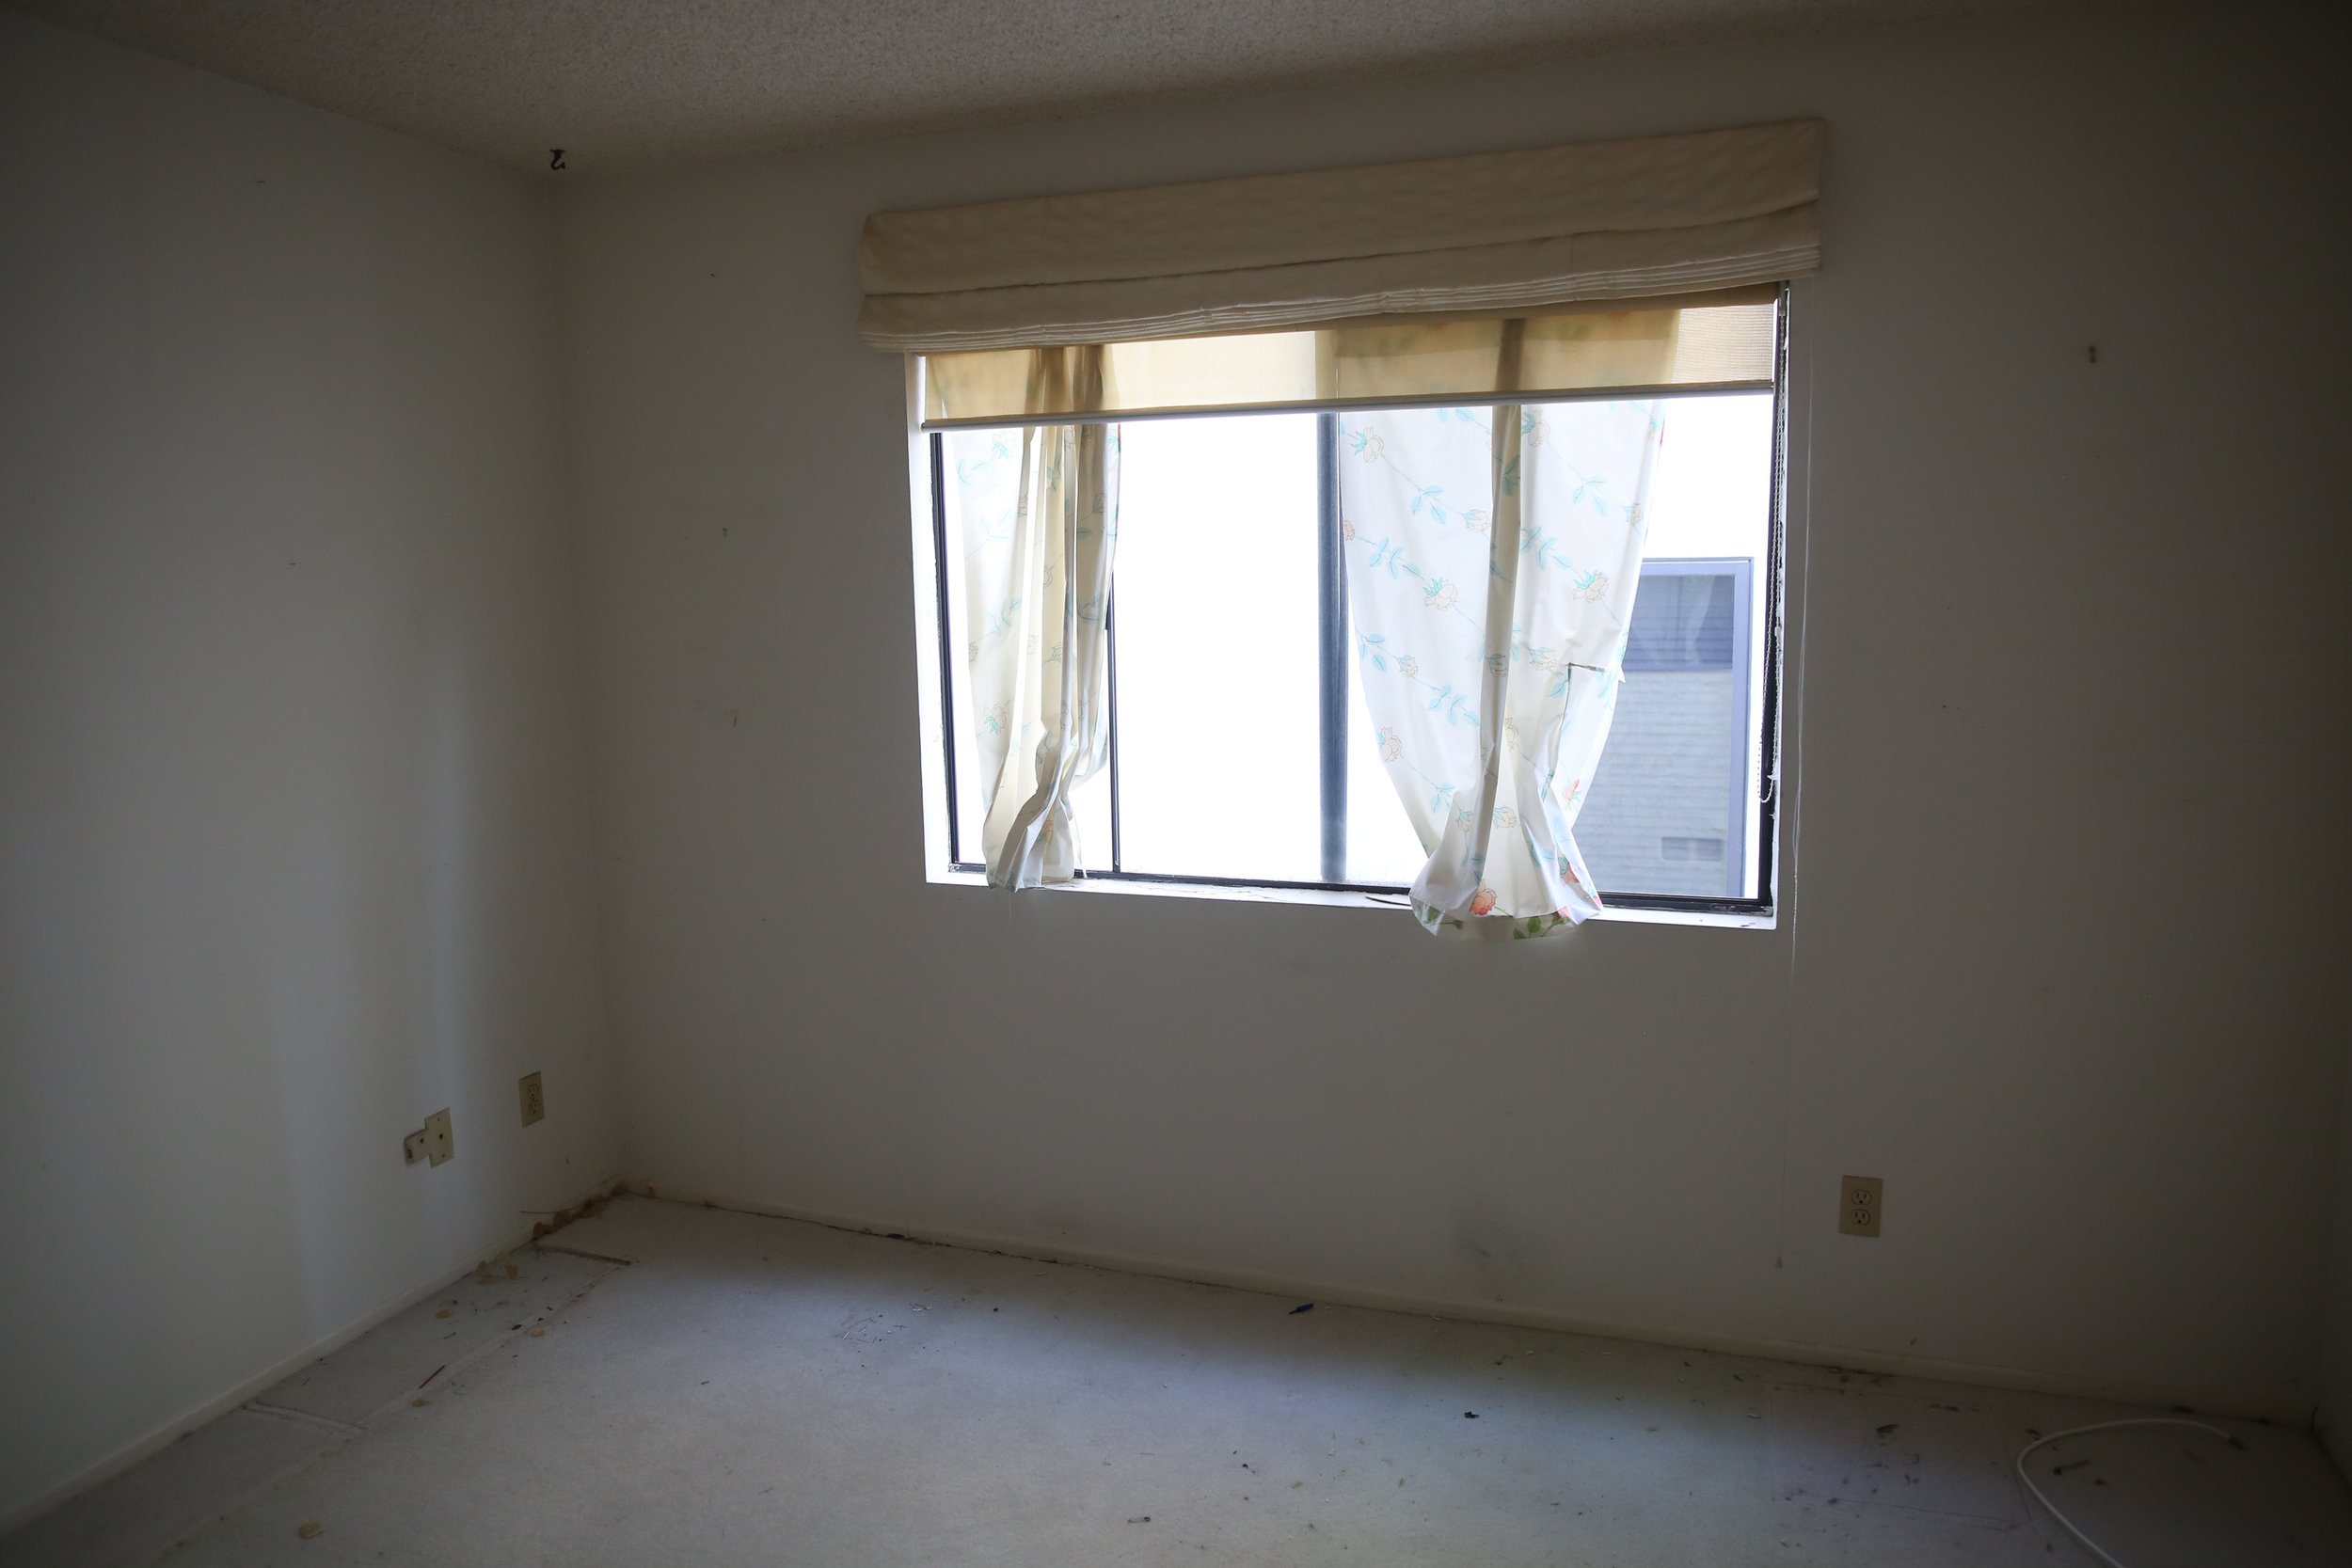
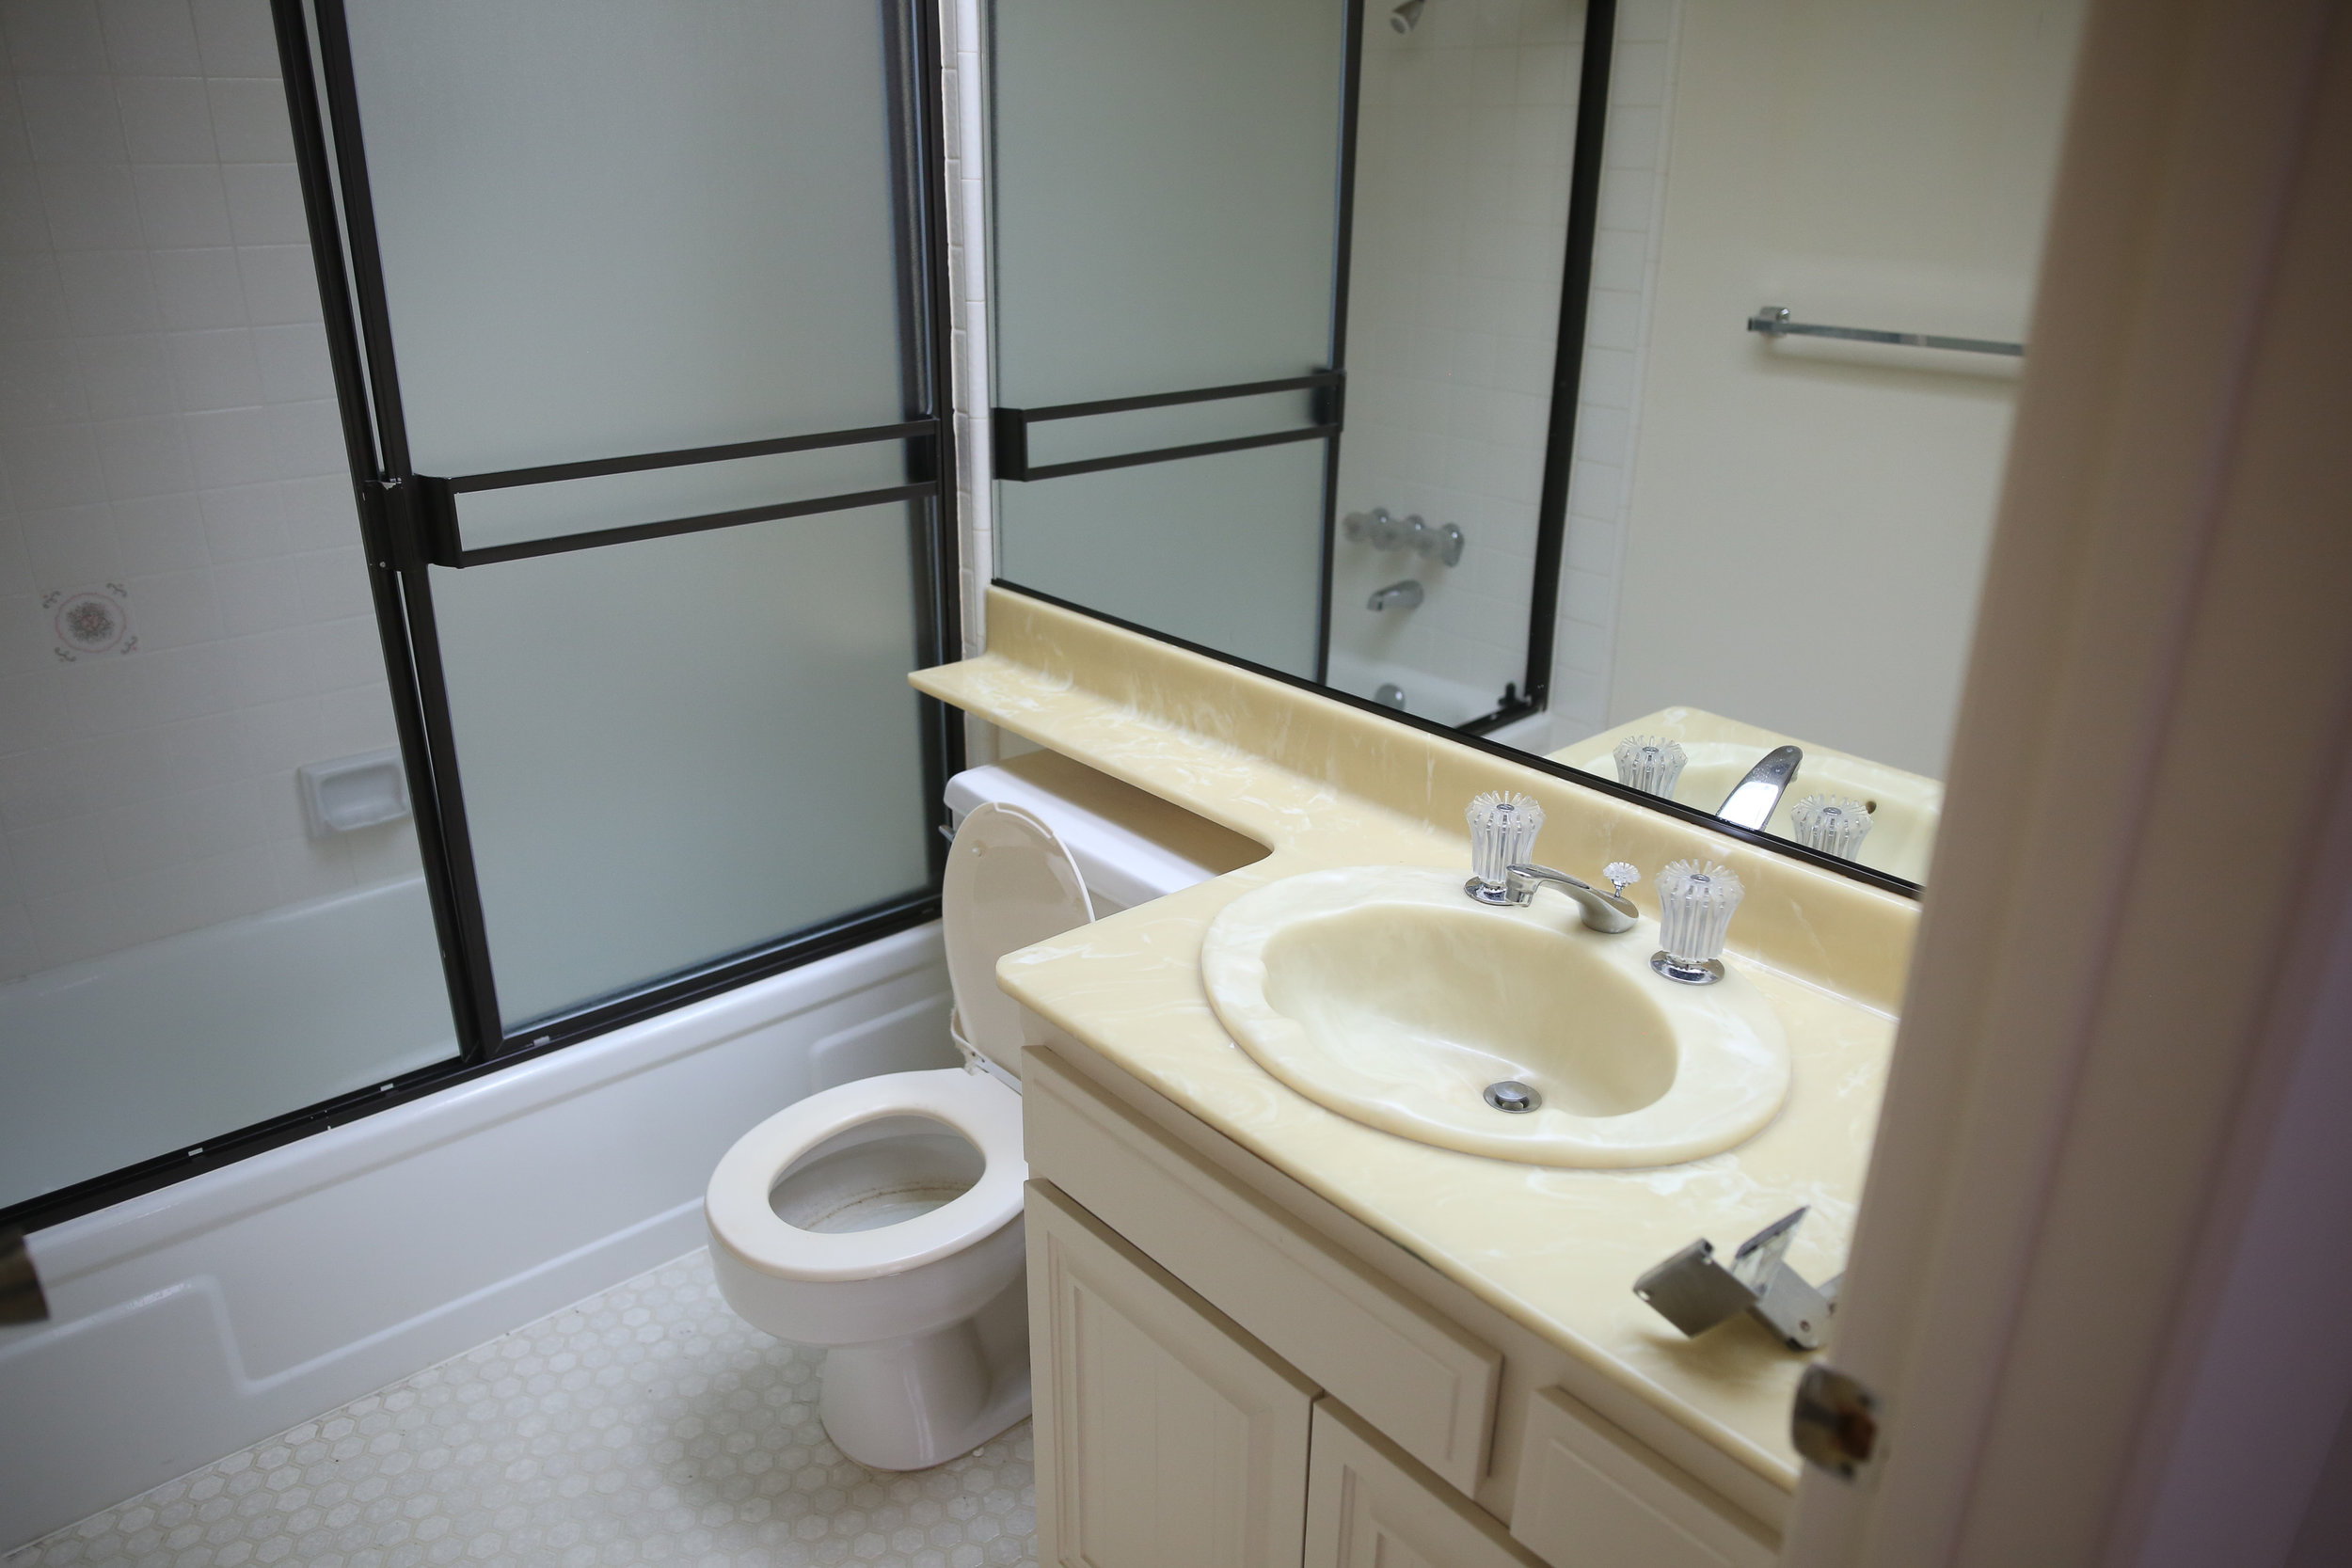
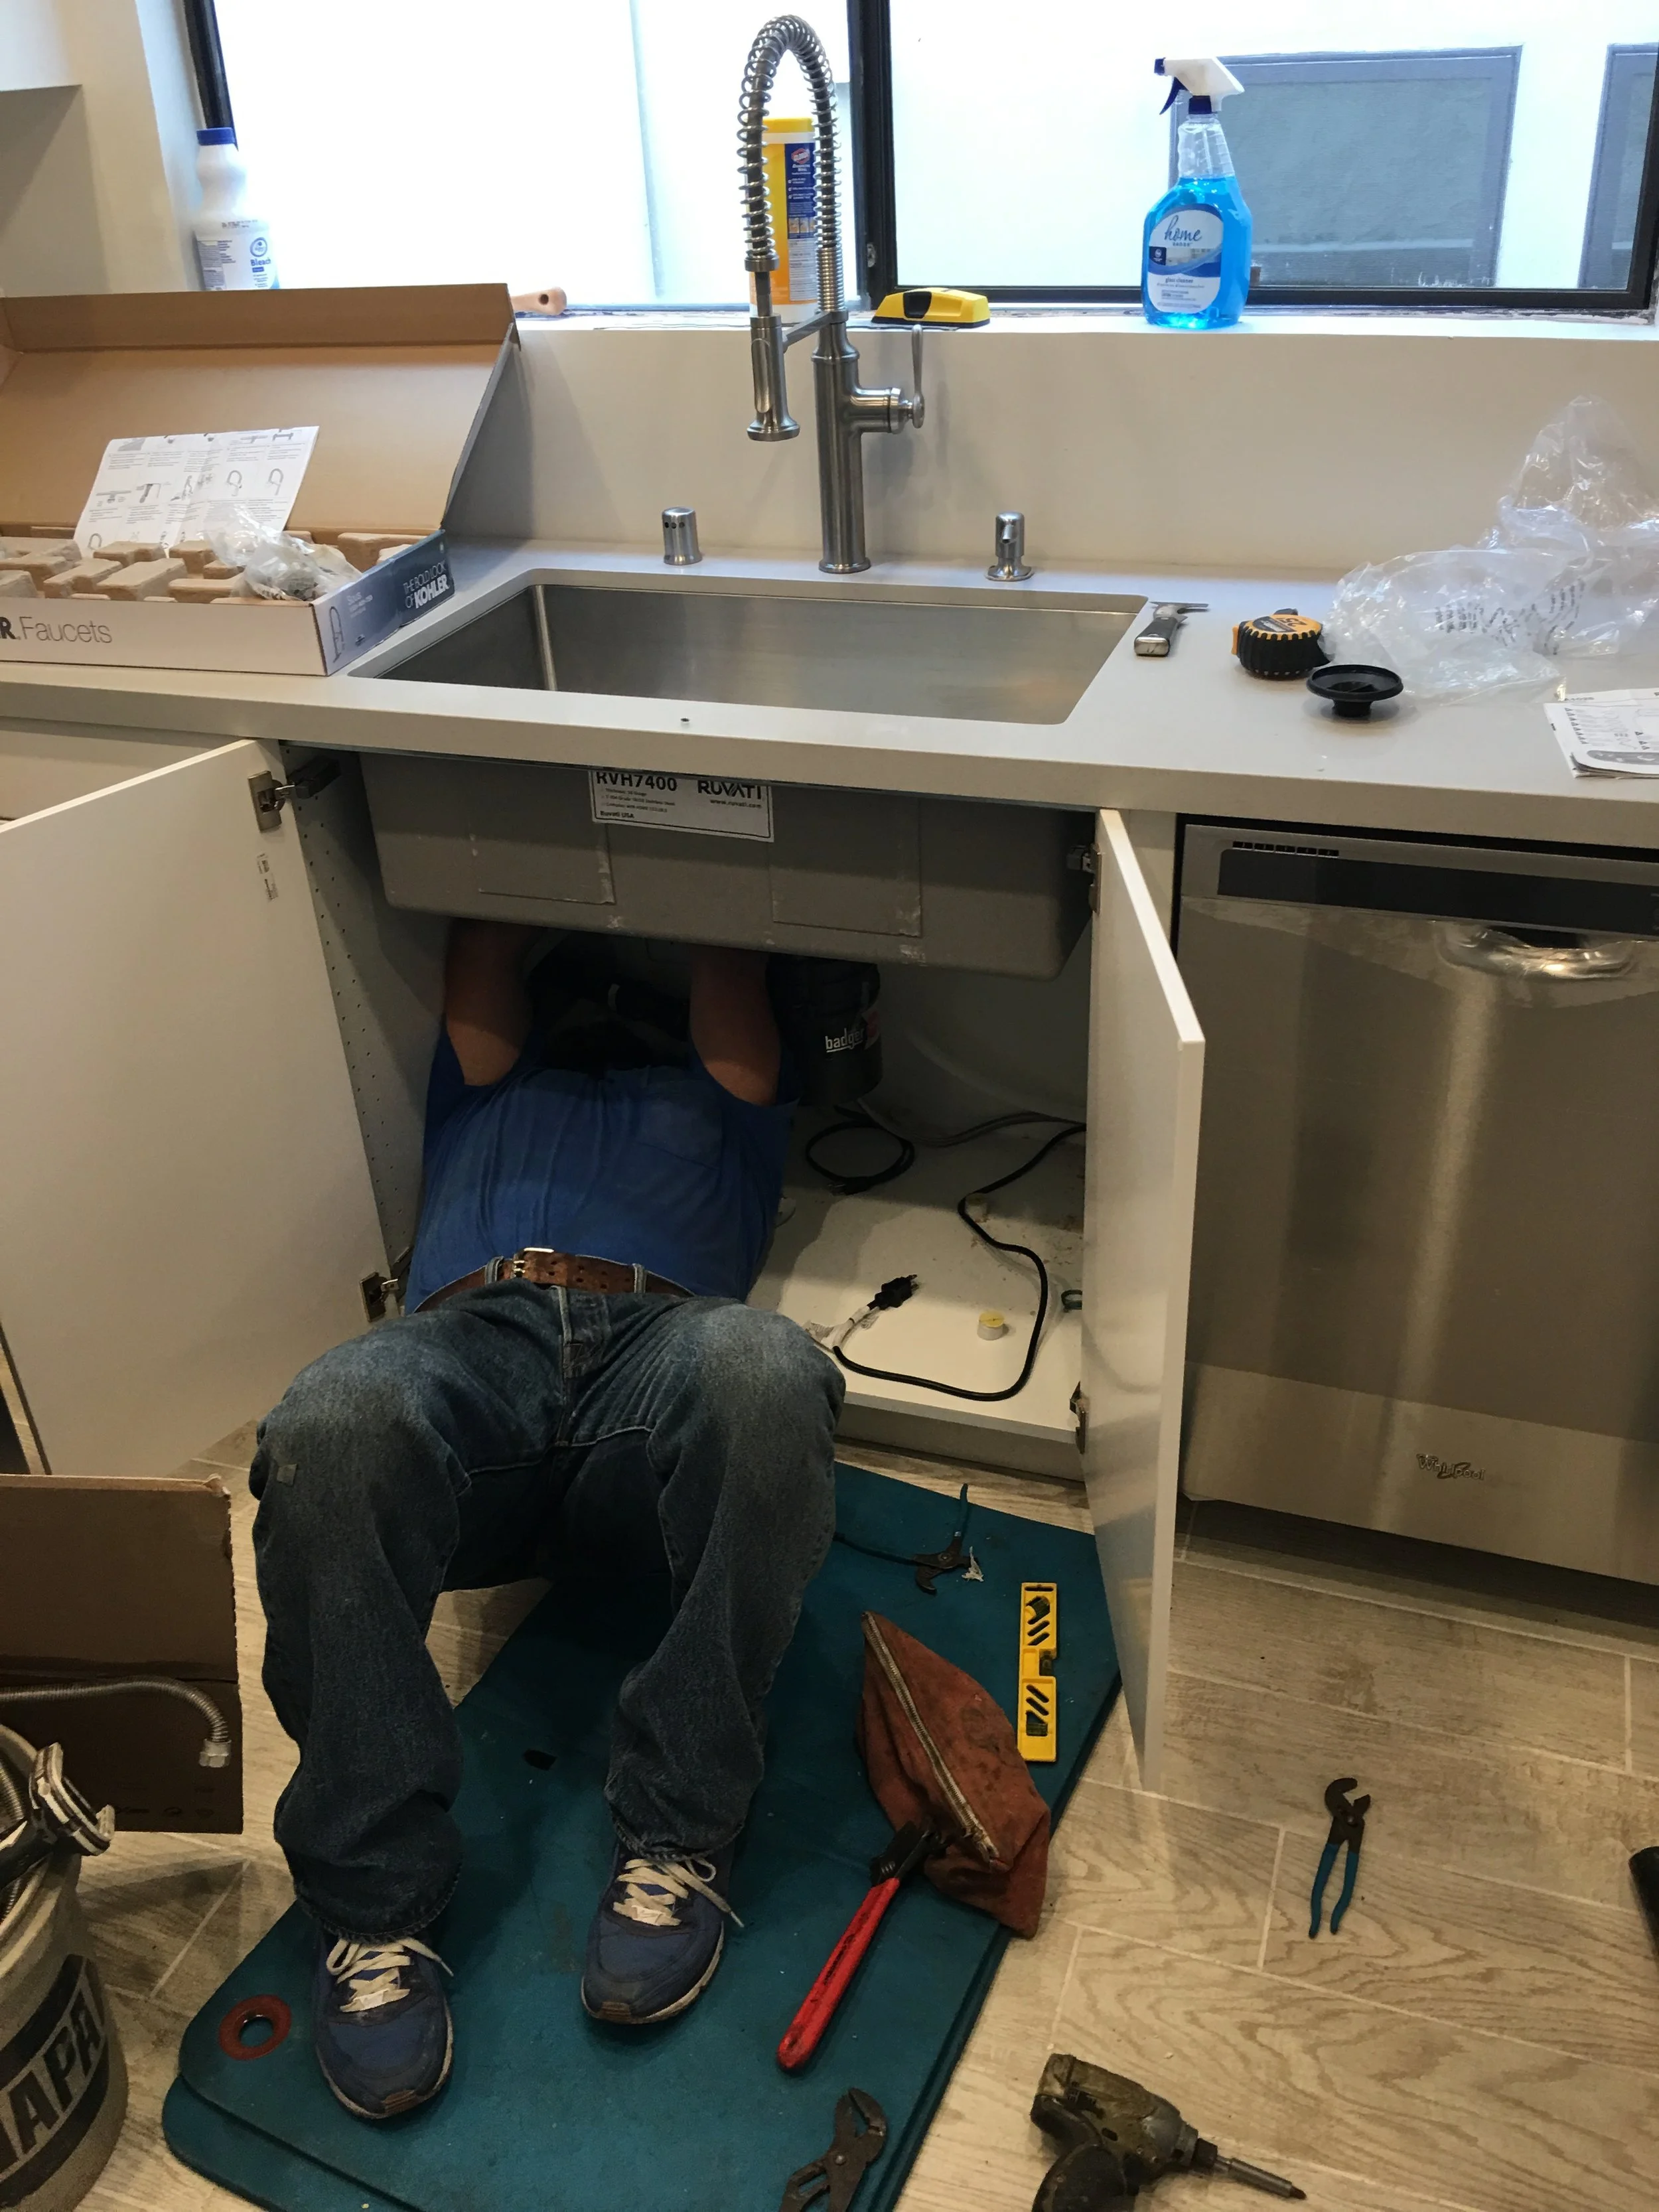
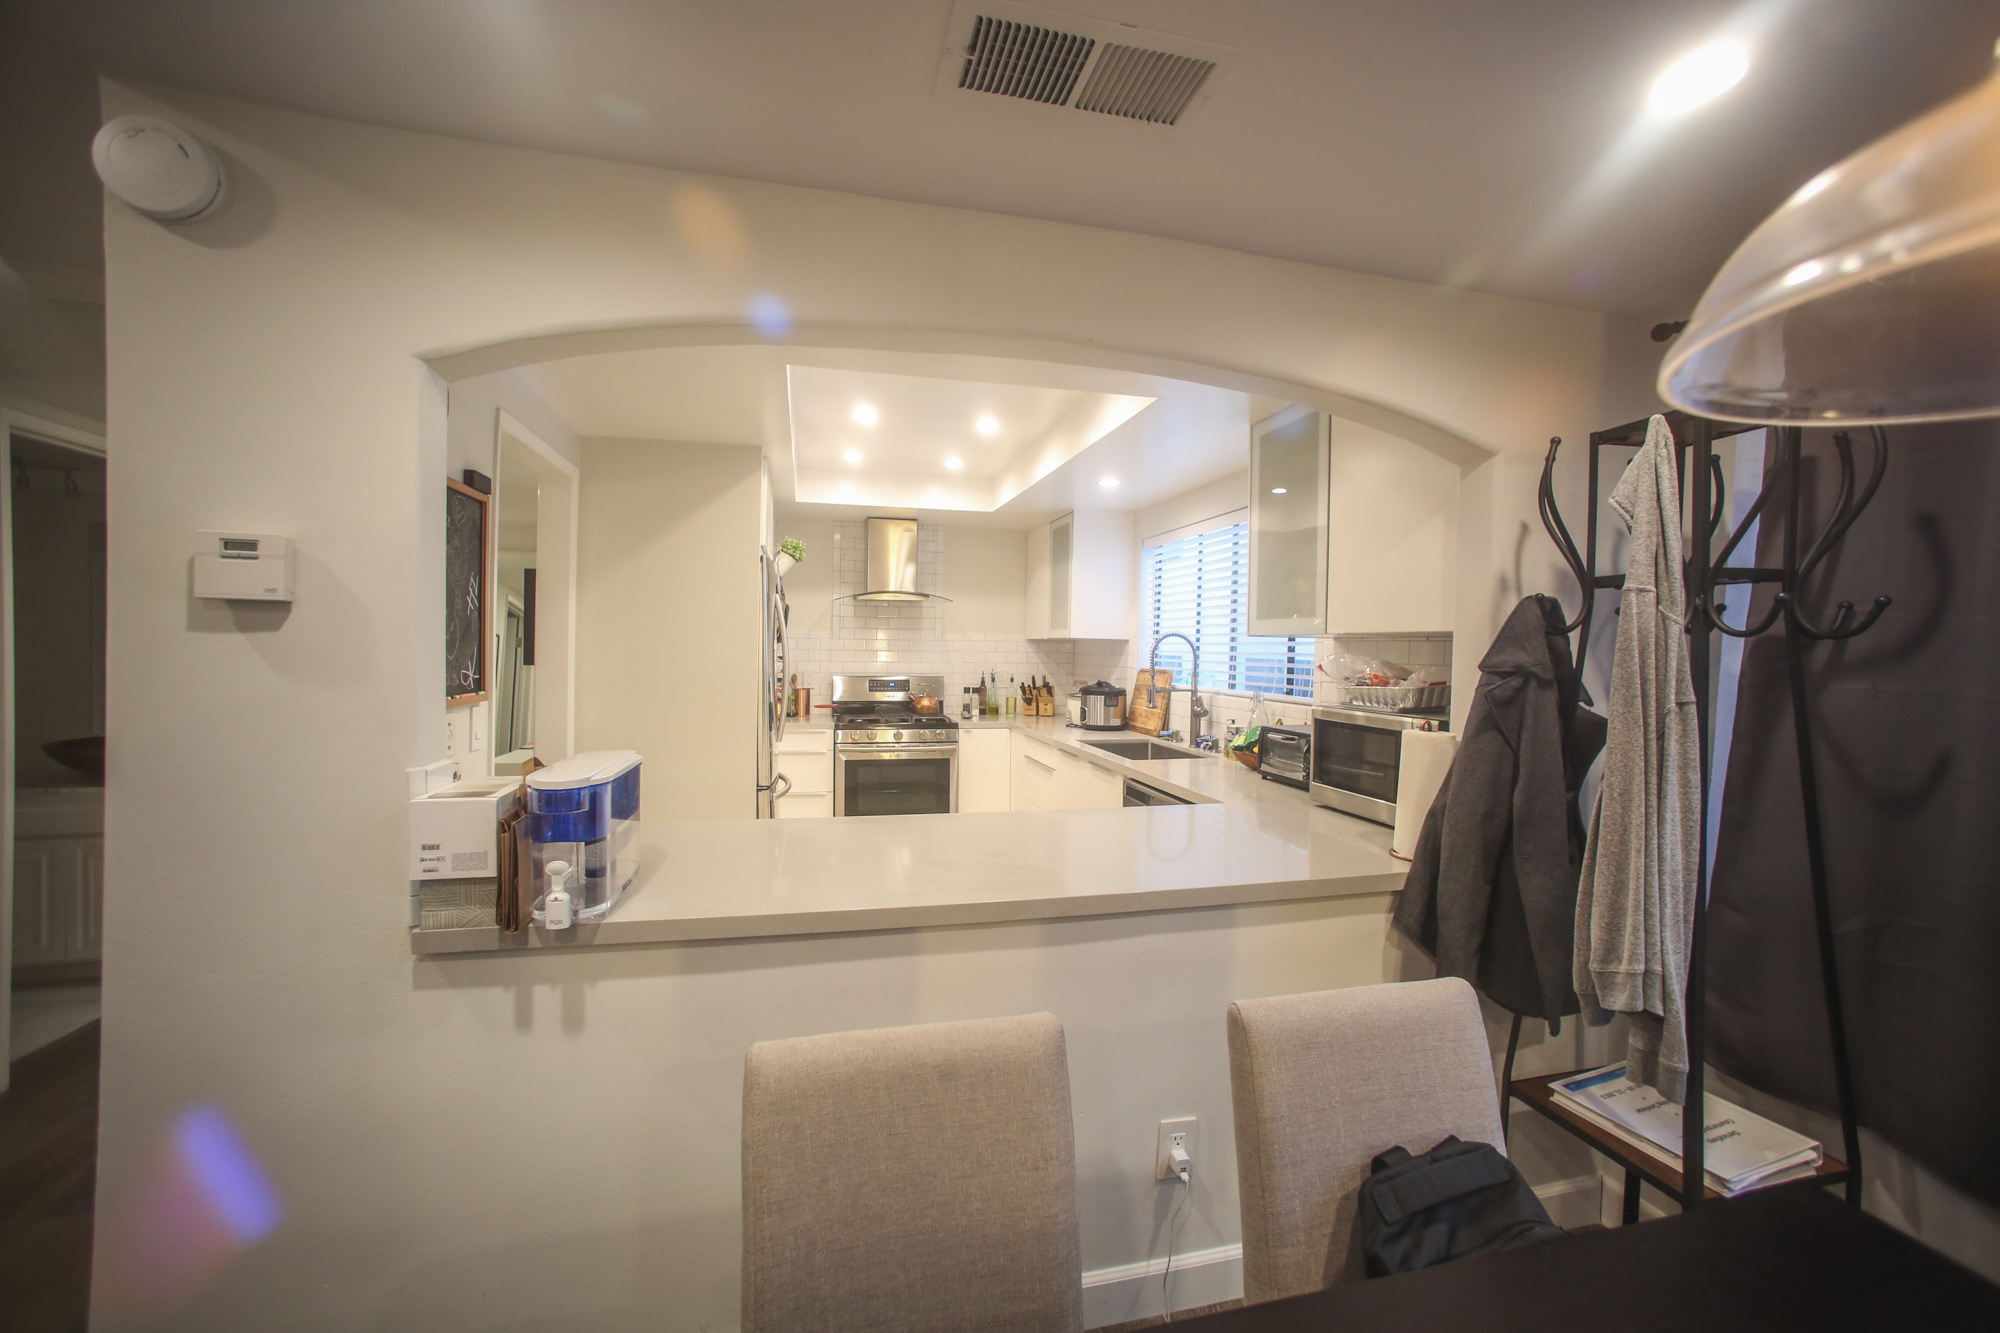
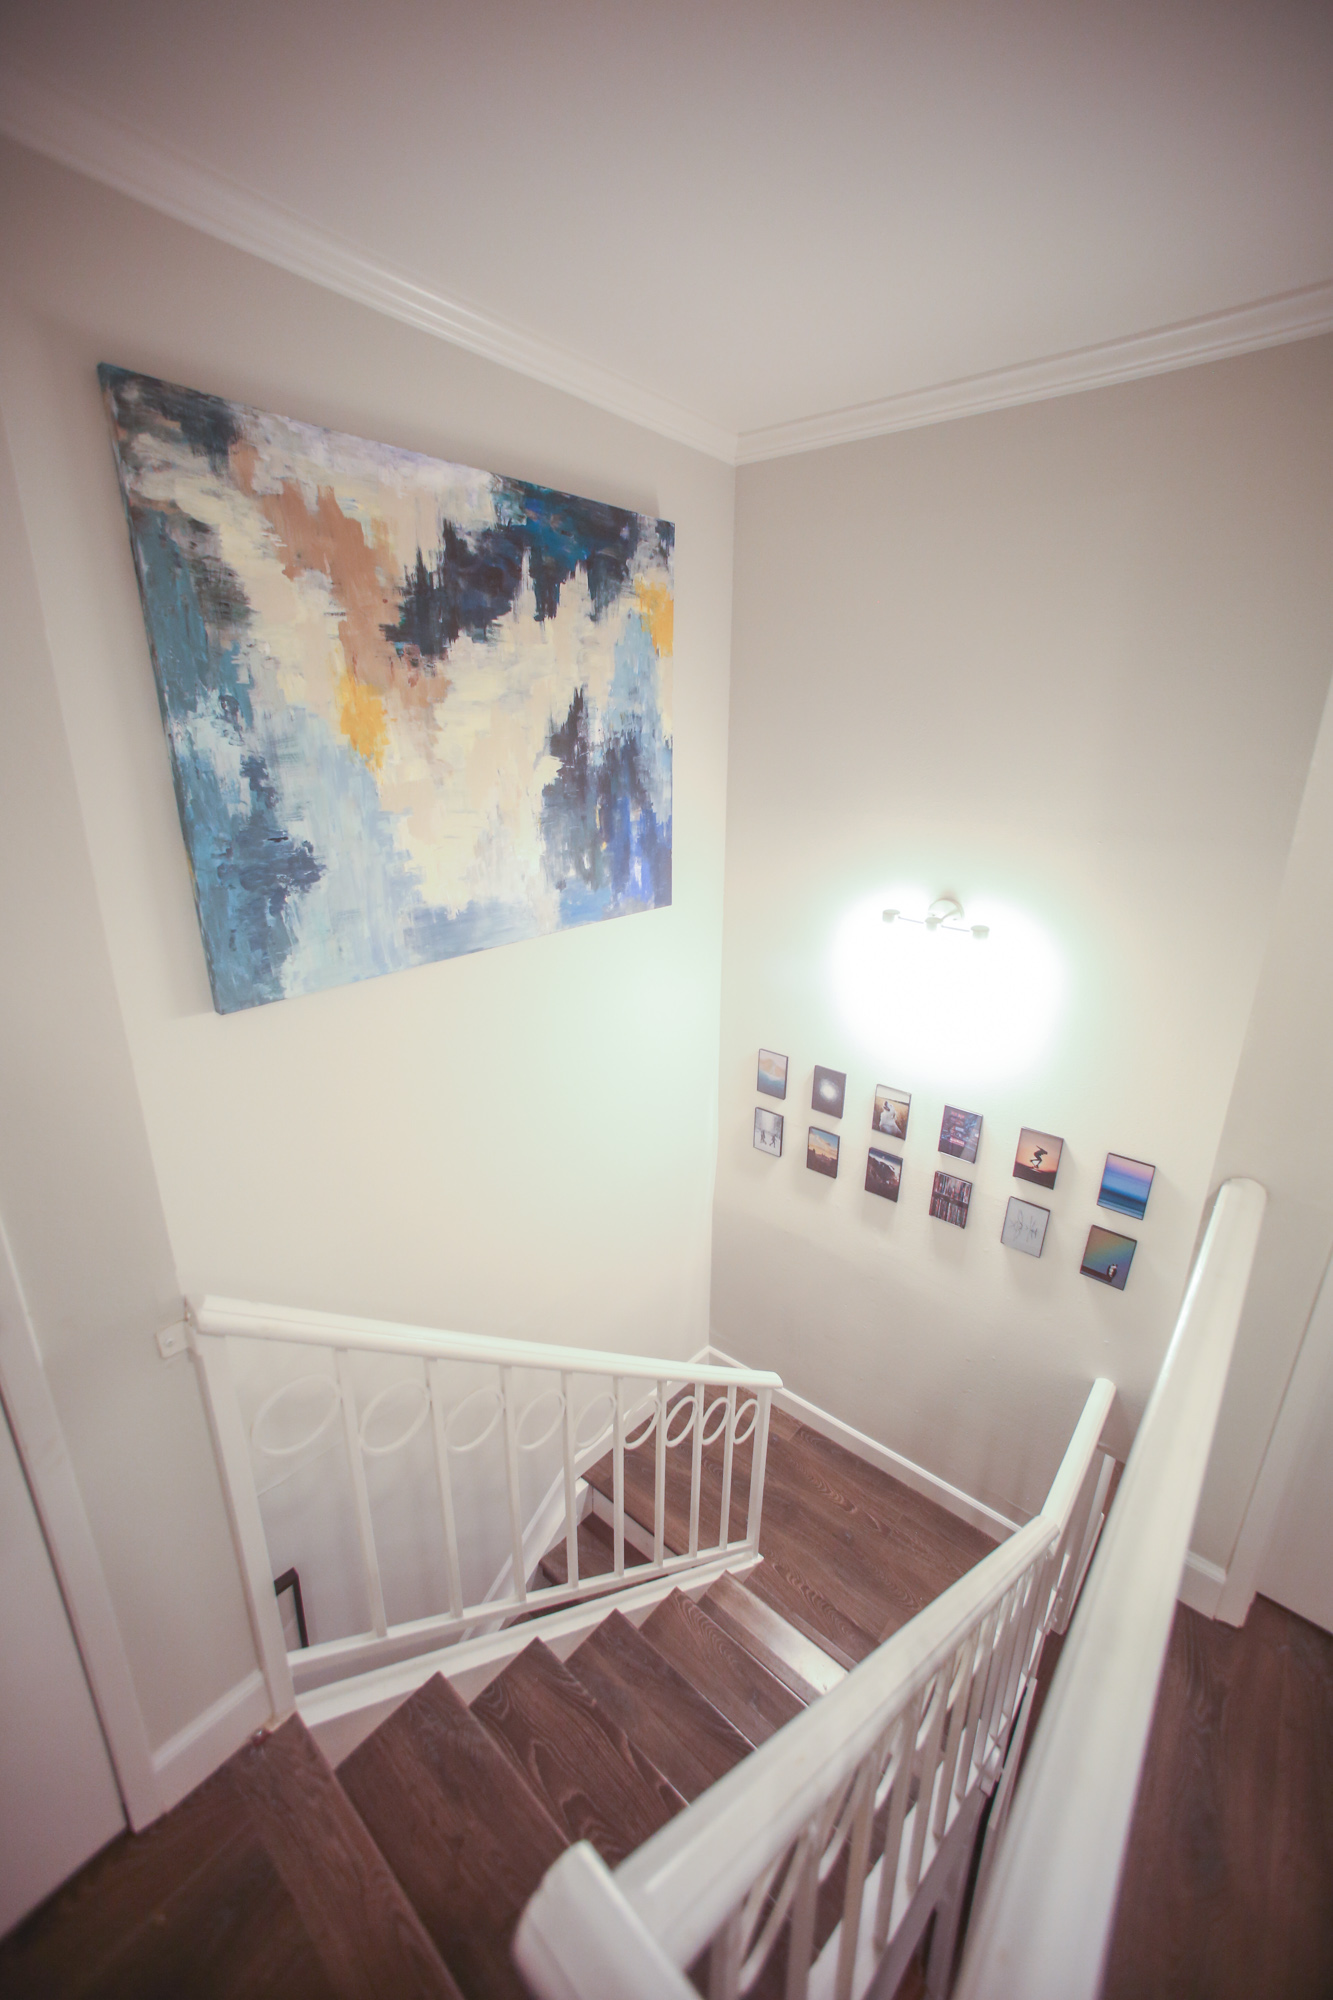
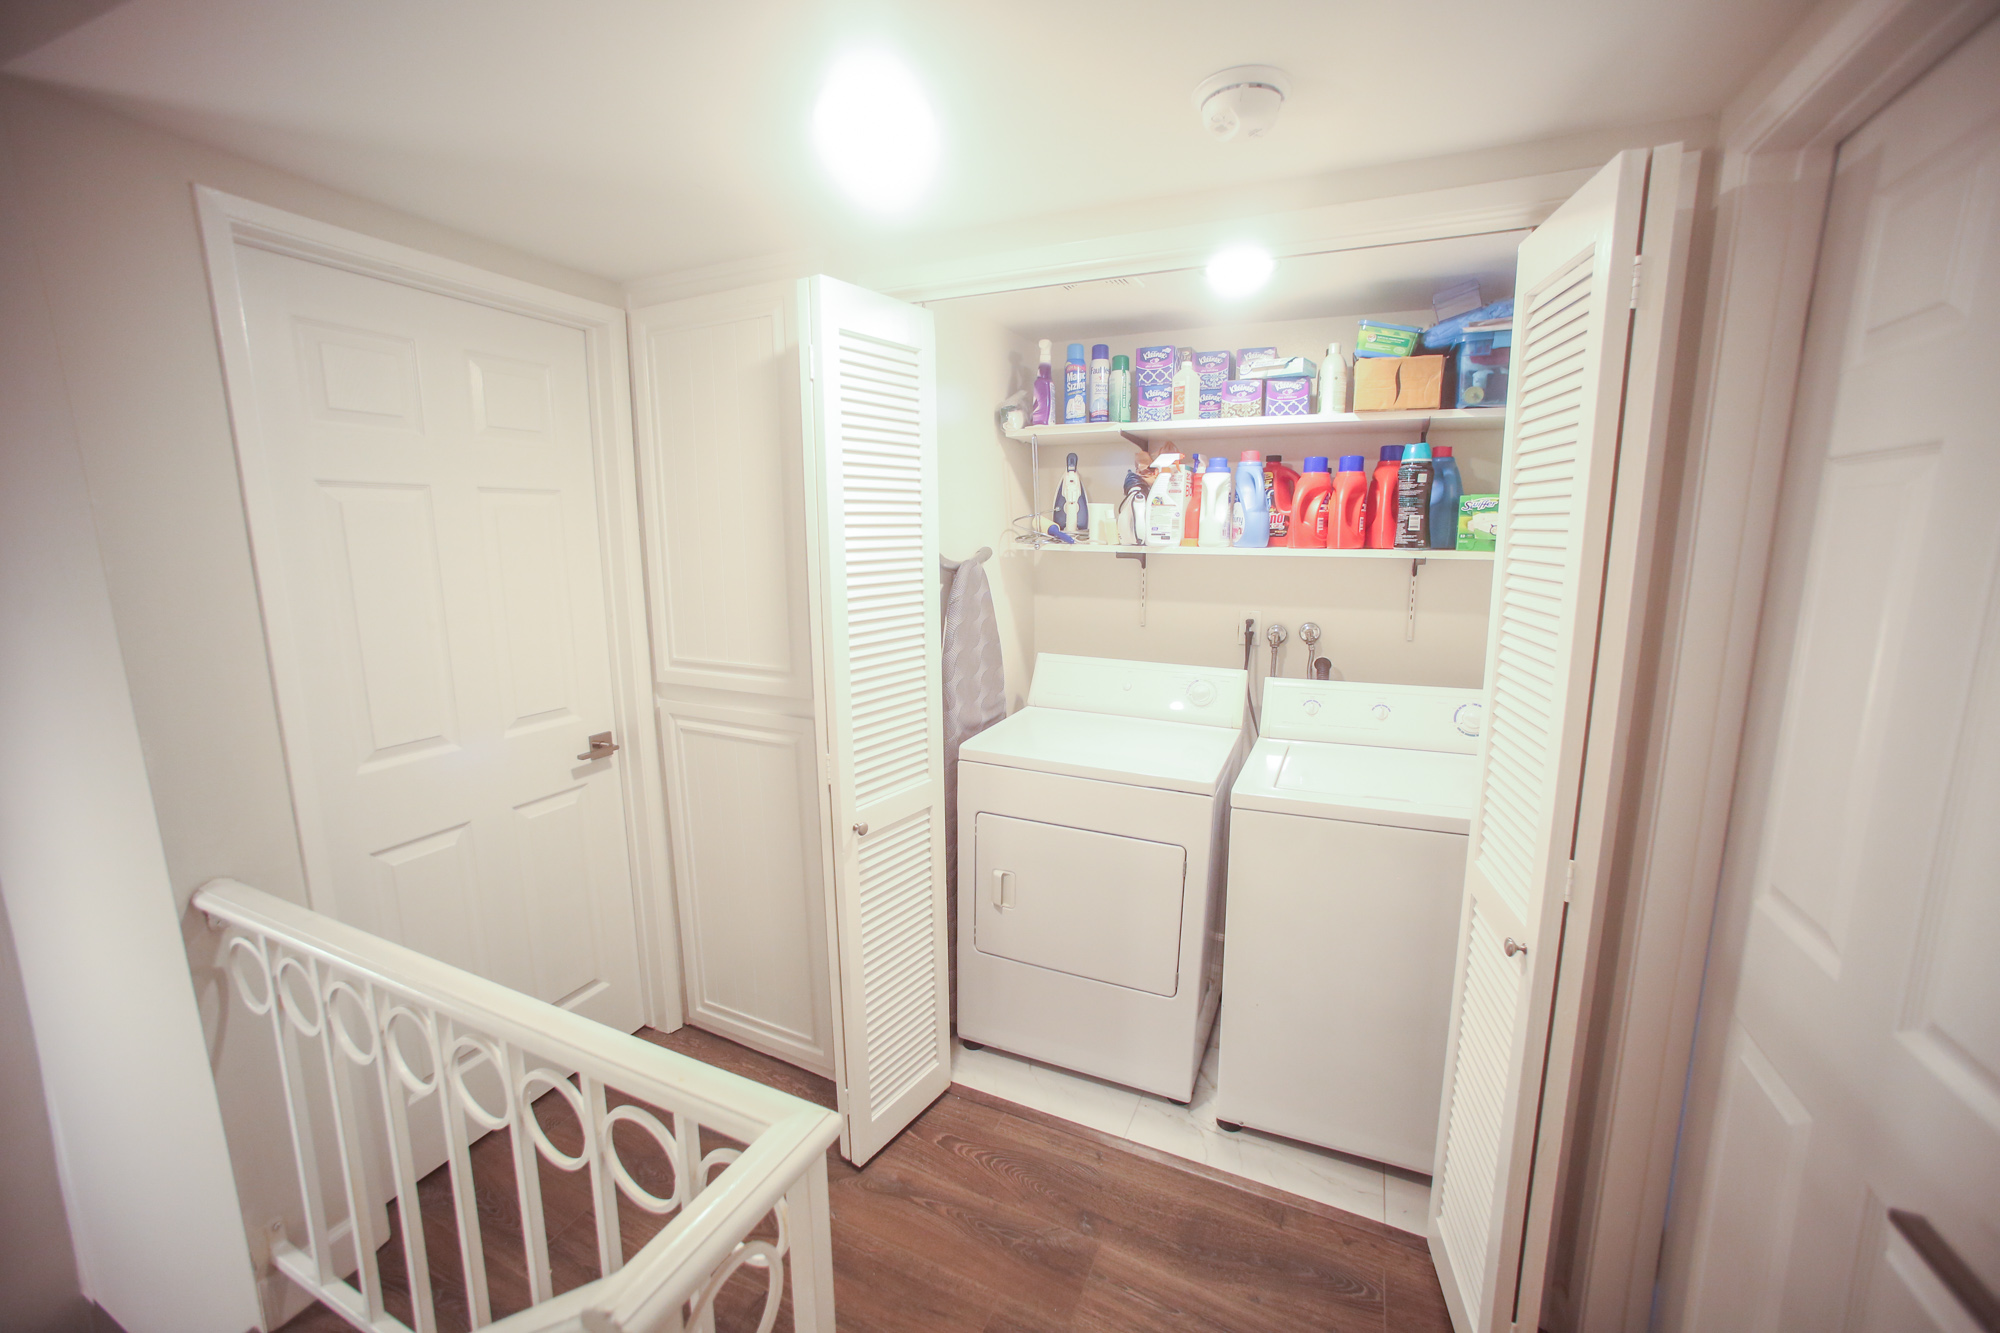
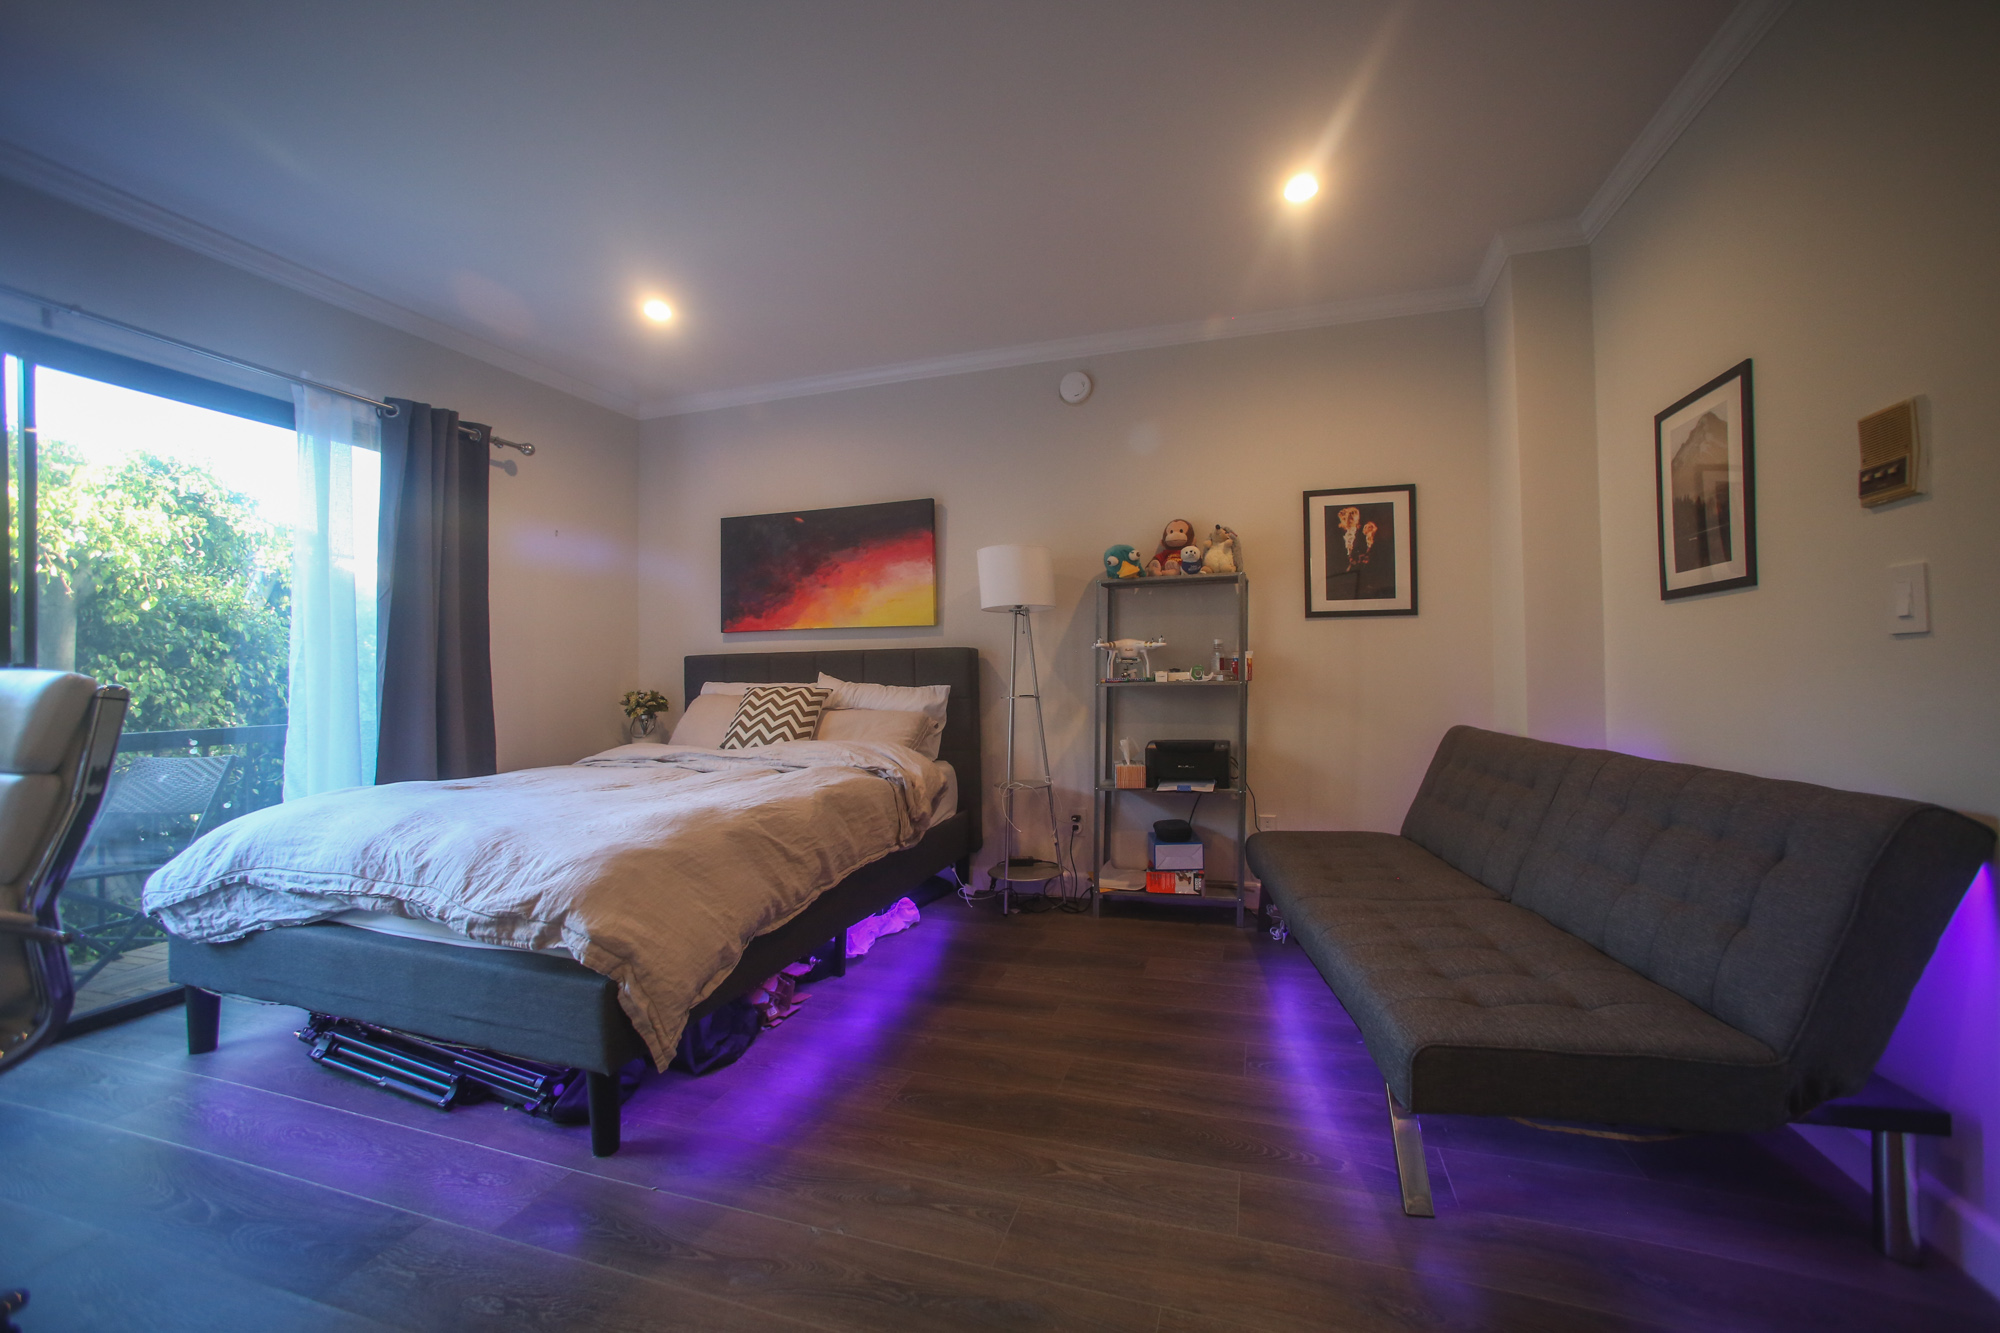
We knew we were going to have to change pretty much everything in the house. You saw the pictures right? That was not going to fly. My mom flew down to LA and we talked to a few general contractors. It seemed like it was going to cost around 80-100k to get the work completed. Since my sister and I were paying for the renovations ourselves, that was too expensive. I decided to act as my own contractor (which saved us A LOT of money in the end) and hire out each separate job to different crews. This became the most adult and hardest project I’ve ever worked on, but also one of the most rewarding experiences I’ve had.

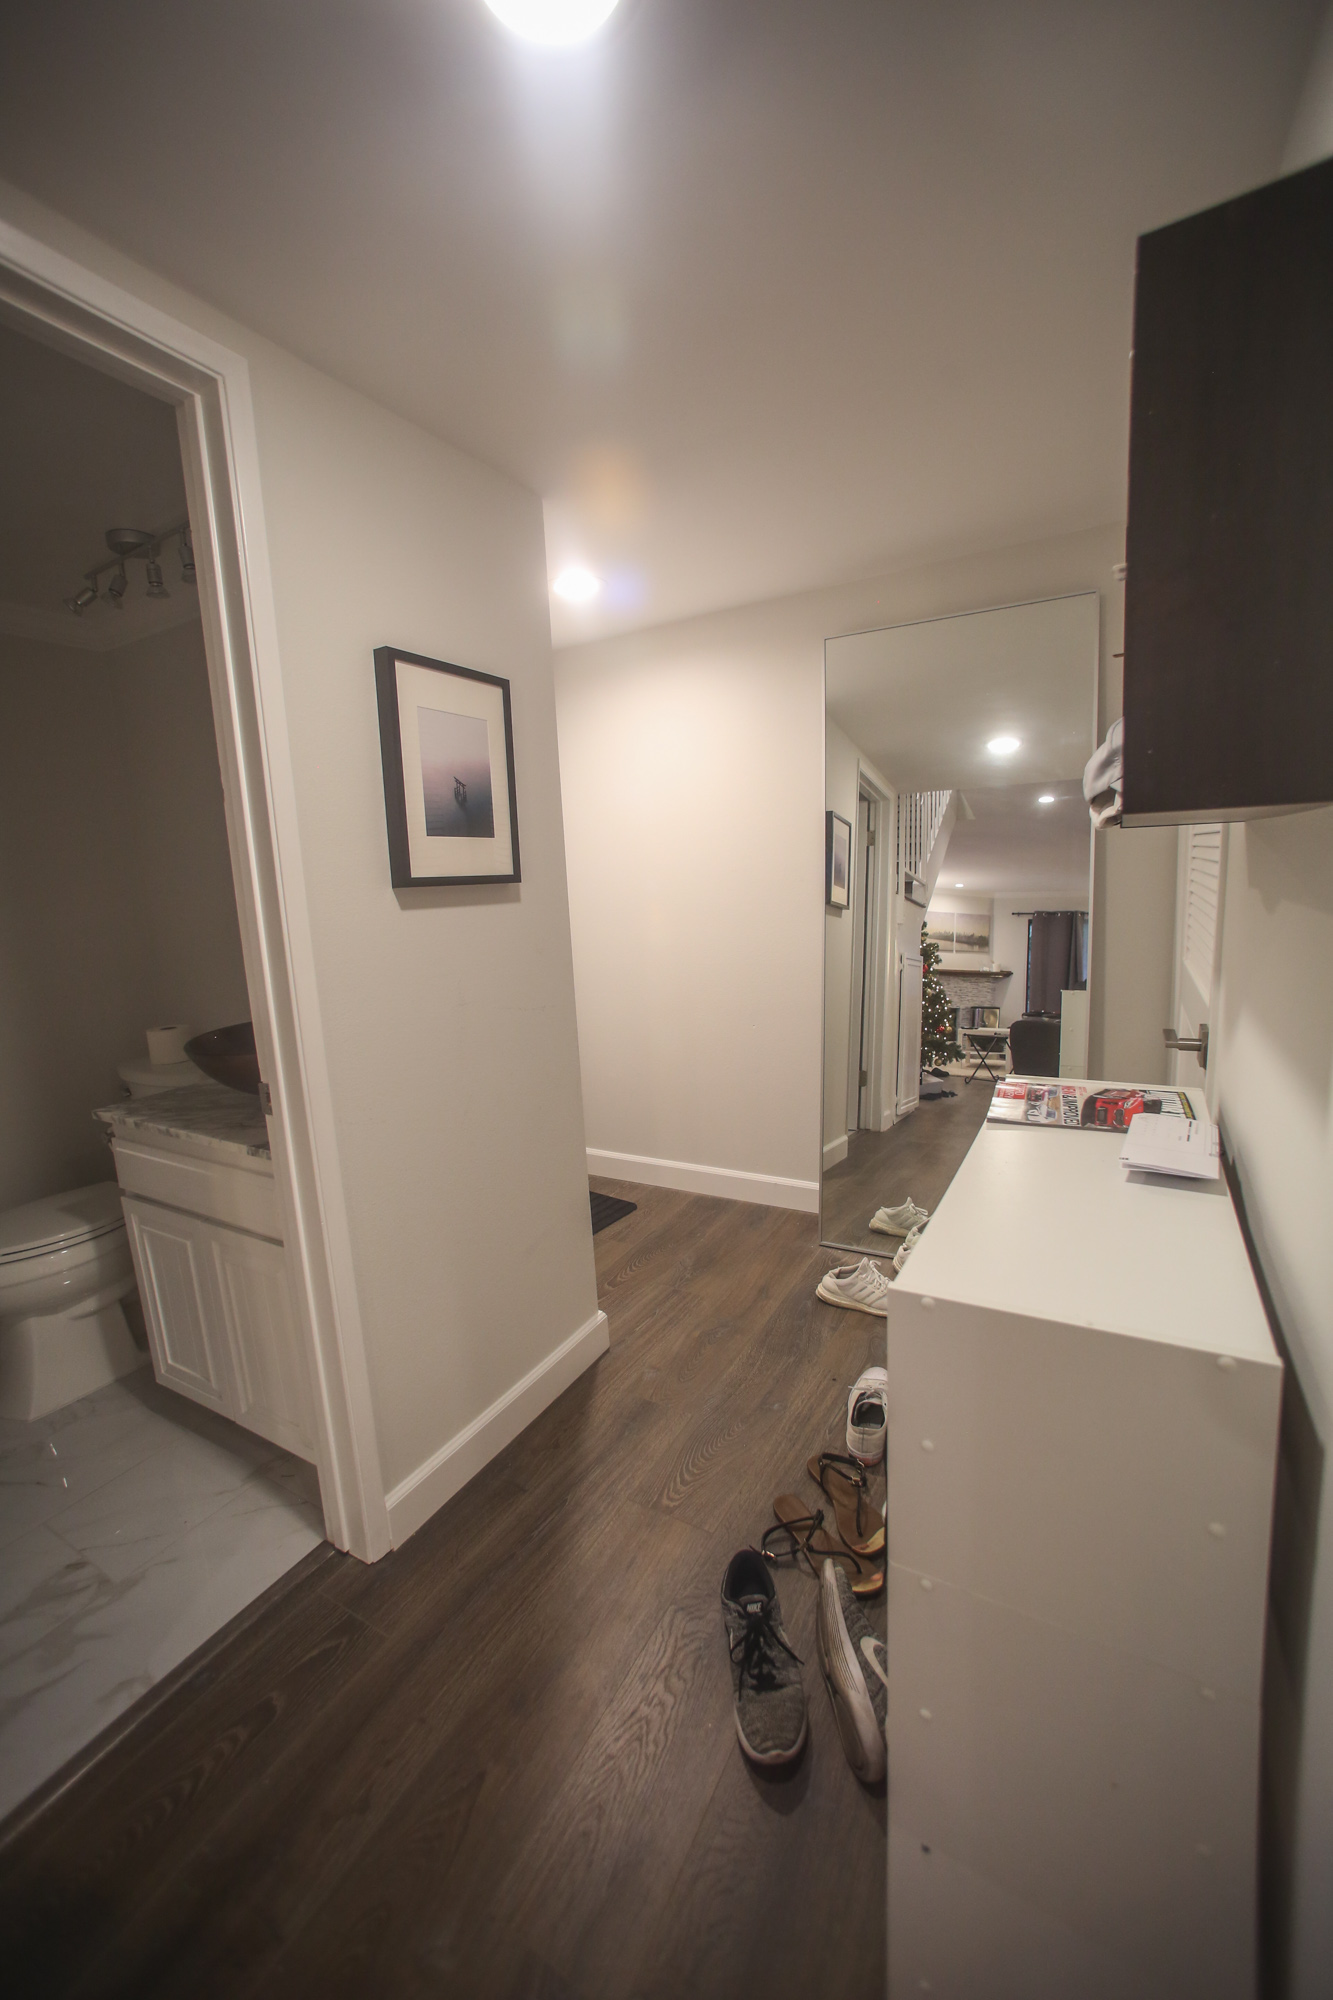
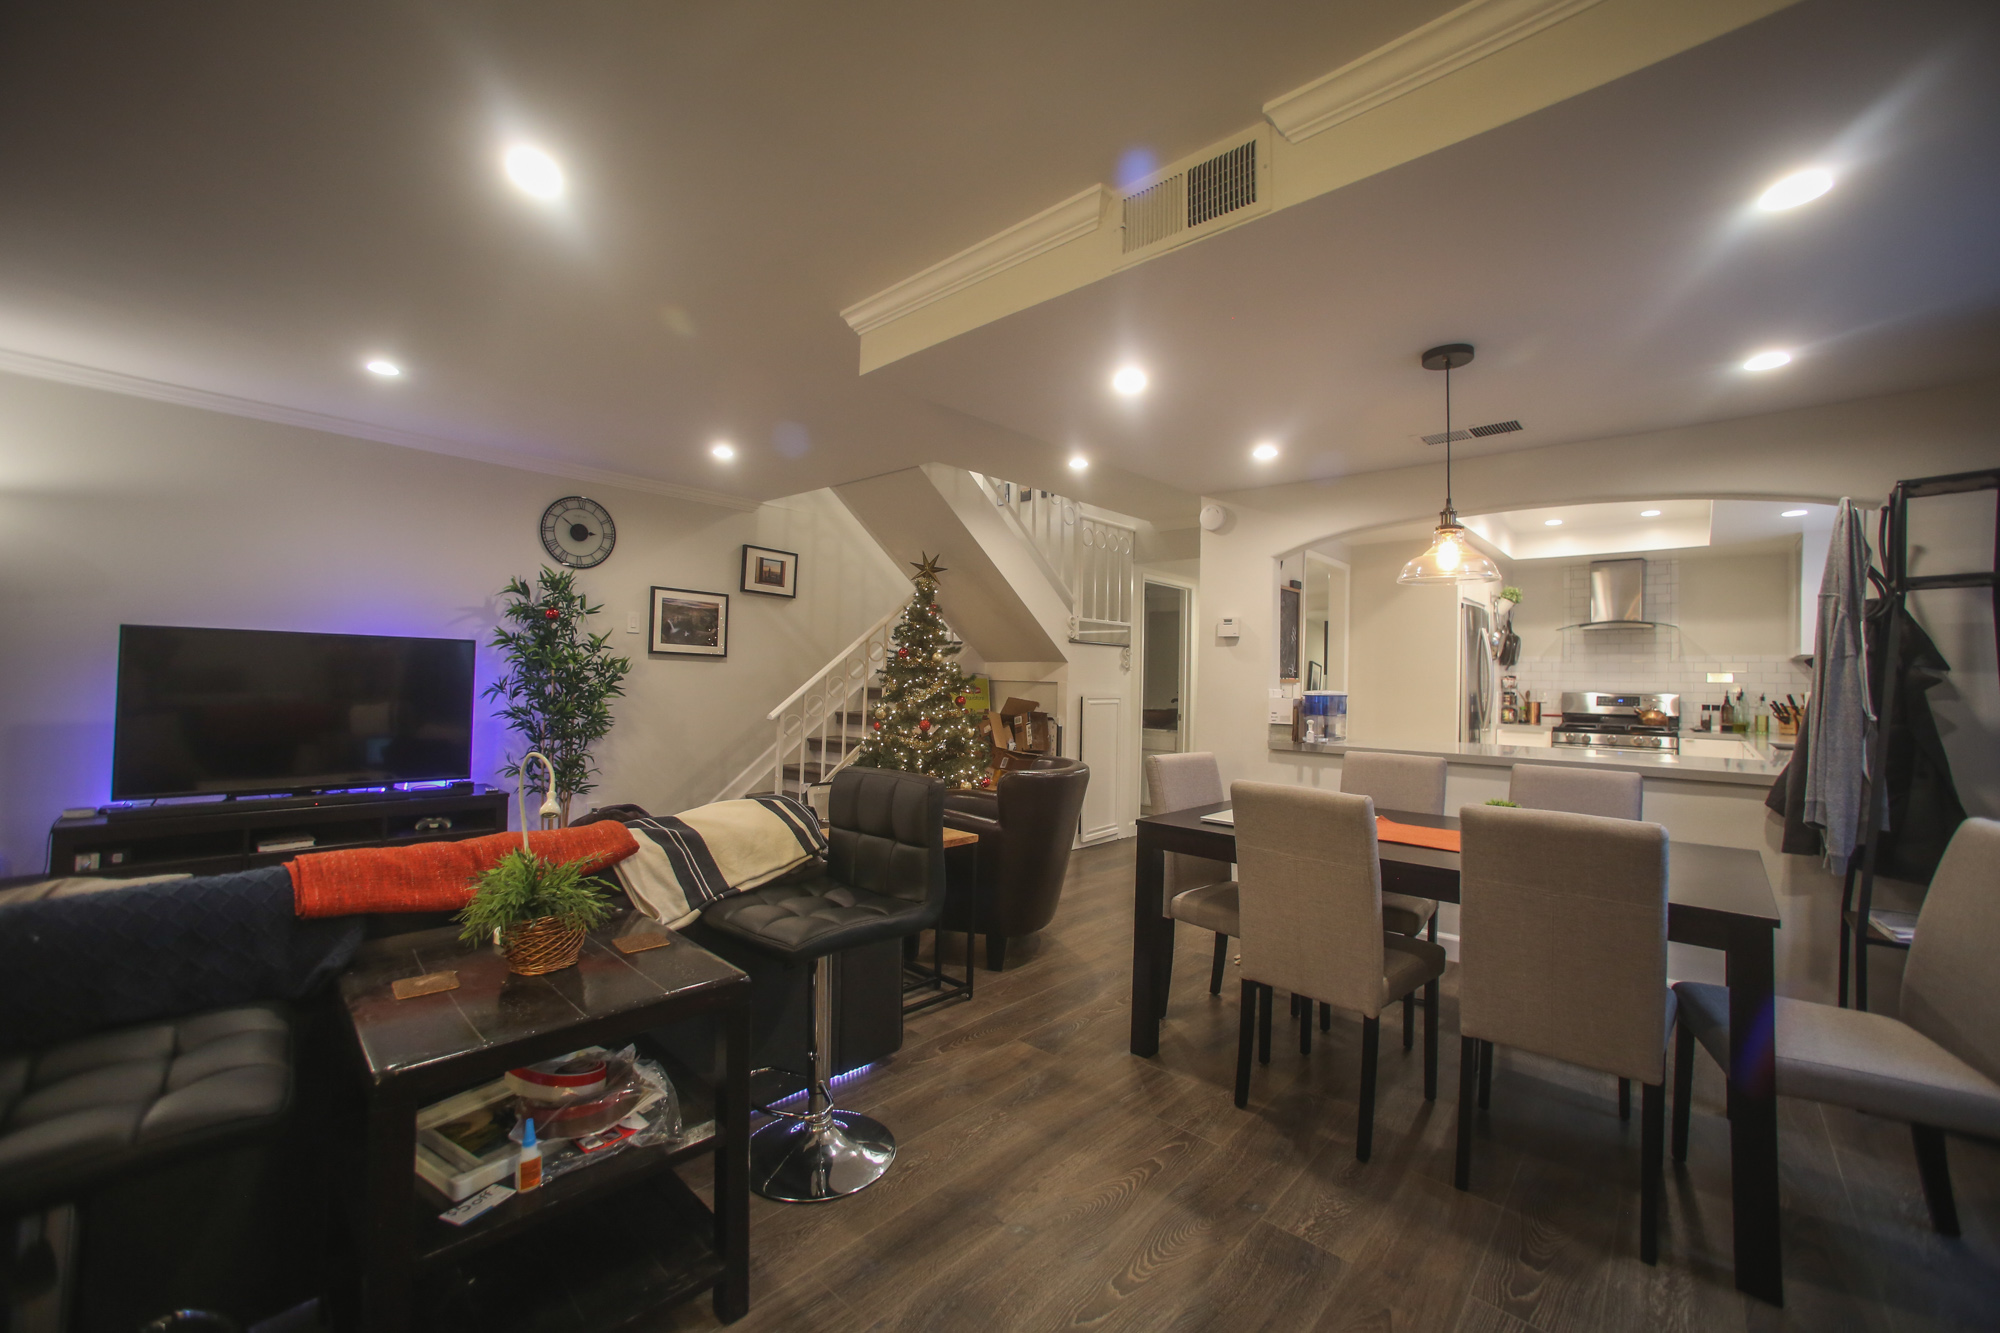
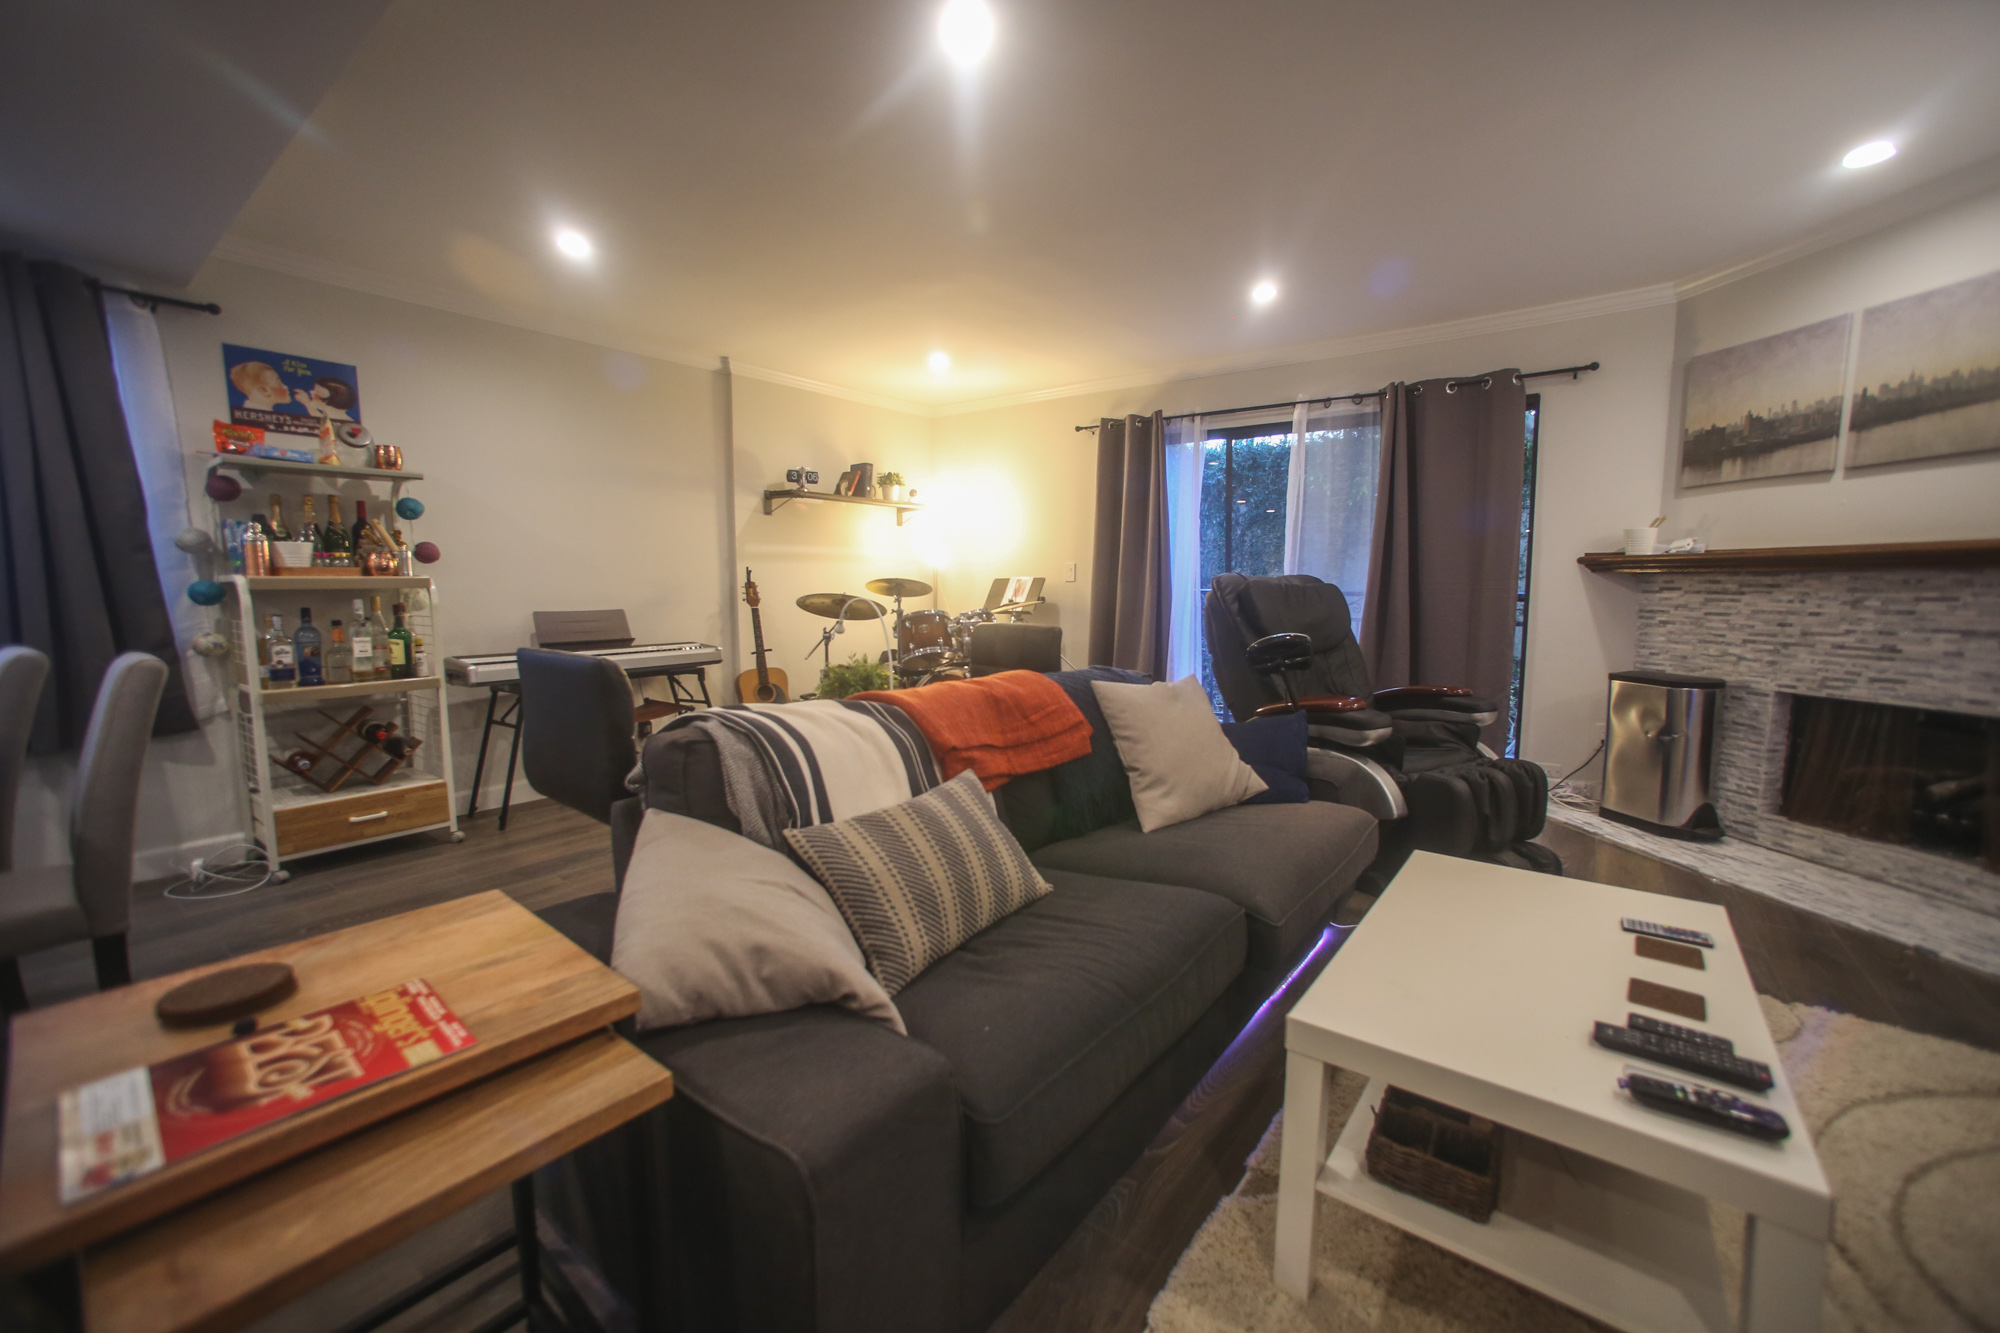
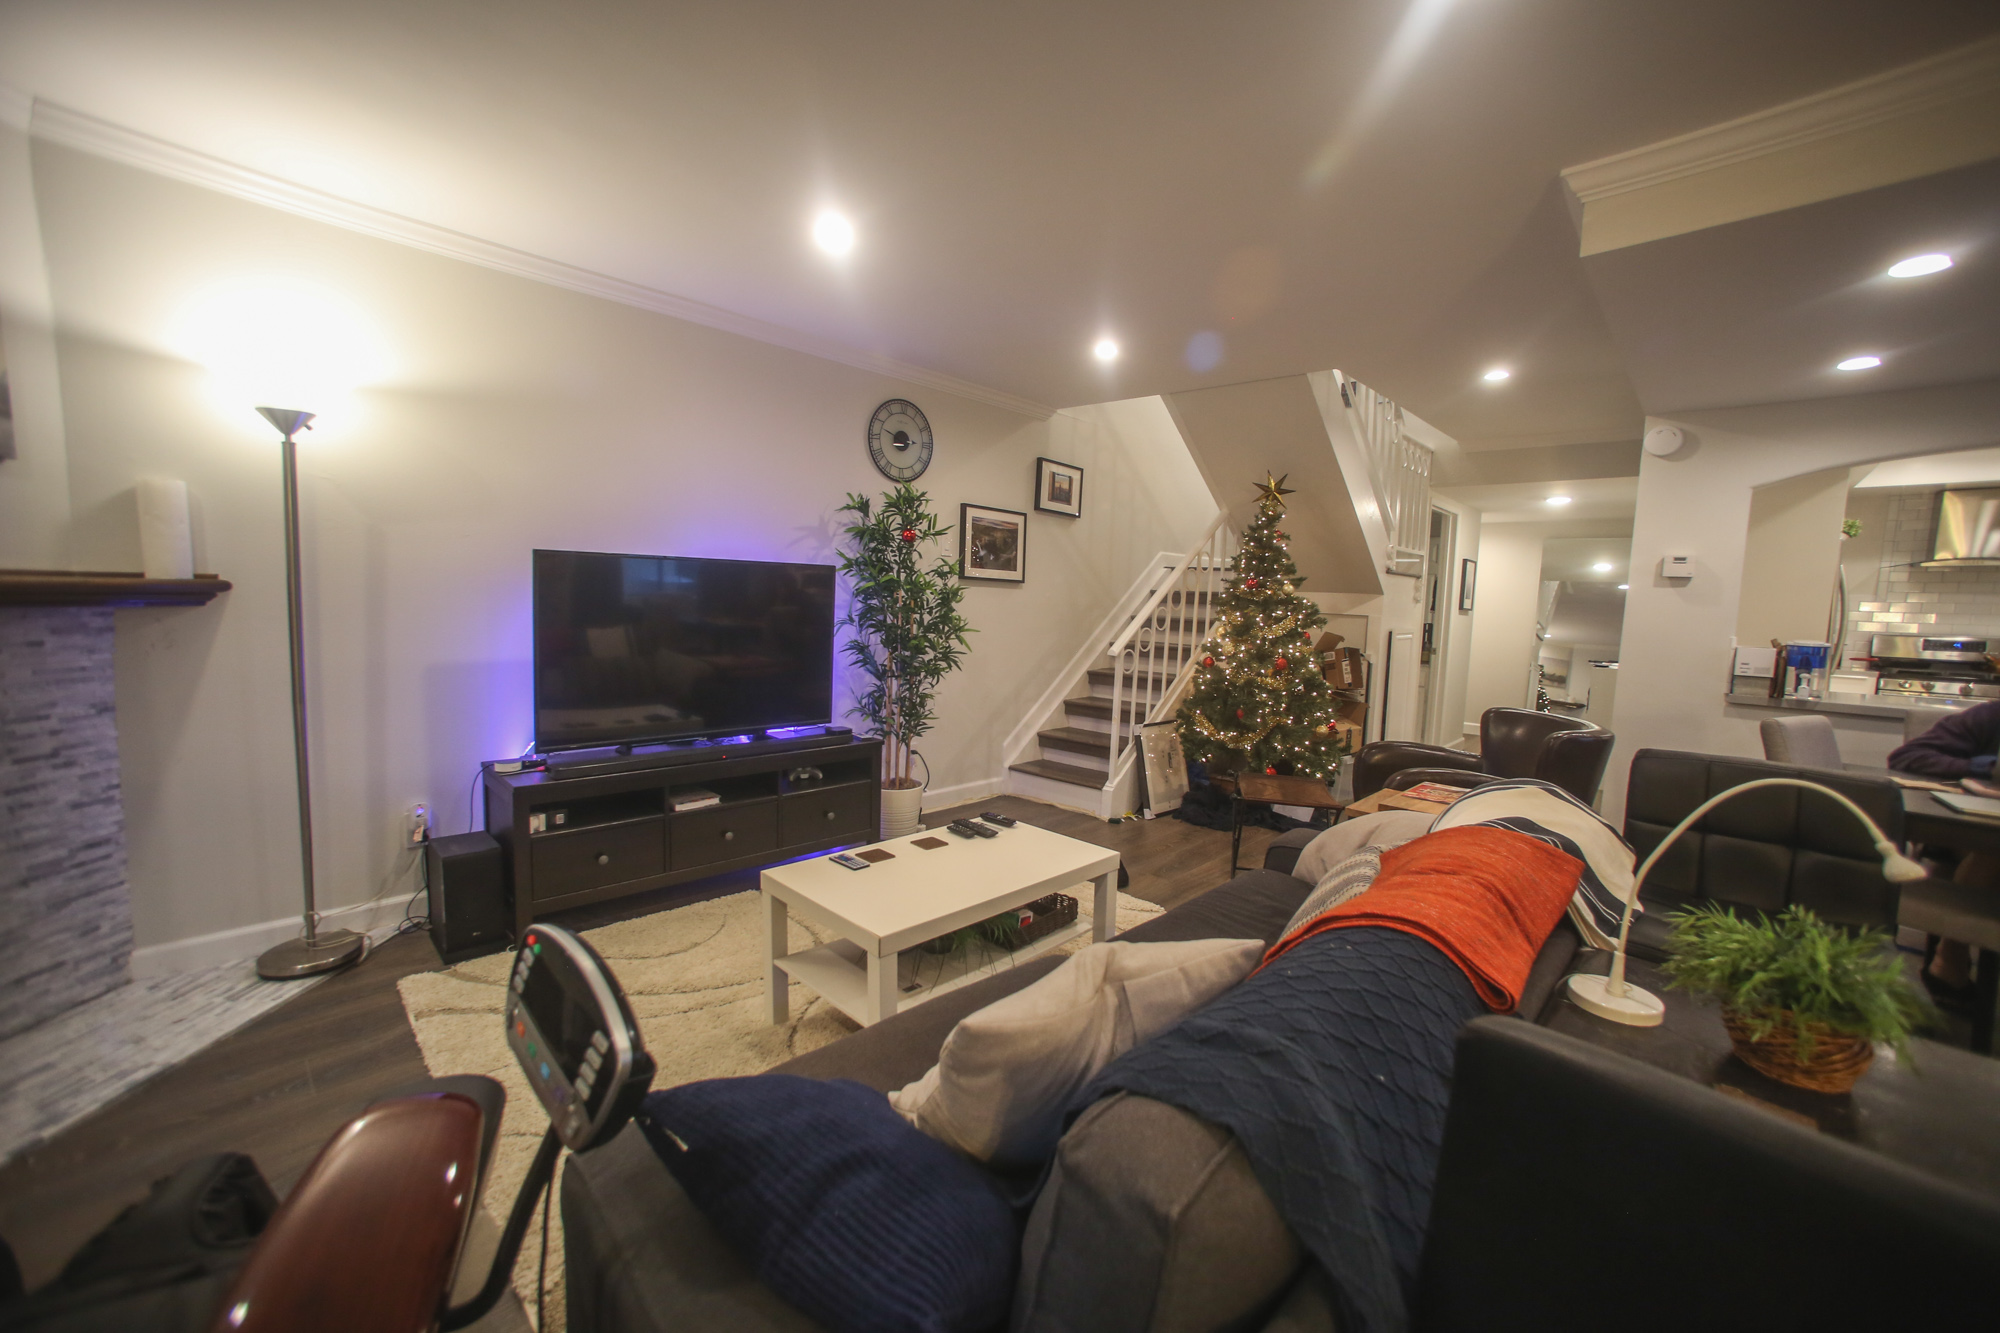
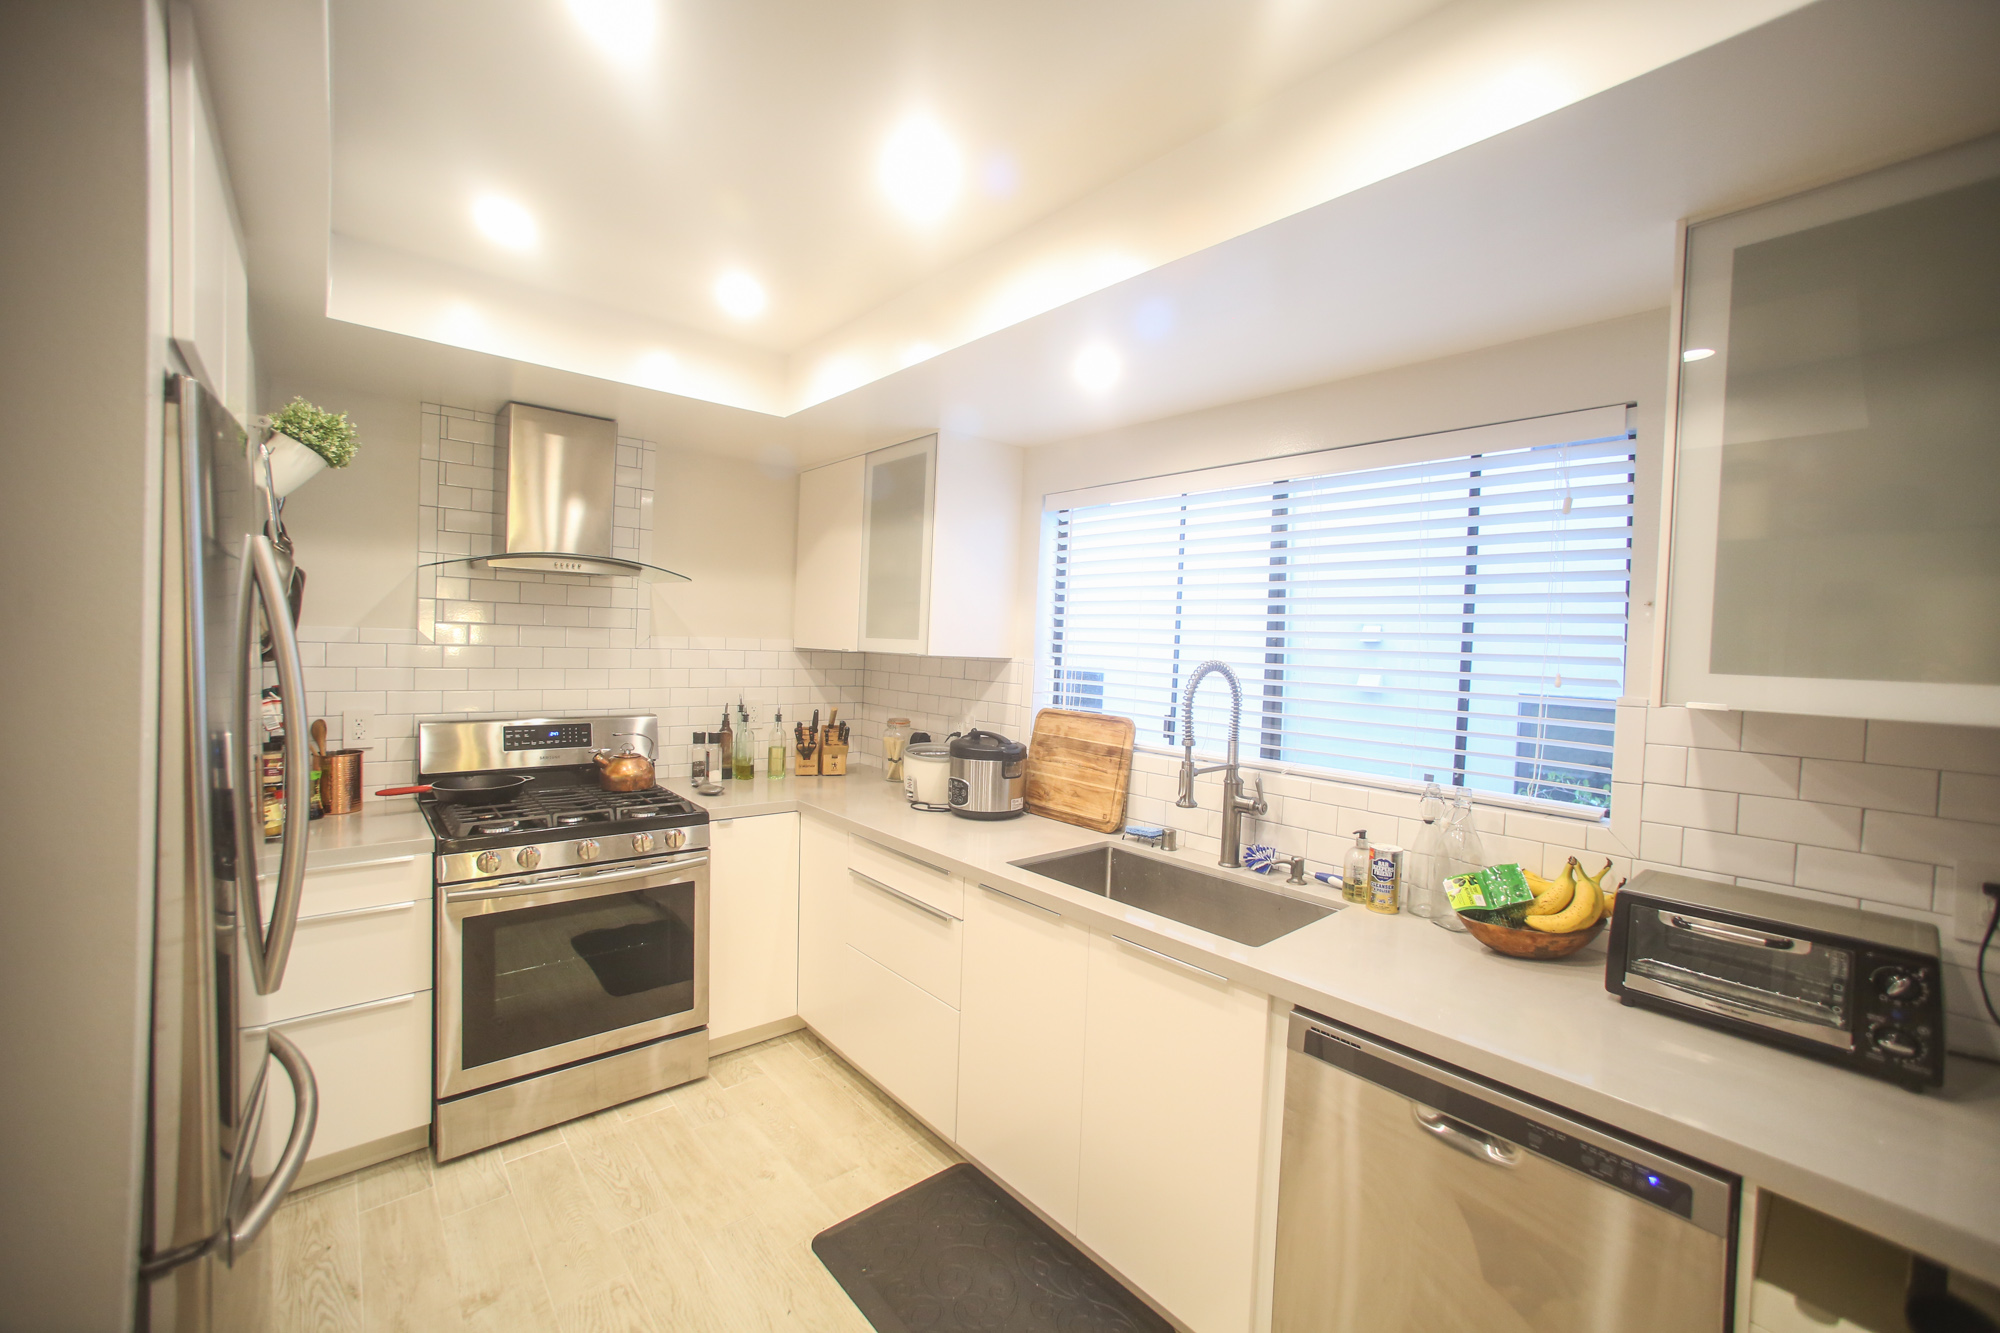
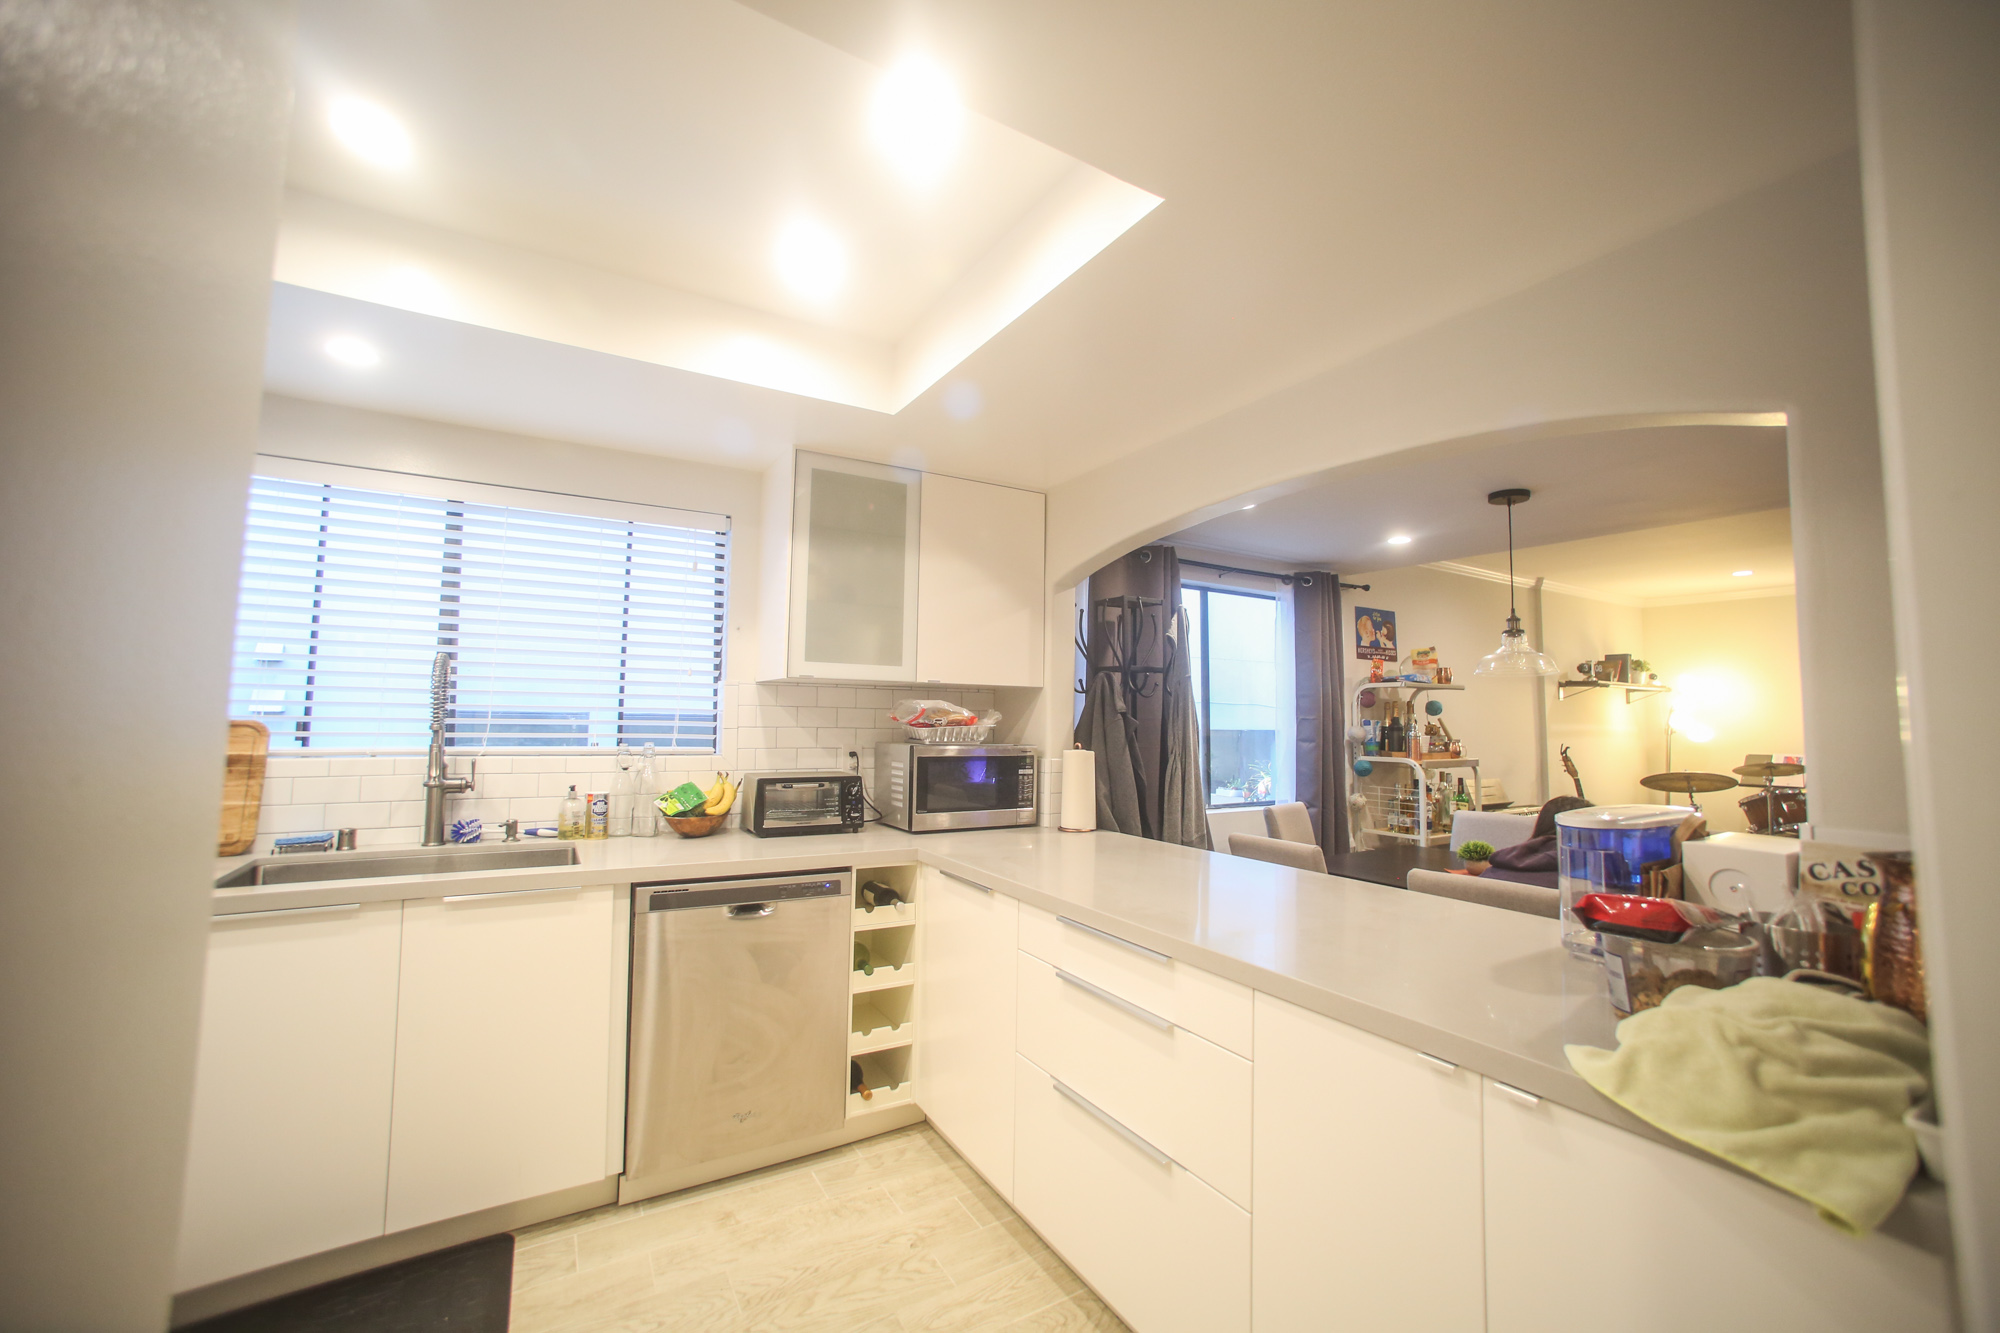
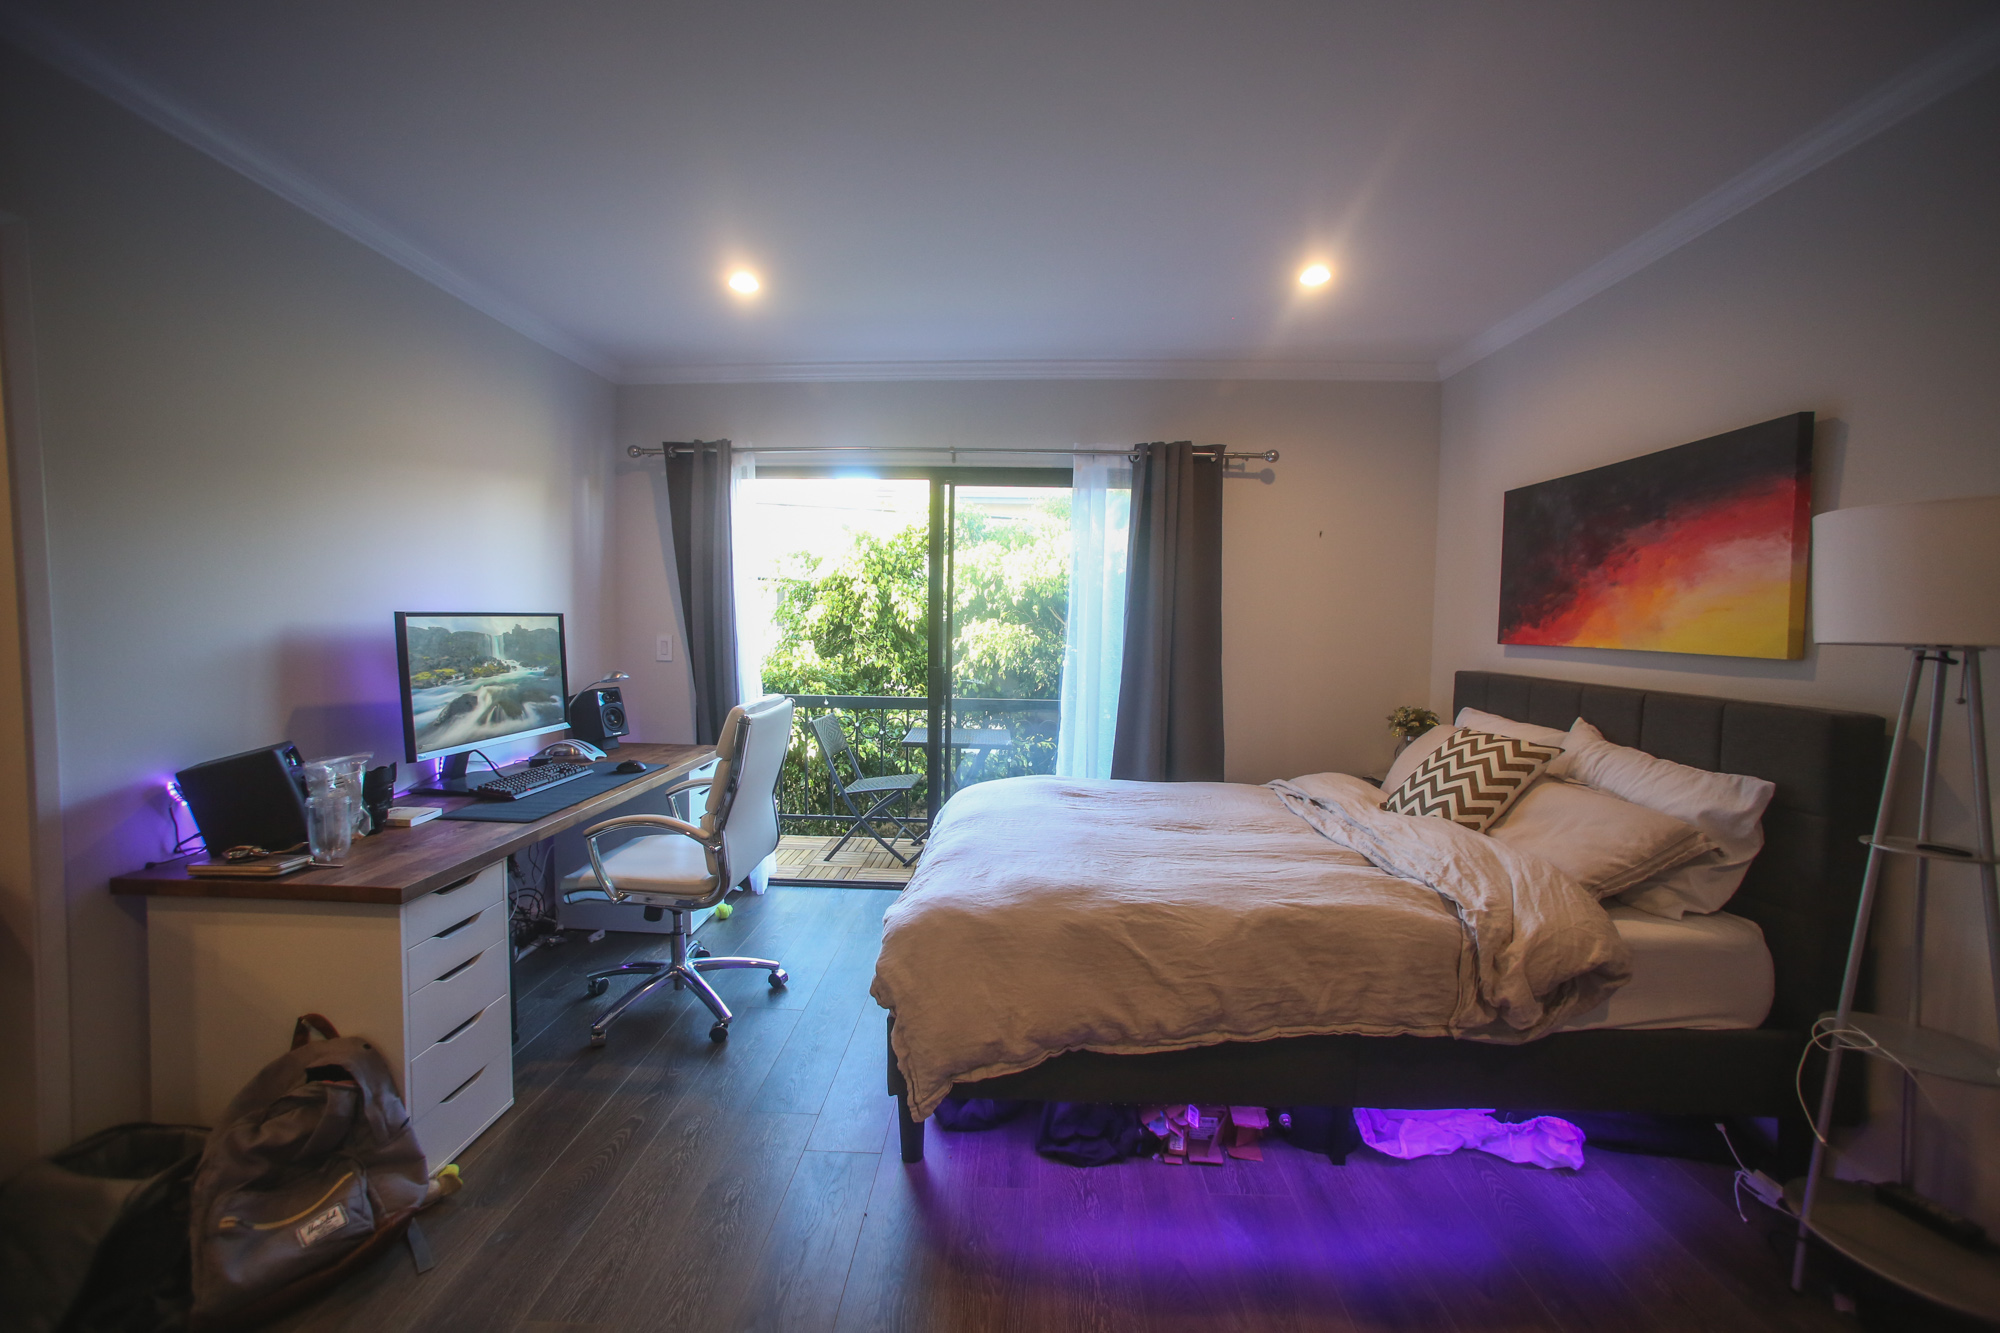
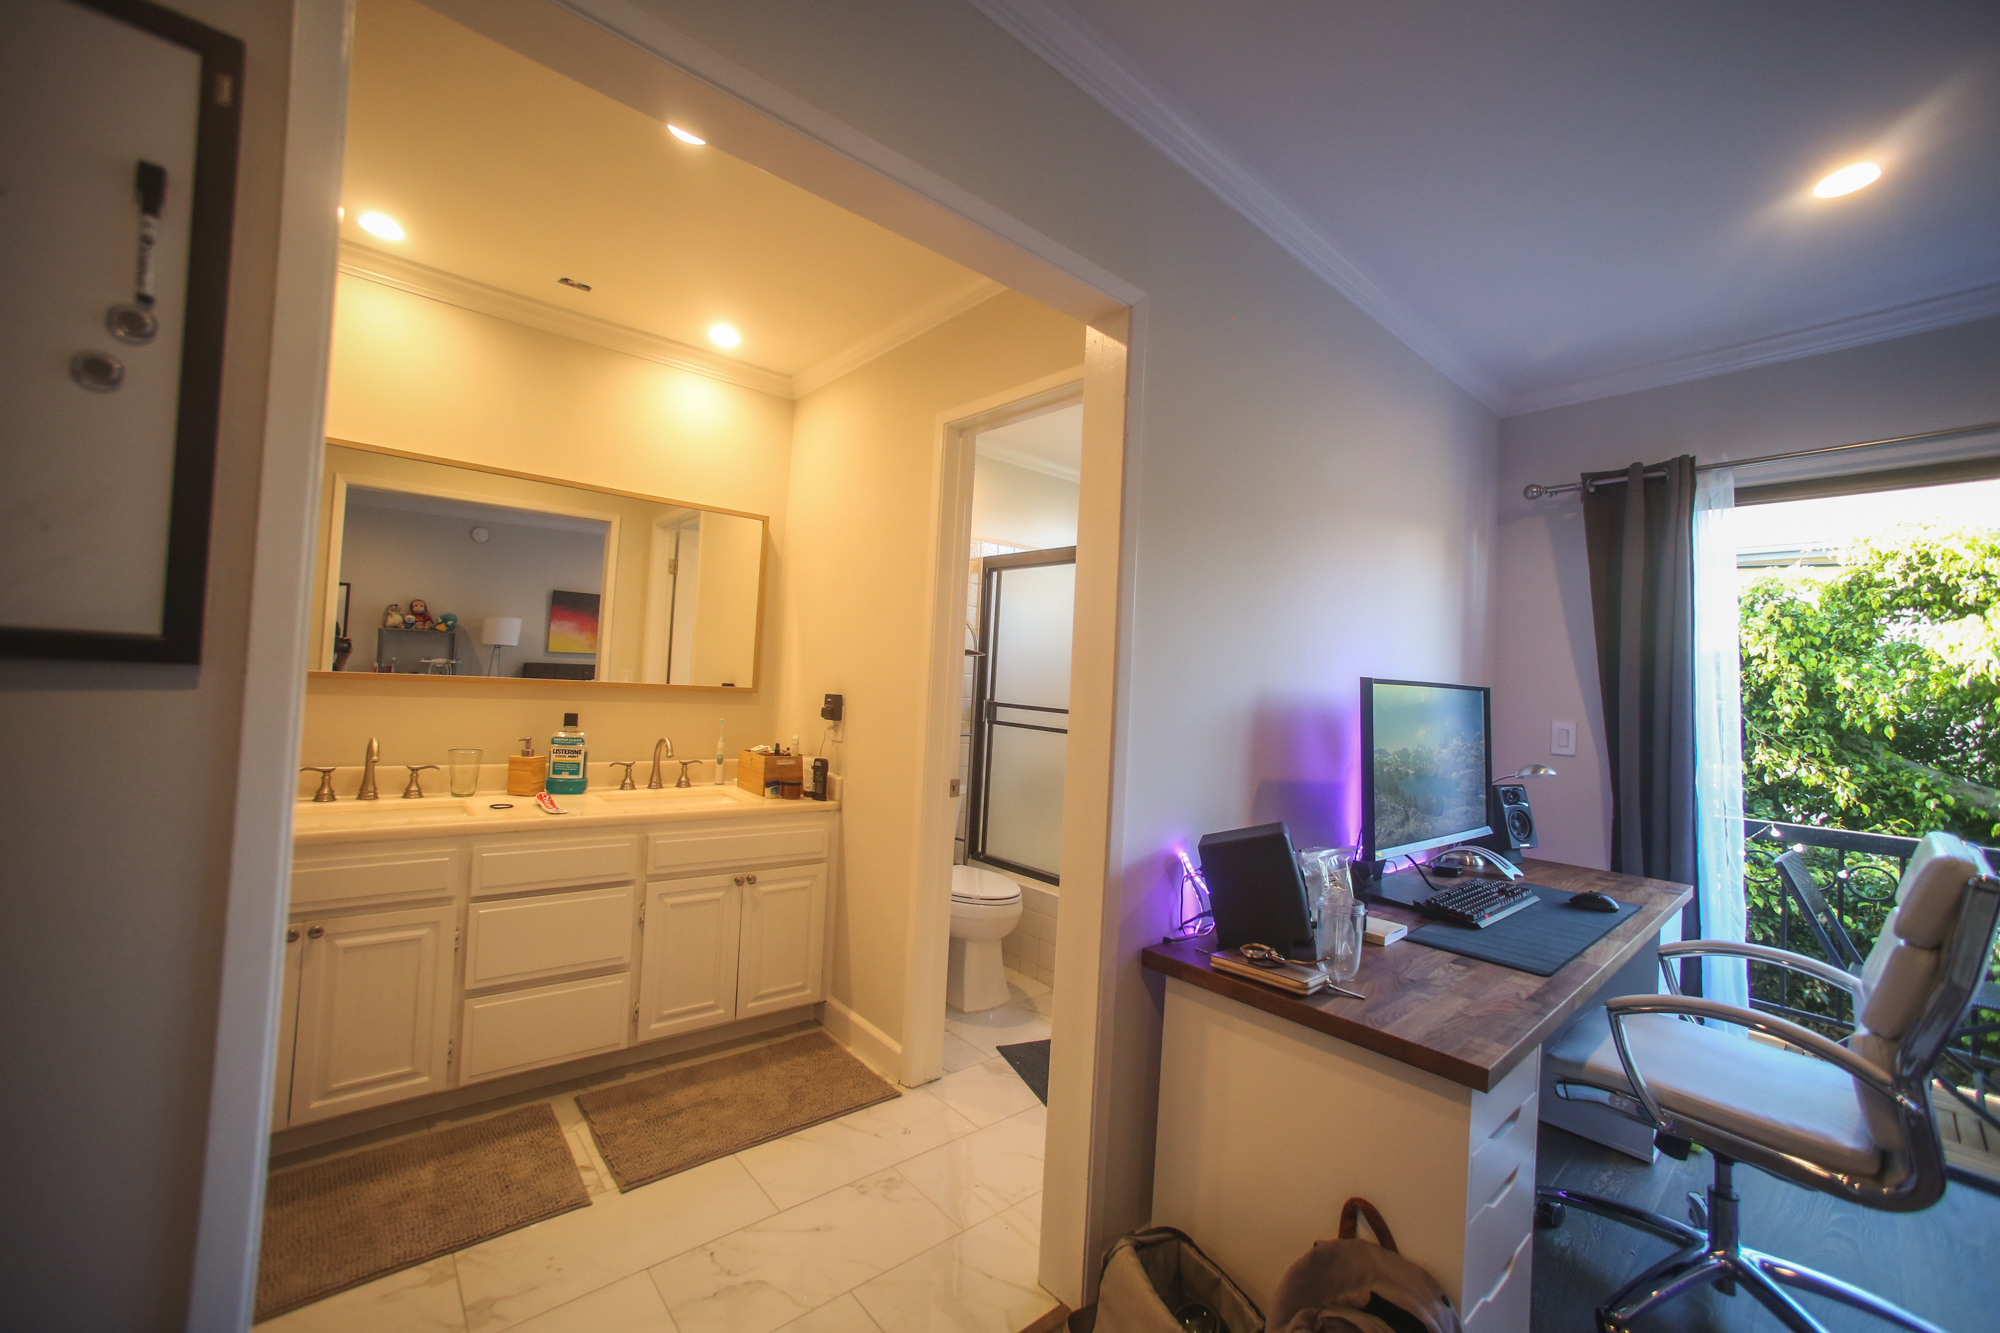
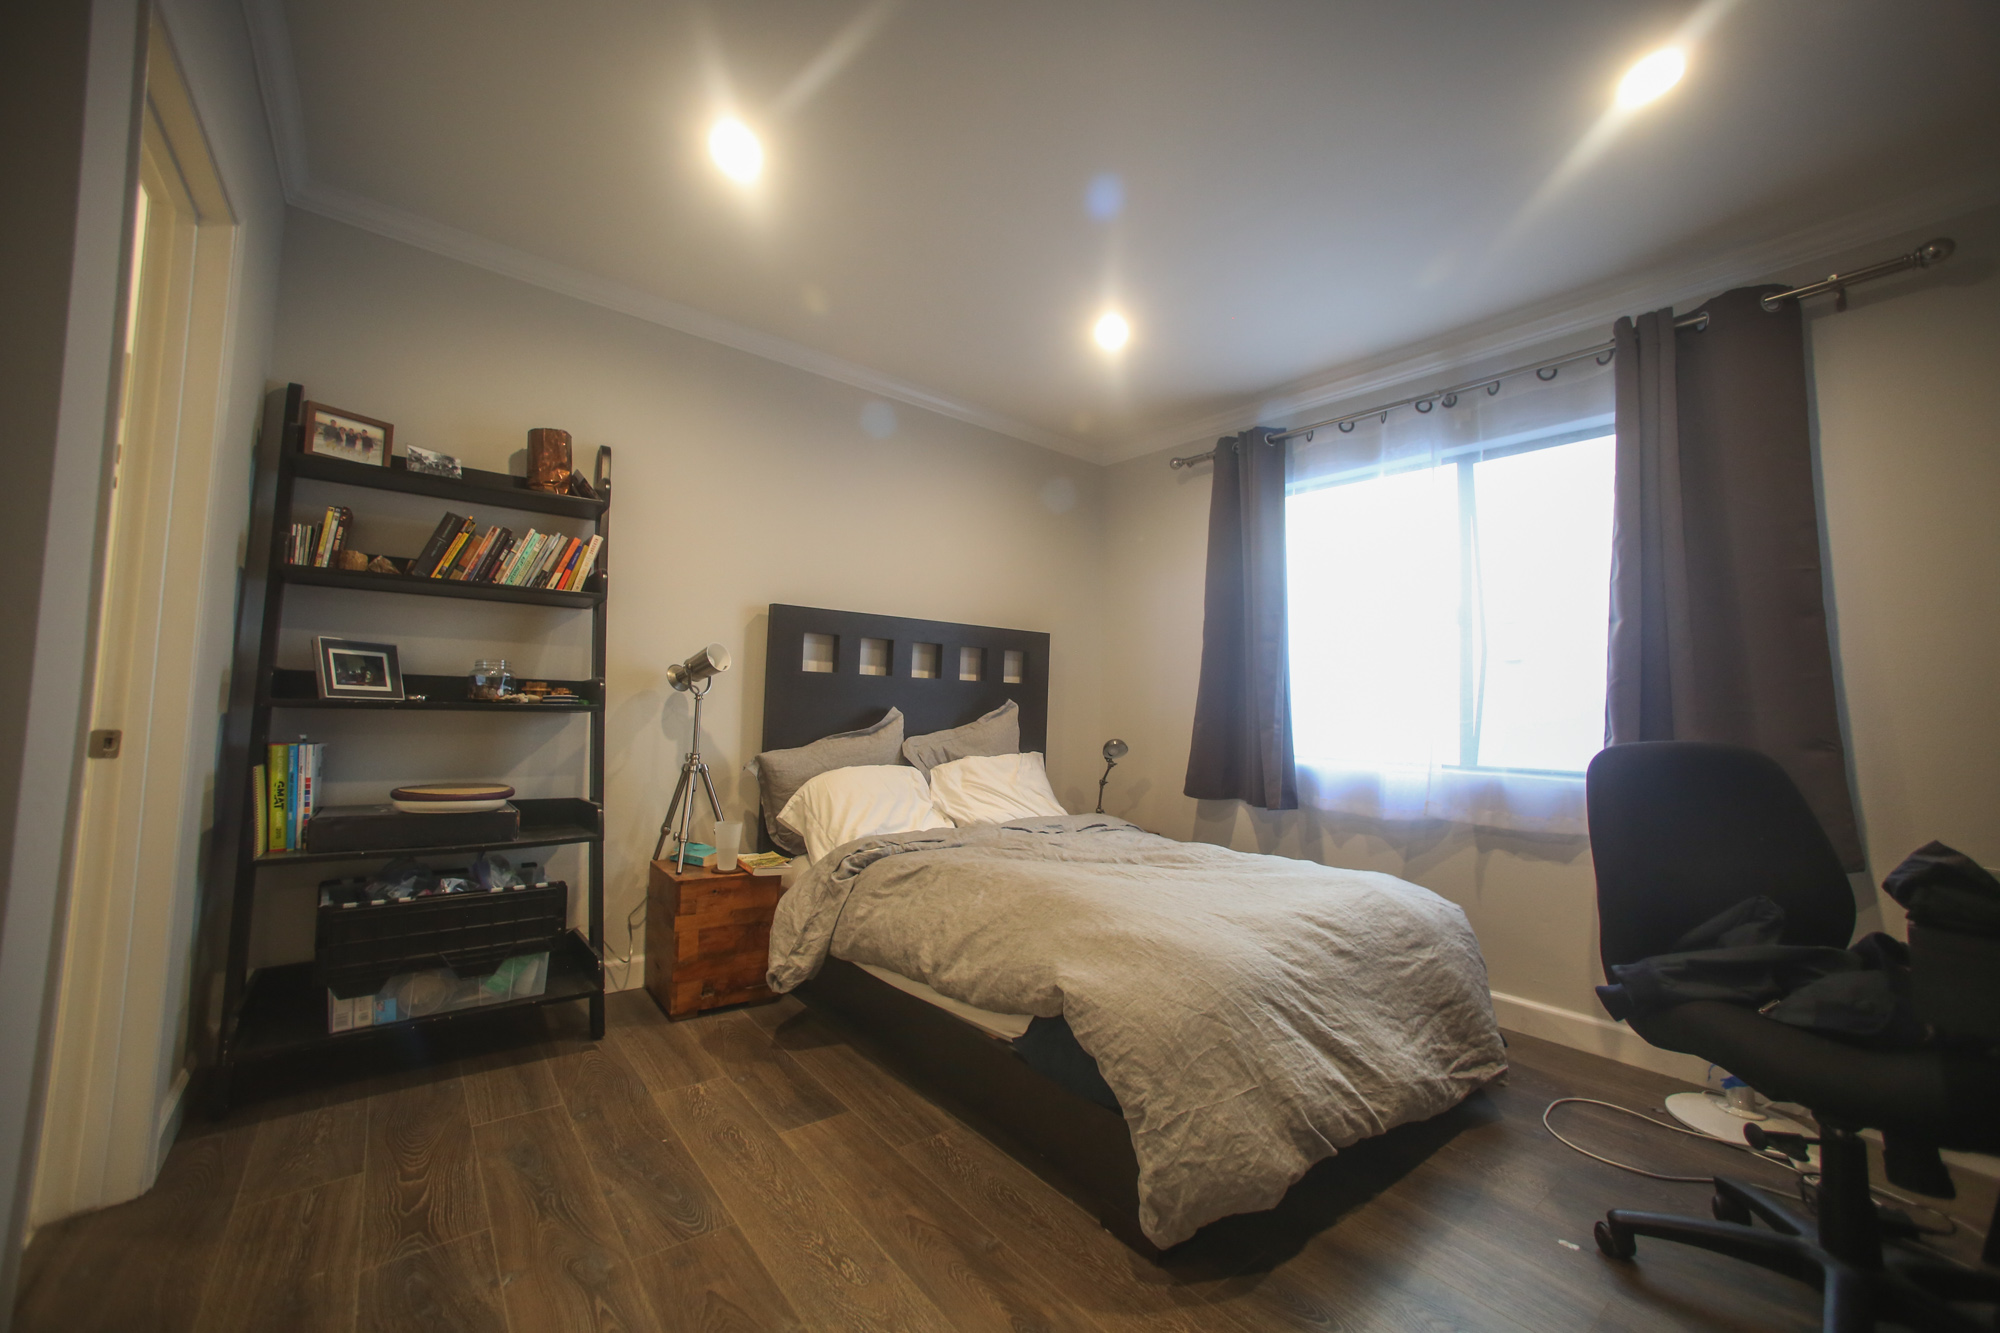
Here are pictures showing the various stages of renovation that the place went through. It was a roller coaster - some days, it would look great and as if it were coming along. Other days, it would be back to being nasty and a full on construction site. 

Stripping the old carpet, we were left with cement

Stripping the old carpet, we were left with cement

Look at those gnarly stairs

Look at those gnarly stairs

I decided to use a 12mm ash gray wood laminate, with an underlayment underneath. It's relatively easy to install.

I decided to use a 12mm ash gray wood laminate, with an underlayment underneath. It's relatively easy to install.

Looking good! It took the guys about a week to do all the laminate floors, stairs, and tile in the bathrooms. Notice those ugly flat doors with old round knobs (I hate round knobs FYI).

Looking good! It took the guys about a week to do all the laminate floors, stairs, and tile in the bathrooms. Notice those ugly flat doors with old round knobs (I hate round knobs FYI).

I chose a carrera white porcelain tile for all the bathrooms and laundry room. I like the hotel-y feel of it! Although it is a bit slippery. When I picked up the tile from Home Depot, it weighed down my car so much. My tires were pretty much scrappi…

I chose a carrera white porcelain tile for all the bathrooms and laundry room. I like the hotel-y feel of it! Although it is a bit slippery. When I picked up the tile from Home Depot, it weighed down my car so much. My tires were pretty much scrapping the wheel wells. I decided on a silver grout for the 1/16th inch grout lines to complete the look.

YES! Removing that popcorn ceiling, throughout the unit. Luckily our place was built after 1978 so no asbestos.

YES! Removing that popcorn ceiling, throughout the unit. Luckily our place was built after 1978 so no asbestos.

I had a crew handle the demolition for the kitchen. We tore EVERYTHING out. Unfortunately there was a leak in one of the pipes which would cause a lot of trouble later on.

I had a crew handle the demolition for the kitchen. We tore EVERYTHING out. Unfortunately there was a leak in one of the pipes which would cause a lot of trouble later on.

At one point there was so much stuff in the living room you could barely move. I purchased most of our appliances from Lowe's and Home Depot.

At one point there was so much stuff in the living room you could barely move. I purchased most of our appliances from Lowe's and Home Depot.

Picking paint colors! I got lots of samples to try from Dunn Edwards. Picking a color is hard, especially if it's a gray. Some grays look blue, some look green, etc. all depending on the lighting and other factors. I ended up choosing the Faded Gray…

Picking paint colors! I got lots of samples to try from Dunn Edwards. Picking a color is hard, especially if it's a gray. Some grays look blue, some look green, etc. all depending on the lighting and other factors. I ended up choosing the Faded Gray (bottom left) for all the walls and Cool December (top right) for the ceilings, crown moulding, and baseboards. The moulding was painted a glossy finish so it would contrast the ceiling's flat finish.

I chose to install 37 recessed lights, and 7 new light fixtures. I decided on low energy 7 watt LED bulbs. It took me about a week to decide what color temperature lights to go with. I'm really glad I went with 3000k. It's a bit yellowy, which makes…

I chose to install 37 recessed lights, and 7 new light fixtures. I decided on low energy 7 watt LED bulbs. It took me about a week to decide what color temperature lights to go with. I'm really glad I went with 3000k. It's a bit yellowy, which makes for comforting light. The other options were 2700k (too yellow), 4000k and 5000k (both too blue IMO, it would look like the inside of a hospital).

We removed all the old mirrors as well as the drop ceilings in the bathrooms. Those had to go, and it freed up a lot of space. We also got rid of all the old school built-in medicine cabinets.

We removed all the old mirrors as well as the drop ceilings in the bathrooms. Those had to go, and it freed up a lot of space. We also got rid of all the old school built-in medicine cabinets.

Here is the closet being painted. The baseboards and crown moulding were a pain. We ran out midway so I had to pickup more in my sedan.. they barely fit. But I love how they look - it gives everything a more upscale and traditional look.

Here is the closet being painted. The baseboards and crown moulding were a pain. We ran out midway so I had to pickup more in my sedan.. they barely fit. But I love how they look - it gives everything a more upscale and traditional look.

It took so much research buying the new bathroom sinks and countertops. I decided to have them custom made from Home Depot. I chose a 71" cultured marble counter with two undermount square sinks for the master bath. For the 2nd bedroom, we went with…

It took so much research buying the new bathroom sinks and countertops. I decided to have them custom made from Home Depot. I chose a 71" cultured marble counter with two undermount square sinks for the master bath. For the 2nd bedroom, we went with the same look but a single undermount sink.

Instead of getting all new bathroom vanities, I decided to repaint the old ones and install new stainless steel knobs myself. This would save a good amount of money. Here is the newly painted cabinet with the old vanity top and sinks, before we repl…

Instead of getting all new bathroom vanities, I decided to repaint the old ones and install new stainless steel knobs myself. This would save a good amount of money. Here is the newly painted cabinet with the old vanity top and sinks, before we replaced it. Plumbing and installing new faucets was a pain.

Decided to splurge on these nice mosaic tiles for the fireplace. The old one was an old school brick. We just covered it with thinset mortar and laid the pieces directly over.

Decided to splurge on these nice mosaic tiles for the fireplace. The old one was an old school brick. We just covered it with thinset mortar and laid the pieces directly over.

Cutting out the pass-through window to the kitchen. This was a pricey and crazy endeavor. I spent so many hours at the permit office, working on the drawings, ugh. When we opened the wall up, we found that there was the water pipes, electircal, and …

Cutting out the pass-through window to the kitchen. This was a pricey and crazy endeavor. I spent so many hours at the permit office, working on the drawings, ugh. When we opened the wall up, we found that there was the water pipes, electircal, and gas pipe running through it (you can see them in this picture). I had to have a plumber come out and reroute those $__$ We also had to make sure it was securely done, so we used 4x4's on all sides of the opening for structural support. This was not a load bearing wall.

For the kitchen, I went through Ikea. I met with a designer, and we spent about 2 hours planning all the cabinets for the kitchen. The Ikea Sektion cabinets have been wonderful so far, and the thing I love most about them is the soft close doors. I went with a white flat panel design (Veddinge), with Blackett handles all around. Total cost for the cabinets was mid 3k's, and installing was 1300 extra. More details later in the final photos.

Hired a company to build and install all the drawers. Well worth it because I never would have been able to install them correctly. The building part isn't the hard part -- it's leveling them that is tricky. They also filled in the gaps at the ceili…

Hired a company to build and install all the drawers. Well worth it because I never would have been able to install them correctly. The building part isn't the hard part -- it's leveling them that is tricky. They also filled in the gaps at the ceiling.

I went to a stone yard warehouse and picked out two jumbo quartz slabs in the Dover Gray color. Originally I was going to use Ikea to do the countertops but their turnaround time was 4-5 weeks which I was not willing to wait. I decided to buy them m…

I went to a stone yard warehouse and picked out two jumbo quartz slabs in the Dover Gray color. Originally I was going to use Ikea to do the countertops but their turnaround time was 4-5 weeks which I was not willing to wait. I decided to buy them myself and have a fabricator cut, polish, and install.

Here they are putting down plywood on top of the finished cabinets. The countertop was glued above this.

Here they are putting down plywood on top of the finished cabinets. The countertop was glued above this.

Plumber doing his thing. I'm so glad I chose this sink and faucet!

Plumber doing his thing. I'm so glad I chose this sink and faucet!

I decided to use a white subway 3x6 inch subway tile for the kitchen backsplash. Purchased around 50 square feet for this. I didn't realize there are bullnose pieces, and specialty pieces to get all the corners and edges. It took me a few hours to f…

I decided to use a white subway 3x6 inch subway tile for the kitchen backsplash. Purchased around 50 square feet for this. I didn't realize there are bullnose pieces, and specialty pieces to get all the corners and edges. It took me a few hours to figure out all the pieces to buy from Floor & Decor.

The electrical connection and setting this thing up was not fun. I ran into lots of problems with it. But here it is semi installed! I used a flexible 6 inch duct and some (not up to code) wiring to get this working.

The electrical connection and setting this thing up was not fun. I ran into lots of problems with it. But here it is semi installed! I used a flexible 6 inch duct and some (not up to code) wiring to get this working.

It took about 2 months to get everything done. I didn't include lots of the pictures I took of the process, otherwise this blog would be way too long!

FINAL PRODUCT


TIPS

  1. Hire a general contractor if you don’t want to sell your soul for the months of renovations, or if you have lots of money.
  2. Contract the renovations out yourself if you want to learn everything and save lots of money.
  3. It will take a lot longer than you expect to renovate a place. It took us over 2 months to finish.
  4. Get design inspiration by looking at Ikea catalogs or by reading the forums at www.houzz.com
  5. You will run into a lot of hiccups during the reno. 
  6. Contact me if you need help buying a house, selling a house, need a mortgage or refinance, or want any other advice.

Houses are complex. Renovating an entire place is a big project. I'm not a decisive person but I had to make a lot of tough decisions for this remodel. In the end, anything you choose will look good! I am extremely happy with how our place turned out. I went with a modern approach with muted colors (lots of grays, my favorite), adding color through accessories, plants, art, etc. It might not be for everyone but I feel right at home :)

For any friends who find themselves in a similar situation, let's talk! And if you are looking to buy a place in the LA area, I can help with that as well. Cheers!


Claudia + Duchuy | Santa Barbara Wedding

I had such a great time photographing this cross-cultural wedding!

Claudia and Duchuy were such an amazing couple. They were telling me about how they met living in the same building in San Diego, and look at where they've come! Duchuy is Vietnamese (hence the elaborate Vietnamese ceremony) and Claudia is from Germany. It was wonderful getting to know you all and your wonderful famiies!

This two day wedding was shot with a Canon 5D Mark 2 with various L-series lenses. Here is a peek of some of my favorite photos from the event :)

Charlie

Kathaleen + Jackson

Kathaleen + Jackson

I had a lovely photo session with Kathaleen and Jackson this past weekend - what a gorgeous couple! They were so easy going and relaxed. We had a great time walking around Westwood, soaking in the urban setting. Here are some of my favorite shots from the shoot!

Read More

MEDleys A Cappella


Here it is, UCLA MEDleys A Cappella 2013-2014! It was an early but fun shoot-- it felt like I was shooting a wedding. Everyone was dressed up all spiffy and nice.

This was my first time using the 70-200 that I purchased a week back. I also took advantage of another 5D that I purchased. Armed with my two cameras, I felt like such a cam man! The 70-200 was so convenient and provided a focal length that I have not really ever used before. Most of my earlier shots were either 35mm or 85mm focal lengths. Now, it is really interesting being able to go to 200mm for that zoomed in look. Great lens, and I think I will keep it for now!


www.twitter.com/MedleysUCLA
www.facebook.com/medleysacappella